

Introduction: Make Your Own Bluetooth Speaker


Hi,
In this Instructable, I will go through the steps I took to make my own bluetooth speaker.
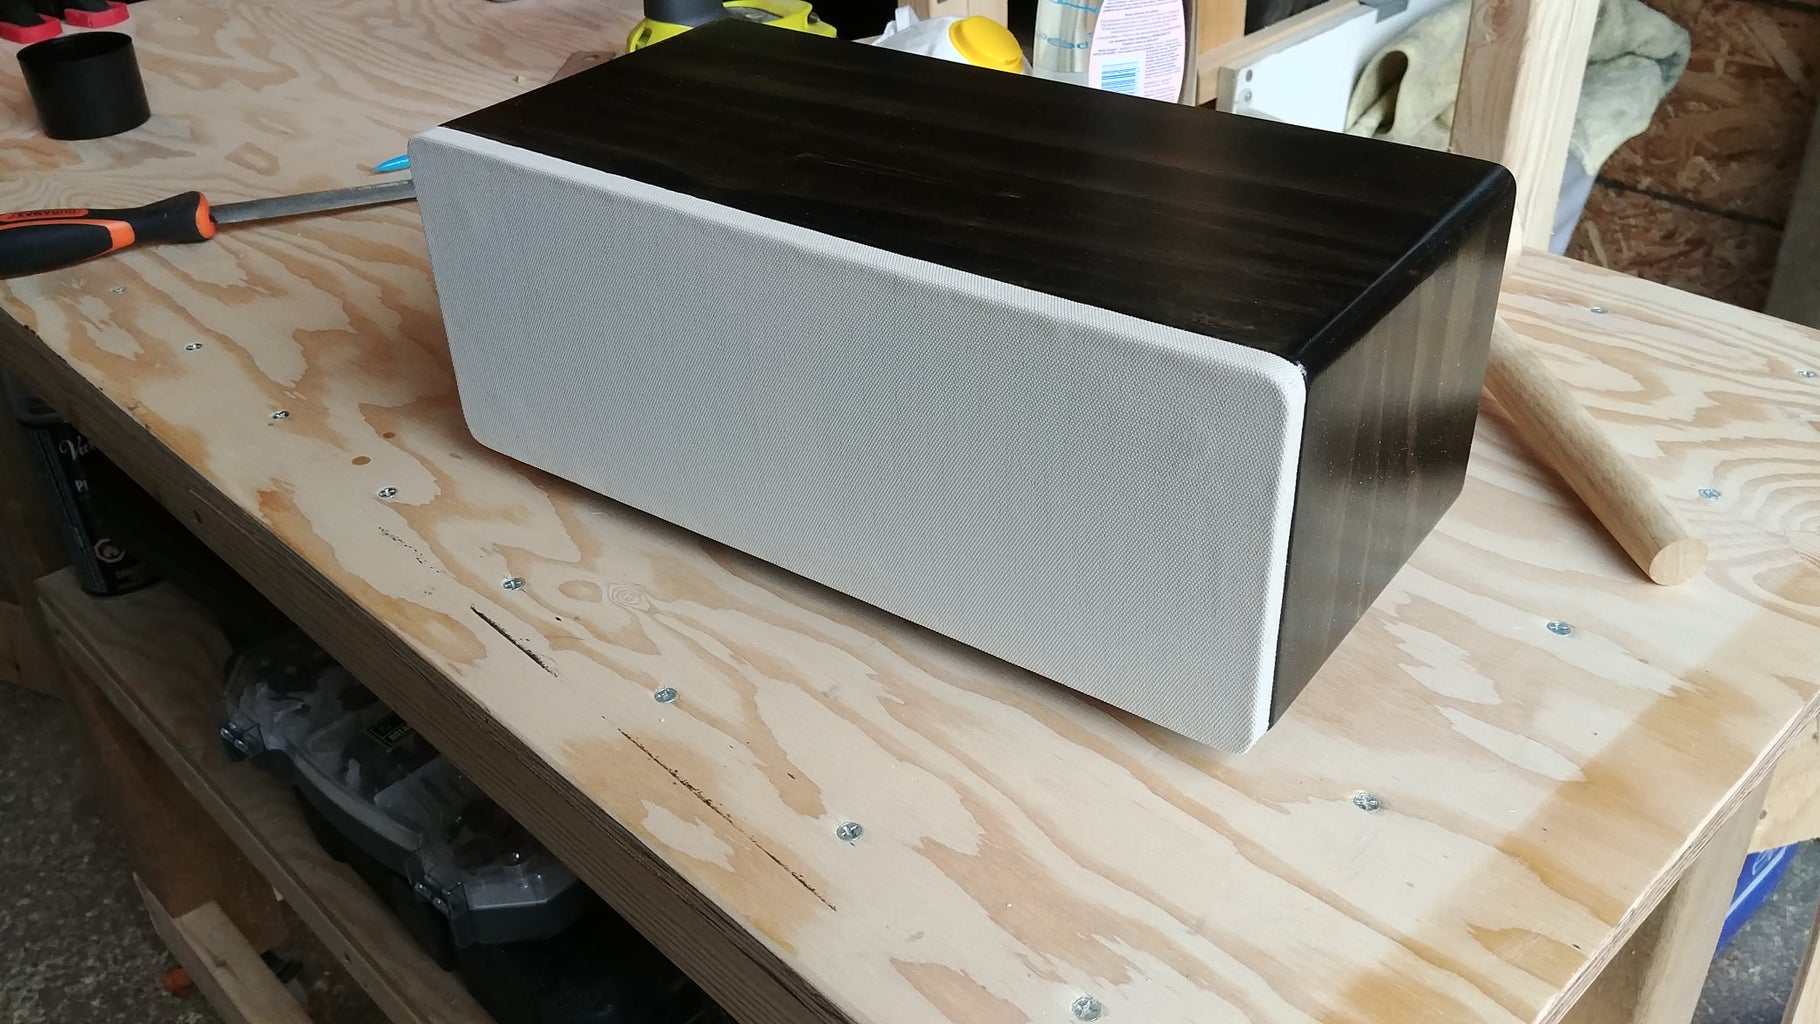
I personally really like the design of AudioEngine B2, so I made my speakers to resemble the B2 as best as I can, including the magnetic grill.
The tools that I used were:
- a table saw
- a router
- a drill press
- cordless drills
- clamps
- sandpaper
- paint brush
- soldering iron
- glue gun
Materials I used were:
- 2 full range drivers
- 2 tweeters
- 8 neodymium magnets
- bluetooth amplifier
- 3/4" thick pine panels
- wood glue
- rubber feet
- audio cables
- solder
- polyester cushion filling
- wood stain
- polyurethane
- baby oil (which is basically mineral oil with perfume)
Let's get to it!
Step 1: Design Your Speaker

First, I drew out the basic design of the speakers based on the dimensions I could find on the web.
Then I scaled my drawing by a factor of 1.1 to match my full range driver diameter with that of the AudioEngine B2 in order to maintain the overall proportions of the design. (My driver's diameter was 3 inches, whereas the B2's diameter was 2.75 inches)
Then, I had to make a design choice: to go with a sealed enclosure or a ported enclosure.
The B2 has 2 vertical slotted ports for its ported enclosure design, but I decided to go with a sealed enclosure.
However, I found the front ports of the B2 was what gave it such an appealing, unique look, so I decided to create fake ports. (More on this "fake ports" later.)
Step 2: Measure and Make Your Cuts


This Instructable isn't so much about how to use certain types of tools, so I will just describe the kinds of cuts I made to come to the final product.
In order to join all the walls and the front of the speaker enclosure to fit nicely, I cut the panels with a table saw at 45 degrees to create miter joints for the enclosure, as opposed to square ended joints. I chose miter joints over square joints to hide the end grains of the panels and try to create a more "uniform" look.
The back side was the only side I did not make angled cuts, since I wanted to create rabbet cuts on the router for me to 'screw' on the back plate instead of gluing it on.
Step 3: Make the False Ports


Since my speaker wasn't really going to have ports, I created grooves using a plunge cutter bit on my router to create an illusion that the ports are there.
First, I carefully outlined where the ports were going to be placed, then I clamped scrap (but straight!) pieces of wood on to my router table to create a jig for the plunge cuts.
After carefully adjusting the height of the plunge cutter bit to be slightly less than the thickness of the panel to ensure the bit does not penetrate all the way through, I made the two plunge cuts.
Step 4: Create Holes for the Drivers and the Magnetic Grill


As described in my "Bluetooth Soundbar" Instructable, I don't have a hole saw big enough to make a hole the size of my driver. So what I did is I started with a small hole, then enlarged it with a rabbet bit on my router.
Once I got the hole to be the desired size, I realized I want the drivers to appear to be sitting closer to the front surface of the speaker enclosure, so I made a rabbet cut around the hole at the back side so that the drivers could sit inside. (See pictures 4 to 6)
I purchased 8 of 1cm diameter magnets so that I can have magnetic grills just like the AudioEngine B2. I drilled holes to hide 4 magnets behind the front plate of the speaker enclosure. (See picture 6)
I had to make extra cuts on opposite ends of the holes to ensure the flaps for the screws on the drivers could sit inside as well. (See pictures 7 to 8)
Step 5: Glue, Cut and Sand


After the pieces were tested for a perfect fit, I glued all the panels together, and had them clamped together with masking tape until the glue was left to dry for 24 hours.
Once the glue was completely dried, I took off the tape, made router cuts for the 4 outside corners of the speaker enclosure using a round-over bit, and sanded the rest of the corners by hand with a fine grit sandpaper.
Step 6: Create the Back Plate


I cut out a rectangular piece of wood to be my back plate for the speaker.
I then cut out a rectangular hole for the Bluetooth amplifier to sit inside with a jigsaw.
Step 7: Stain and Seal the Enclosure


This step is always the most pleasing and enjoyable step for me.
I stained the entire exterior of the enclosure to a dark brown colour, as well as the exterior side of the back plate.
Once the stain was left to dry for 24 hours, I sealed it 3 times with matte finish polyurethane. After the 3 layers of polyurethane was dried, I wet sanded it with a 2000 grit sandpaper to get rid of any surface imperfections due to dust particles landing on the wet sealant during the drying process.
Step 8: Add the Legs and Give It Shine


This step is pretty straight forward.
I center-punched the locations for the 4 legs to sit, then I drilled them about 1/4" deep with a forstner bit, then I screwed on the 4 legs.
I applied some baby oil and rubbed it into all the exterior surfaces. I wiped off any excess oil with a dry paper towel.
Step 9: Add the Drivers and the Electronics
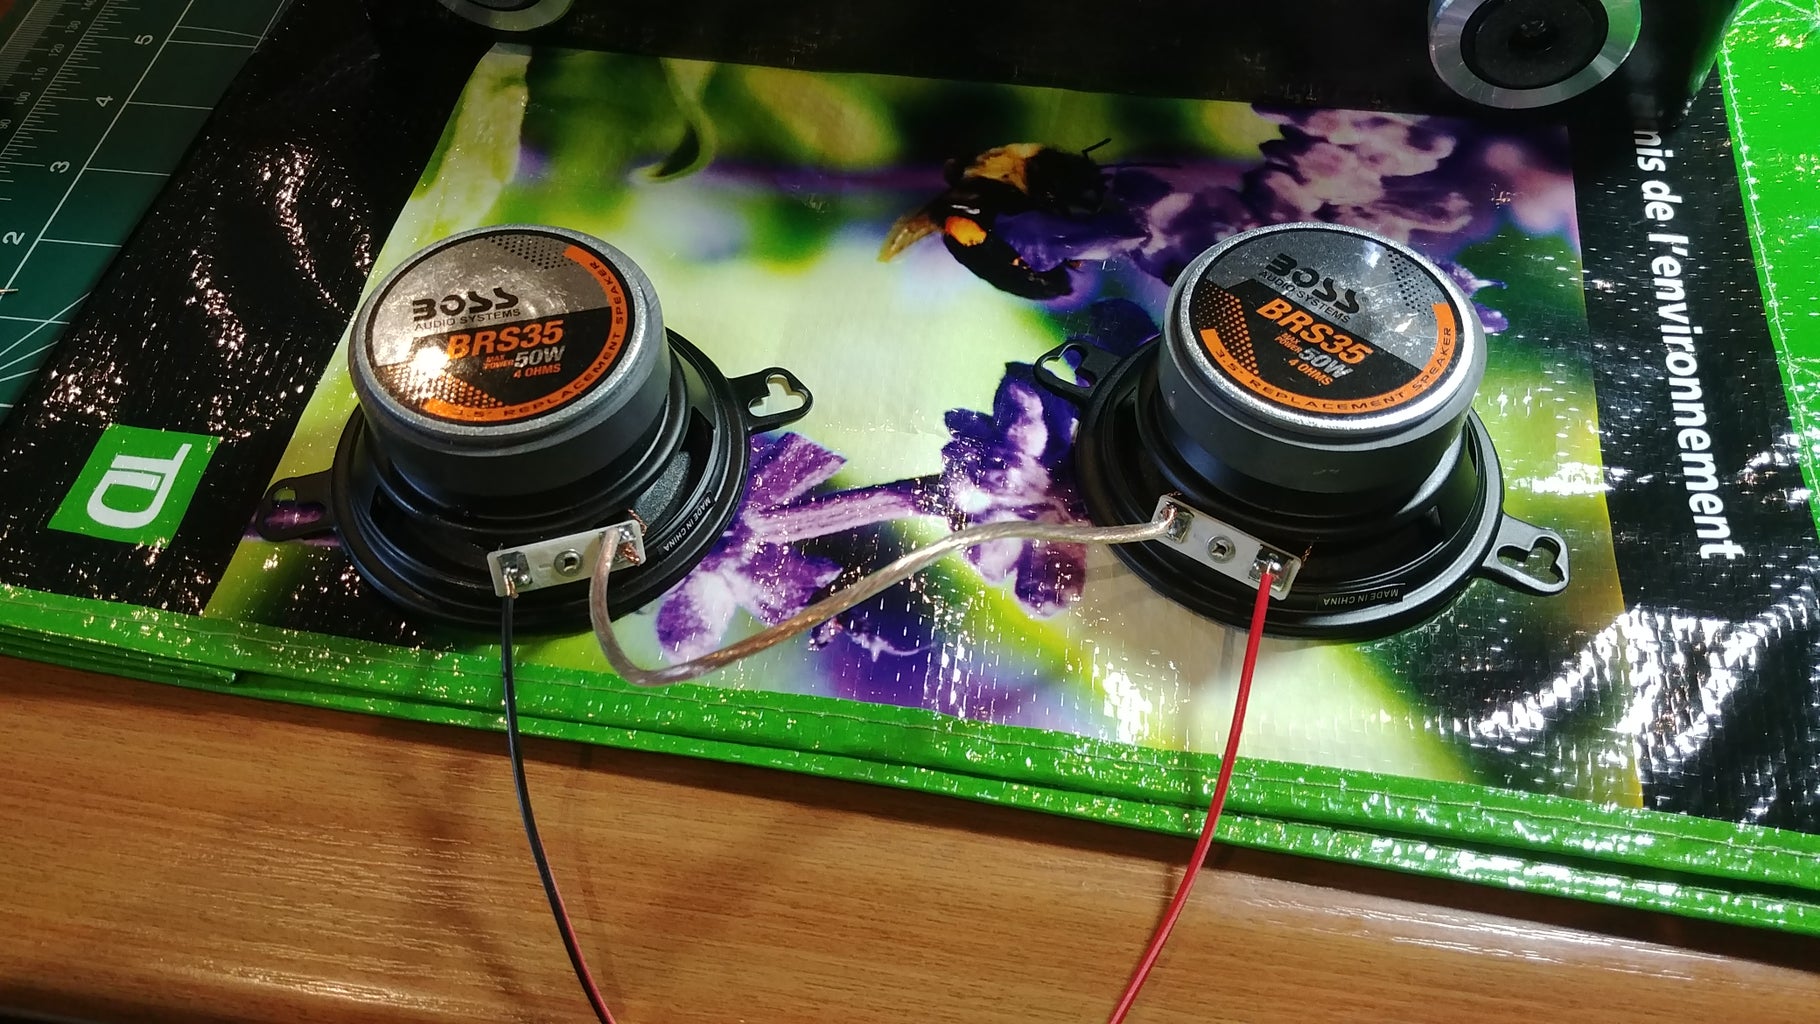


The drivers I purchased (both the full range and the tweeters) had 4 ohm impedance.
Since the impedance value I was aiming for was 8 ohms, I connected the full range drivers in series, and the tweeters also in series. The amplifier conveniently had 2 separate ports, 1 for the main and 1 for the high, so I plugged in the full range in the low and the tweeters in the high.
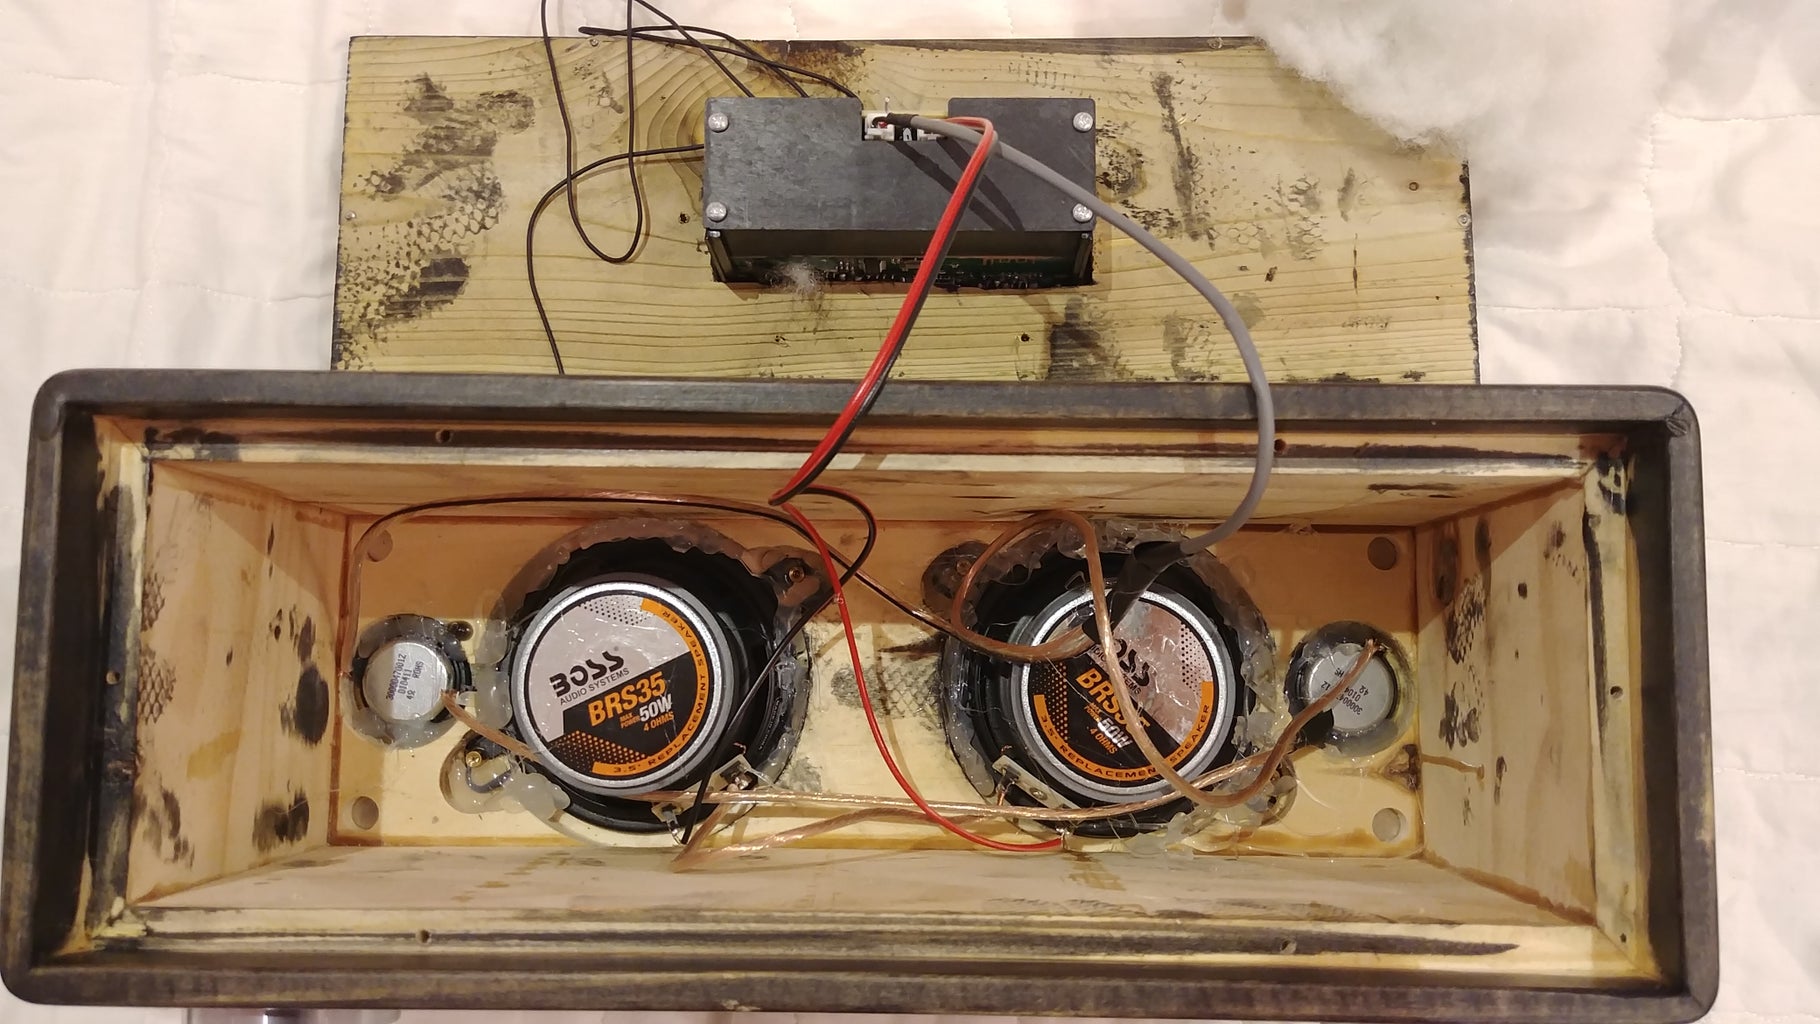
I fastened all the speakers with a glue gun, and filled the enclosure with some polyester filling.
I then screwed on the back plate, with the Bluetooth amplifier attached.
I could have ended here for the speakers, but I really liked the magnetic grills, so I went further and created the grills too.
Step 10: Create the Grill


First, I cut out a plywood the size of the front face of the speaker enclosure. (See pictures 1 to 2)
Second, I placed the remaining 4 magnets where I had embedded the other magnets back in Step 4. (See picture 3)
Third, I transferred the magnet locations on to the plywood I had cut and drilled holes to fit the magnets inside. (See pictures 4 to 6)
Fourth, I drew out the openings for the drivers and the tweeters for the grill. (See picture 7)
Fifth, I cut out the holes with a jigsaw. (See pictures 8 to 10)
Sixth, I cut a piece of fabric I wanted to use, applied spray glue on the plywood and stuck it on to the fabric. (See pictures 11 to 13)
Seventh, I carefully stretched the fabric over in all directions and wrapped it around the whole grill. (See pictures 14 to 15)
Eighth, I trimmed any excess fabric and I was done! (See pictures 16 to 19)
For the grill, I wasn't worried too much about how messy the other side was, as this is going to get covered when the grill is on anyways. But in the future I might add something to make it look a bit more finished.
Step 11: Blast Some Music


Put on the grill, or don't depending on the preference, and blast some music!
The speaker can get really loud, and I have yet to turn up the volume knob all the way because it's too loud as is.
The beauty of the Bluetooth amplifier board I got is that it comes with a remote, so I can digitally change the volume, the high and the lows, and it's even got a power button, so you can leave the rocker switch at the back at the "on" position all the time and use the remote to turn the speaker on or off.
Well, this is all I got for this project. I hope you liked it!

First Prize in the
Audio Contest 2017


