

Introduction: Make a Fruit Fence Planter


Sew a FRUIT FENCE Bag for your fruiting plant.
Fruit Fence planters clip on to city fences. These bags have been designed to support larger fruiting plants, about the size of a small bush. An internal water reservoir helps to extend the amount of time between watering. Depending on the plant, weather and construction, the water reservoir can hydrate the plant for 1-3 weeks.
* Makes a bag that is equivalent to a 3 gallon container and is supposed to last for 1-2 years. The bag materials are recyclable.
* Full bag weighs about 30 pounds when watered.
* Bag dimensions can be altered for smaller or larger plants.
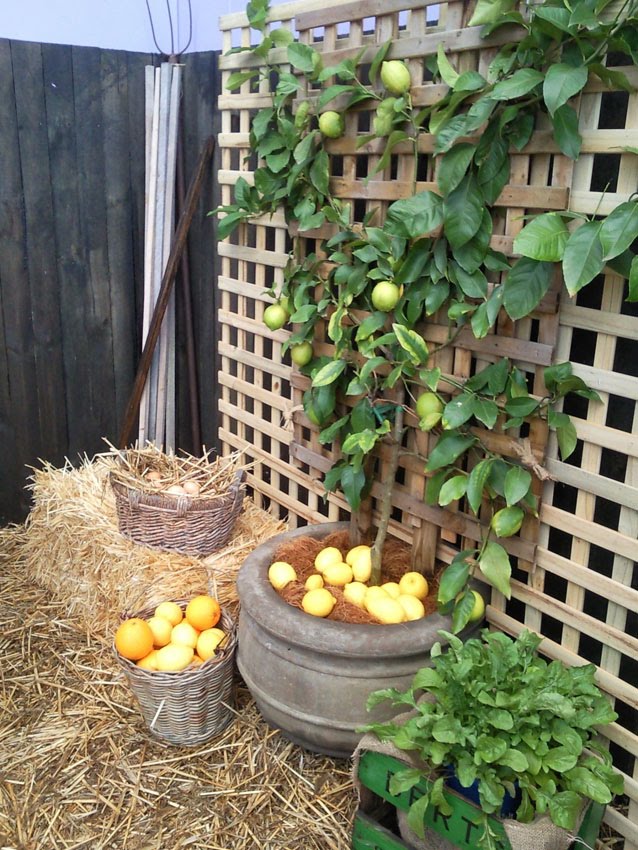
Suitable for blueberries, espaliered lemon trees and other dwarf varieties of 3-6 year old trees. Fruit bushes will require fertilization and pruning care, of branches and roots as appropriate for the plant. Small bags can support strawberries as well as many other plants.
Because these plants can clip on to fences, or railings, it makes it possible to use underutilized urban space, and to help plants access more sunshine.
There is a twitter-based communication service for your planters, you are welcome to create a hashtag for your planter and put it on your bag and use the service to log tweets related to the care of your plant, which you can share with a number of volunteer care-givers. Visit http://www.fruitfence.us to register your planter. Code is on Github and is build with nodejs, mongo and googledocs if you are interested in hosting your own service.
Learn more: www.fruitfence.us @FRUITFENCE
Step 1: Planning

You will want to figure out where you will put the planter, and learn about the plants before you adopt them.
Choose plants that can do well in 3 gallon containers for several years. Learn about the fertilizing needs, and soil type. Identify where you would like to put your planter, and select plants that will do well in that space.
For public spaces in California, ever-bearing strawberries are particularly good as public fruit, since they fruit for most of the year. Lemons fruit year round, and some blueberry varieties will maintain green foliage all year.
Dwarf trees and bushes are good options to look into.
It is true that the plant will not grow to full size or produce large quantities of fruit (though you might be able to get several pounds of lemons and a pint or so of blueberries from one plant if well-cared for.)
Productivity is not really the point of the Fruit Fence planters. The point is to grow more fruit in public view, and provide a way for people with less access to soil a way to care for a fruiting plant. Living with a plant for an extended period of time, at home or in your neighborhood, will allow those who get to know the plant to become more attuned with the cycles and seasons of fruit plants. This helps with general appreciation of fruit production.
The plants themselves are almost a form of bonsai plant, you can maintain them at a smaller size and they can fruit. For example, according to internet legend, there was once a 1-foot tall Ponderosa lemon that produced a single 1-pound lemon. The book Pruning & Training will teach you what you need to know.
In urban environments, you need to pay special attention to places that are windy, or are blocked from sun for part of the day because of buildings.
Cost
A roll of 10 yards Tyvek is about $80 shipped from Pennsylvania. We were not able to find other suppliers, but you can contact local printers who use Tyvek, or look on Craigslist and Ebay for extra rolls that people are not using. This will allow you to make about 10 bags.
You'll also want soil, fertilizers, and high quality plants.
Transportation
If you can, share rides to go to a good nursery and pick up plants. A large bag of soil weights about 50 pounds but can be hauled with a bike if necessary.
For moving the planters around, it is helpful to put them in a reusable grocery bag. If the water reservoir is damp, you might want to bring a towel with you if your bag art is a little delicate. (As is the case if you print onto Tyvek with an inkjet printer.)
Step 2: Materials


Appropriate Soil
Appropriate plants (we suggest blueberries and strawberries. The adventurous can try espaliered lemons.)
Tyvek
Polycotton or extra-strong polyester thread
Cardboard
Seam sealer
2 Carabiners
Sharp sewing needle (for microfiber fabrics)
Sources of materials
Tyvek
Tyvek can be ordered from Material Concepts. We are using Tyvek 1460, the UV-coated fabric-like Tyvek. In theory Tyvek should be available from advertising companies like ClearChannel, but we have not identified a source. You can sometimes order Tyvek from Craigslist or eBay. There is the already printed Tyvek housewrap that is sold at the bigger hardware stores, but we have not tried that kind yet. Paper-like Tyvek should also work, but it is really slippery and more difficult to sew.
Carabiners
A camping-repair supply shop is where we got our carabiners, but if you are making a bunch of bags, ordering in bulk might make more sense. The smaller metal carabiners support about 30-40 pounds of weight. D-rings are helpful to insert in the tabs, but you need to make sure that they can't twist out, because otherwise they stretch under the weight of the bags.
Fruit trees
We got our Lemons and Blueberries from FourWinds Growers in Fremont,
Sewing needles
For this bag, you will be sewing multiple thick layers. An industrial sewing machine is better. You definitely want the right needles for the job, and be gentle with your machine. Read more about sewing Tyvek.
Seam sealer
Since the current bag design includes sewing the sides of the bag together, water can leak out. Future designs will try to avoid this. In the meantime, seam sealer does work to minimize dripping.
Step 3: Cut Tyvek


Images:
A roll of Tyvek
A roll of Tyvek laid out to cut out tyvek for three bags.
Measuring Tyvek.
You can fold or crease the Tyvek to make it easier to work with.
Components that will be sewn together to make a bag.
Step 4: Prepare Bag Pieces

You will need to crease the floor of the inside of the bag.
You will also make strips that will be used to create the tabs that the clips attach to.
Step 5: Cut Main Part of Bag


Step 6: Sew Tabs in Place

Step 7: Stitch Side Seams for the Water Funnels


Note: When sewing Tyvek, each stitch puts a small hole in the fabric, compromising the Tyvek's ability to hold water. If you do not seal the seam with many coats of seam sealer, there will be a noticeable drip.
If you think about reengineering the bag, know that if you can avoid putting holes in the bag, the water will remain for much longer. Earlier prototypes of the bag used folded Tyvek, but it made the rest of the bag much more difficult to sew.
Step 8: Envision How Your Water Reservoir Will Come Together

You will be placing the long strip as the floor of the planter.
There will be open holes on the outer edges, these serve as drainage holes.
The long strip gets sewn, along with the two wicks which are held in place with the same stitches.
Step 9: Do First Line of Stitching to Attach Floor of Plant Container

Step 10: Prepare to Sew the Second Edge of the Floor of the Planter

Step 11: Finish Sewing the Floor of the Bag

Step 12: Sew Up the Sides of the Bag

Step 13: Coat Seams in Water Reservoir With Seam Sealer


Step 14: Create Graphics


You can create any sort of graphic you like for your bag.
Design
Our bags were designed to indicate that the fruit is public, and to give pedestrians an idea of when to expect fruit, and how much fruit would grow. The Twitter hashtag was printed on the bag.
Technical Construction
For these planters, graphics were ink-jet printed on sheets of paper-like Tyvek that had been prepared with InkAid and then gloss coated with UV protective varnish.
First the sheets of Tyvek were primed with InkAid and allowed to dry. It was important to not touch the Tyvek, as oil from fingers will prevent the InkAid from binding with the Tyvek.
Large sheets of Tyvek were taped to the wall and then painted with a large brush. Since the coat is clear, it was necessary to check coverage by looking at the coated paper from different angles.
Then 1-up 14X11, and 3-up 3X13 graphics were printed onto 11x14 pieces of printable, paper-like Tyvek.
The Tyvek sheets were carefully taped to a piece of 11x17 tabloid printer paper, without touching the Tyvek surface. The sheets needed to be as flat as possible, otherwise extra ink would get all over the print.
When dry, the printing was sealed with a UV-protectant gloss coat.
Note
In general, the printing seems to be lasting, however injury to the surface of the print through transportation - especially when the bag is wet - can damage the print.
Step 15: Add Clips and Cardboard


The clips you will use to attach your bag to a fence.
The cardboard insert will help improve the overall shape of the bag at the front, which is helpful if you are adding printed graphics.
Step 16: Plant Your Planter


Give your plant a good soak before planting, as transplanting plants stresses plants out a lot.
Fill your planter with appropriate soil halfway.
Pull the wick up into the soil for maximum contact.
Prune roots if necessary.
Set plant into soil and fill bag with soil and soil amendments as necessary.
Step 17: Water Your Plant

Water from the top. Water will drain and fill up the water reservoir.
Top off the reservoir with water, filling from the funnels.
Subsequent waterings you can fill from the bottom, the wick will help the water get to the plant.
If your plant gets dehydrated, fill it from the top to reestablish the wicking, which requires moisture in order to remain functional.
Step 18: Recommendations for Success With Your Planter


This is the first version of the design, originally created for the Urban Prototyping festival in San Francisco in October 2012. Future designs are planned, to account for the following issues with the design. You might want to consider these as you create your own planters:
* Silk-screening is recommended over printing onto Tyvek. (Though we have not tried it yet.) Unless you can get positively weatherproof printing, which can be expensive.
* The drainage holes of the planters can spill out over the sides of the reservoir and cause unsightly staining. This could be improved through printing on the problem spots.
* With rough handling and moving the bags around (especially with novice gardeners), the roots can shift causing injury to the plants and general instability in the bag.
Additionally, when carrying the bags by the "handles", the Tyvek can get stress tears, so it is generally better to move the bags while supporting the full plant. Once hanging and still the planters are generally OK. Future bags could use a big more support at the top.
* The drainage holes can collapse, I recommend stitching the extra flap in place so that it does not come out and spill soil out the side of the bag.
* The water reservoir could be a bit larger.
* We originally planned to put lights inside the water reservoir so that the water levels can be checked at night. The bag can appear full and maintain the shape of a full bag even after the water is gone, so right now you need to feel the bags to ensure they are full.
* Remembering to water is still a big challenge. Be sure to set up a support system for the plants, and if you feel like you cannot take care of the plants, lend them to someone who can. If you look at some of the other designs for planters for urban spaces -- the intention is usually to plant vegetables for the people, but the plants do not thrive.
This is usually because there is not enough water and nutrients for the plant. But if you take a look at WindowFarms, you can see that when plants have a lot of nutrition, they do well. and so usually (in California) people plant inedible succulent plants in bags without a water reservoir.
The goal of the Fruit Fence planters project is to design & create a clip-on planter that can support fruiting plants.
* UV-coated Tyvek is required because otherwise Tyvek degrades in the sun in 90 days.
* Currently, we are watching the original planters to see what other effects time can have on them. So far after 2 months planters that have been out near the rain are still thriving, and even fruiting with blueberries. Planters that required weekly watering are suffering a bit more from neglect.
Step 19: Attach Your Plant to a Fence or Similar Structure.


You can carry your planter with you in a reusable grocery bag, it should fit.
Lift your bag into position, it helps if you have a friend to help you, but should be manageable by someone who can lift 40 pounds.

Participated in the
Instructables Design Competition


