

Introduction: Make a Musical Bench


The Musical Bench is an exhibit which makes music when people touch, kiss, or hold hands. It uses a micro-controller to detect changes in resistance, via the copper armrests, and plays high or low notes depending on how much current flows through you and a friend. This exhibit is the result of messing around with many different ways of using the human body to complete an electrical circuit.
The original Exploratorium exhibit runs on a prototype board, but for this instructables we’ve used an Arduino instead. This makes it possible for you to build it into a bench, a drinking fountain, or something that we haven’t thought of yet. You can also use this as a personal tool for playfully investigating electricity, conductivity, and capacitance. Have fun and happy tinkering!
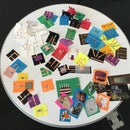
Step 1: Materials


Collect these parts:
- Arduino USB (any type will work)
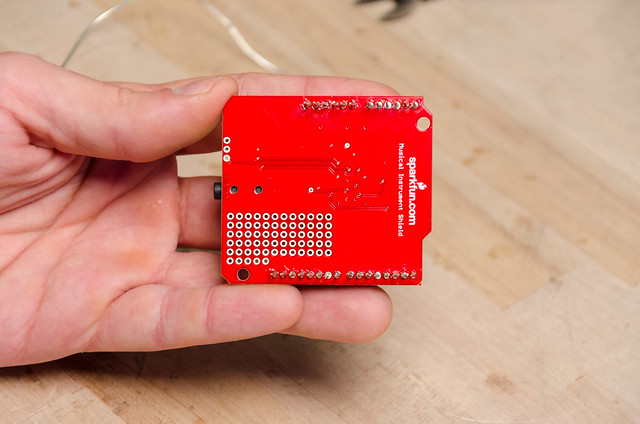
- Sparkfun Musical Instrument Shield
- Arduino Stackable Header Kit
- Two 1k Ohm resistors
- One 39k Ohm resistor (you can use a 47k resistor from this set if you can't find a 39k)
- One 0.1 uF capacitor
- Solid core wire (red, black, and white)
- Stranded wire
- Two Touch Pads (you can use scraps of copper or brass, copper pipes, or other conductive objects)
- DC power supply 9-12V
- Speakers or headphones with ⅛" stereo jack
Tools:
- Soldering iron (we like this one from Weller)
- Solder
- Wire stripper
- Wire cutter
- Safety goggles
- A computer loaded with arduino software
If you are new to Arduino Programming here are some helpful links:
How to program an Arduino http://arduino.cc/en/Main/Software
What an Arduino is http://arduino.cc/en/Main/ArduinoBoardUno
How to choose an Arduino https://www.sparkfun.com/arduino_guide
If you're familiar with schematics
Here are two schematics that should help most experienced arduinio/electronics people figure out how we're making. One is a drawing of the connections done with Fritzing, and the other is an electronics schematics of the sensor interface.


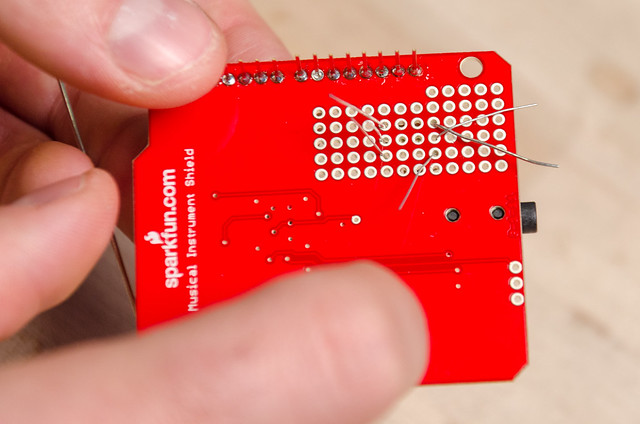
Step 2: Solder the Headers

The musical Arduino shield is capable of generating sounds, but first we'll need to set it up so it can take inputs from the physical world and communicate them with the main Arduino board. The first step is to solder on the headers that connect it to the main board.

Insert the pins of the headers into the round holes along the side of the Shield. Make sure pins are down and pointing away from the side of the shield with the components on it.
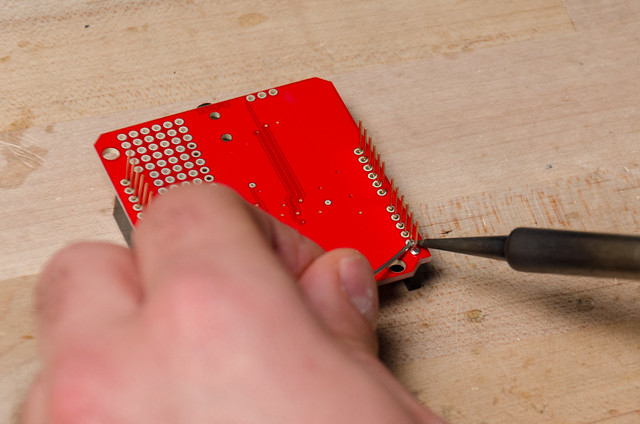
Flip the shield over.
Solder each pin to the round hole.
Take care to keep the pins straight, these will go into the corresponding sockets of the Arduino board.
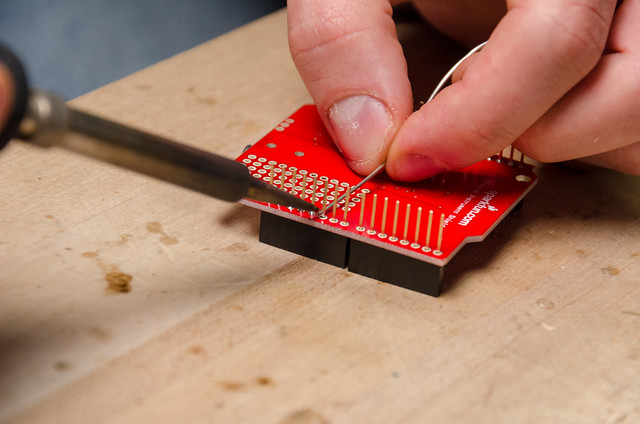
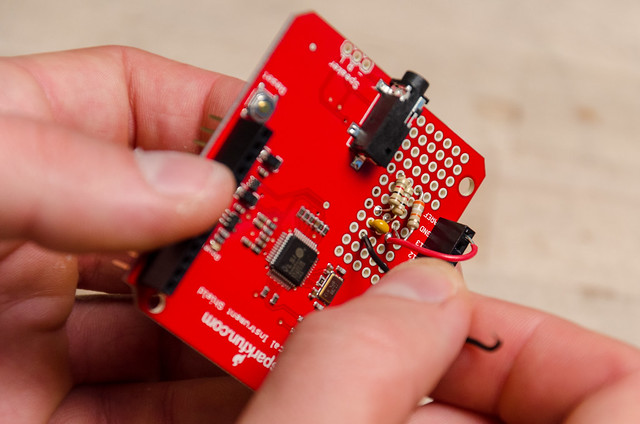
Step 3: Add Your Resistors

- Orient your shield so that you're looking at the side with the components on it, and the text "Sparkfun.com" is right side up.
- Place the three resistors next to each other in the center of the prototype area of the Musical Instrument Shield. Place the 39k resistor on the left—we'll call this R1. Place one of the 1k resistors in the middle (R2), and the last 1k resistor (R3) on the right, nearest the audio jack. It helps to spread the legs with two spaces in the middle so that the resistors can lay flat.
Flip the board over. Solder each leg into place. Don't snip the ends yet.

Cross over the legs of R1 and R2 on the side closest to the audio jack and solder them together.
Step 4: Add Your Capacitor

Flip the shield over again. Place the capacitor (C1) above the resistors, just on top of R2 and R3.
Flip the shield to the back, and solder C1 down.

Solder a leg of C1 to the adjacent end of R2.
Solder the other leg of C1 to the adjacent end of R3.
Step 5: Add the Red Wire
Now you will add three wires to the board. To keep them easily identifiable we've used red, white, and black but the color of the wire doesn't matter.
Cut a piece of solid core wire (we used the red one) about 2” long and strip both ends.

Insert one end into board right next to C1 and directly above R1.
Flip over the board and solder that end into place.
Bend down the leg of R1 (the side not connected to R2) and solder it to the red wire.

Flip the board back to the front and insert the other end into the header socket labeled “AREF” (it is on the bottom left side of the shield).
Step 6: Add the Black Wire
Cut a piece of solid core wire (we use black) about 2" long and strip both ends about 3/8".
Insert one end into the board just above the C1/R3 junction.
Flip the board over and and solder the end into place.
Make a soldered connected to the adjacent C1/R3 junction.

Flip the board back to the front side and insert the other end of the wire into the header socket labeled "GND" (right above "AREF").
Step 7: Add the White Wire

Cut a piece of solid core wire (we use white) about 3" long and strip both ends about 3/8".
Insert one into the board just above the c1/R2 junction (just to the left of the black wire)
Flip the board over and solder the end of the wire in place.
Make a soldered connection to the adjacent C1/R2 junction.
Flip the board over and Insert the other end of the wire into the header socket labeled "A0" (on the middle right side of the shield).
Step 8: Connect the Wires for the Touch Pads

Cut two pieces of the stranded wire as long as you will need to reach from the shield to where you want the touch pads to go.
Strip back 1/4" on one and insert just below R3.
Flip the board over. Solder the wire in place and make a soldered connection to the leg of R3.
Go back to the front of the board. Strip back 1/4" on the other wire and insert just below R2.
Flip the board over. Solder the wire in place and make a soldered connection to the R1/R2 junction.
Step 9: Connect the Wires to the Touchpads

Now you need to connect the other ends of the wires to your metal touch pads. We soldered them but you can also use bolts, alligator clip leads, or any method you wish. You may want to experiment with different materials and sizes for touchpads using alligator clips before soldering the leads.
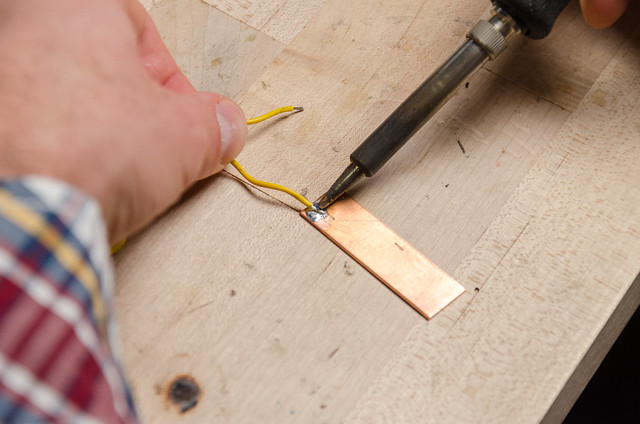
Strip the other end of wires and solder the ends to your pieces of metal. Depending on what kind of metal you are using it might be a good idea to use flux to help with the soldering.
Step 10: Check Your Work


Trim off all protruding leads, and visually inspect your work to ensure that all things that are supposed to be connected are, and nothing is accidentally connected that shouldn't be.
Step 11: Mount the Shield on the Arduino

Mount the shield assembly to your Arduino by plugging the stackable header pins into the Arduino's header sockets. There may be more header sockets on the Arduino than on the shield, but it's fine. Those sockets will not be used, and if you look closely, you will see that, due to the gaps between headers, there is only one way to plug it in smoothly without bending any pins.
Check to be sure that the USB connector on the Arduino is not shorting out to the bottom of the shield. If it is, you may need to put some tape in between.
Step 12: Load the Sketch to the Arduino
Plug the USB into your computer and load the SingingSnack sketch on to your Arduino.
If you need help with this go to the guide on the Arduino home page (http://arduino.cc/en/Guide/HomePage).
Attachments

Step 13: Start Exploring

Plug your headphones, earbuds or powered speakers into the audio jack on the shield.
Touch both pads and start exploring how different types of touch maps to different notes.
If you hold one of the touch pads and a friend holds the other you can make music by touching fingers, shaking hands, or hi-fiving. Experiment with which parts of your body allow more electricity to flow (higher notes equal more conductivity).
Step 14: Tweak the Sketch
If you go into the sketch on the arduino there are a few variables that are fun to play with. We've labeled which variables are the most tinker-able and the ones are probably better left alone (unless you are an arduino master).
#define SIXTEENTH_NOTE_MS (100) - this number changes the fullness and denseness of the arpeggio (a series of notes played in sequence). We've decided to use the arpeggio to make the sound amore "musical"
#define SENSOR_HYSTERESIS (10) - this variable defines how sensitive the device is to changes jn resistance. We dialed this down to 4 to get a more full sound (although it also can produce more 'noise' in the system).
#define LOWEST_NOTE (48)
#define HIGHEST_NOTE (96) - these two variable controls the range in notes that can be played although the highest and lowest notes are usually not used.
#define MY_INSTRUMENT (0) - it's set to the 'grand piano' instrument but it's fun to play around with the numbers (it goes up to 127 to create some interesting sounds and even percussive effects).
You can also change the volume and "strike force" here if your headphones don't have volume control.
If you want to get more in-depth into programming or electronic music feel free to mess around with the sketch and make changes or additions to the code. You may be able to add a digital numerical display to show the levels of resistance, you might try making the music more melodious, or you can add something we haven't thought of yet. Please share your changes and additions with us so we can improve the code.
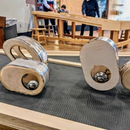
Step 15: Hack a Bench!
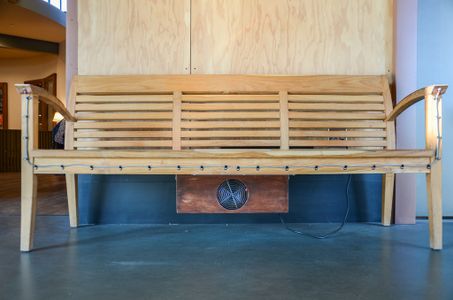
At the exploratorium, we have a prototype cricket computer board running a similar program built in to a normal museum bench. Follow these steps to turn any bench into a fun and social, musical instrument.
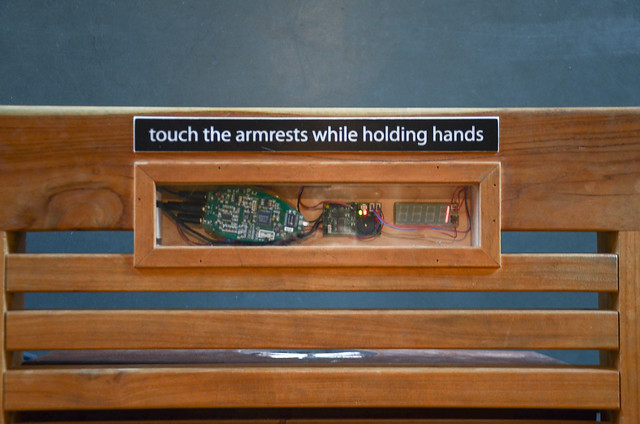
Find a way to mount the arduino on the bench. We cut a hole in the seat of the bench and installed a wooden box with a plexiglass cover. We like that arrangement because its visible to the people sitting on the bench but depending on your furniture and tools available you may want to figure out a different solution.
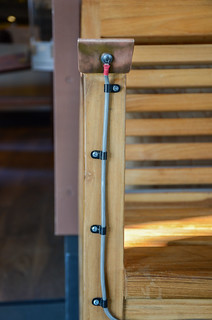
Run the wires to the armrests. We used p-straps to attach the wires to the front of the bench.
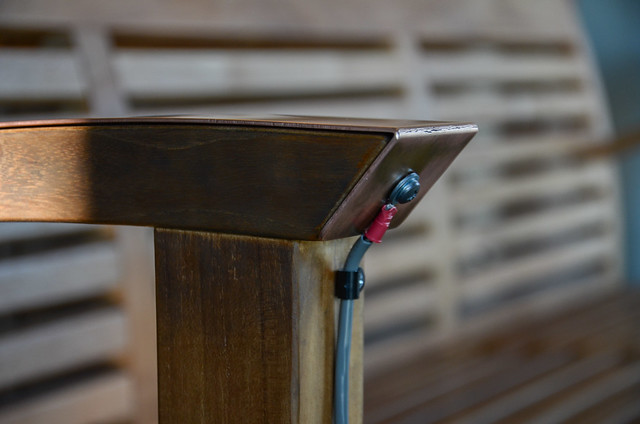
Cut two pieces of copper (or another conductive material) to fit on the armrests. Be careful that the edges aren't too sharp. Attach the pieces of conductive material to the bench.
Solder a ring terminal to each wire and use it to screw the wire to the covered armrest. If you want you can also solder the wire directly to the copper piece.
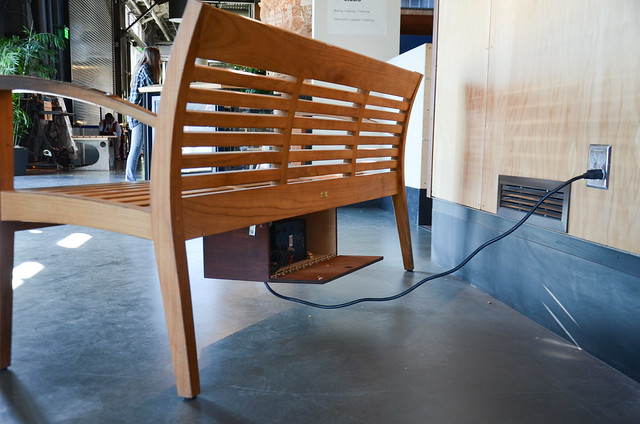
We built a box under the bench to hold the speakers and power supplies. You could also mount the speakers to the bench or nearby.
Step 16: Keep Playing!
What you've made is really a tool to explore the world around you and create interesting sounds from variations in resistance and conductivity. Keep playing with various materials and household objects, have fun, and let us know what other cool discoveries you make.


