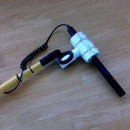
Introduction: Make a Rubber Band Shock Mount for Your Boom Mic for Only $3!
When attaching a boom mic to a pole, you need a special mount to insulate the microphone from pole noise. If the mic is connected directly to the boom, it will register unwanted sound whenever anything hits or moves across it (like the operator's hands). Thus, you need a special mount that will 'float' the mic away from the pole. Rubber band mounts are a good way to do this, but are often very expensive (around $50). Why not make your own for $3 and put the rest back into your movie?
Step 1: Parts List
Here's what you'll need for this project, most of which I found at the dollar store:
1 wire mesh pencil cup (with mesh bottom)
1 piece of 1/2" PVC pipe scrap cut to length of cup
2 medium length rubber bands
2 hose clamps
The cup cost $1 and the clamps came in a variety pack of twelve that also cost $1. The elastics came in a wonderful bag labeled "One pound of rubber bands" (also $1) that I have used for many a project. I already had the 1/2" PVC scrap laying around, but even if you buy a ten foot length it will only cost $1.50. Cutting the PVC is a real pain unless you get some ratcheting pvc cutters, which I highly recommend. PVC pipe has so many great uses (it's sometimes call "the Tinkertoys for adults") that these cutters are a wise investment. Get them for a scant $2.49 at Harbor Freight ToolsHarbor Freight Tools.
Step 2: Bottom Out
The first thing you need to do is remove the bottom mesh of the pencil cup. I first tried cutting it out with small wire cutters, but found that pushing down on the mesh would break it free rather easily.
Once the bottom of the cup is removed, check the edge for straggling bits of metal that someone (like you) could cut their fingers on. Get some needle-nose pliers (I used the Gerber multitool that I always carry) and pull them off. I'm all for expending blood and sweat on a shoot, but tying up loose ends like this will save you some.
Step 3: Make Your Marks
Next, lash the PVC pipe to the cup vertically using one of the rubber bands. Then, using a marker that can be seen against the color of your cup, make a pair of short lines where the pipe meets the cup. Do this at the top and the bottom.
Step 4: Cut Holes
Remove the pipe and use your wire cutters to cut a path where your marks are.
Step 5: Add Clamps
Feed the hose clamps through the newly opened holes. This will take a bit of work and may deform the clamps, but don't worry.
Step 6: Insert Pipe
Run the pipe into the clamps, and tighten. The clamps will wrap around the pipe and the pierced cup and reform into shape.
Step 7: Rubber Bands to Finish
Finally, wrap a rubber band around the cup twice, so you have two bands next to each other. Do the same with the second band, placing both in an "X" formation in relation to the PVC. This will suspend your mic nicely in the center of the pencil cup.
And that's it! Run your mic through the center of both pairs of bands, attach the mic clamp to the PVC, and you are well on your way to cleaner sound, unmarred by any noise your boom op may make as they reposition themselves. The only thing else I might do is spray paint the PVC black so the whole thing matches and looks more professional.
Go check out the new, improved version!


