

Introduction: Make a Simple Guitar Stand


This is a quick, lightweight stand for stringed instruments in or out of their cases. I mostly own ukuleles and violins so I chose to make my own, scaled to those smaller instruments. The basic idea will work for full-scale guitars, however (but I wouldn't try it on a cello!)
Materials: plywood or chipboard, PVC EMT or dowel, pipe insulation (optional)
Step 1: Measuring

The important thing is figuring out the relative position and ratio of the three supports.
What I did was take a representative instrument and measure a chord across the bottom of the case where it would cradle the bottom curve of the instrument.
The next step was putting the cased instrument up on a table and tipping it over until it started to fall over. Using a drywall square, I measured the distance from the center of where the two lower supports would be to where the neck support would need to be, then up to how high above the lower supports the neck support should be.
My measurements, for a stand that fits tenor ukulele, violin, and 3/4 guitar were 6" - 9" - 21" ; the "cradle" supports were 6" apart, then 9" over and 21" up to find the neck support.
Plot those three supports on your plywood and draw whatever shape you like that covers all three and extends far enough in back to keep the weight of the instruments from tipping the whole thing over.
Step 2: Cut and Clean

Screw two scraps of plywood together. I had some 1/2" birch ply scrap lying around; the ukulele-and-violin version only needs 14" x 26" worth of material. If you put the screws right where the holes will be you won't have to patch the screw holes later...AND you've got a guide to where the holes are going to go.
Jigsaw, bandsaw, scrollsaw, whatever your comfort. Or if all you have is skillsaw, then make a big trapezoid so you only have to cut straight lines.
With the pieces still screwed together, sand the edges clean. A belt sander is very handy here. It isn't important for this project that the two pieces match exactly but it is neater to do it that way.
Sand down or route the edges to taste. Then drill the holes to fit your support pieces snugly.
Step 3: Test and Paint


A sanity test is always worthwhile. One Vorson electric ukulele in case, and nothing fell over. So on to painting.
I had a nice birch that could have been stained but not enough patience to do so. Paint will do.
Optionally, slide copper pipe insulation over the supports. This pads them in case you want to put instruments without their cases on the stand. It is also grippy and helps keep them from sliding around.
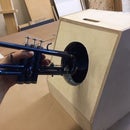
A little glue and you are done; Gorilla Glue, epoxy, or Zap-a-Gap is fine.
Step 4: Complete

At 24" mine fit four instruments comfortably. When I revised it to 30" I could do five with enough space for a soprano uke or maybe the bodhran. It sticks out from the wall about 30" total, so be aware if you were hoping to tuck this into a narrow hallway or something.
Total cost: for me, about $10 as I had the plywood and paint. I could have used scrap EMT as well but chose to purchase 1/2" sched-40 PVC. A couple hours cutting and sanding and a day of waiting for paint to dry.


