

Introduction: Make a Z-axis for Your Laser Engraver!


Hi folks
It has been a while since i posted my last instructable, where i showed you how to make an awesome arduino based laser engraver running on GRBL. In that instructable, I said I designed the laser engraving machine that way, so you could easily convert it to a cnc router by adding a Z-axis to the machine. In this instructable, I will show you how to make a Z-axis for this cnc router. While I was doing that, I made some improvements to my engraver for a better engraving quality, but more on that later in this instructable. I have 3D-printed the whole Z-axis. Why? Because i can! And of course because 3D-printers are awesome :). If you don't have a 3D-printer, or can't affort one, you can just use an online 3D-print service like 3Dhubs, this is a very easy way to get your things printed. As usual, I made a bill of materials and included all the printing files in this instructable so you can make this Z-axis with no trouble, if you just follow this instructable.
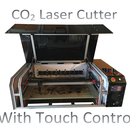
I started to make this Z-axis just for fun, I'm not really in need of a cnc router right now. I love making things and I thought: Why shouldn't I give it a shot? But as I am currently also working on building a CO2 laser cutter, I decided to stop working on my previous machine, but I still wanted to share what I've made. I hope you like it!
Step 1: Bill of Materials

* 12 mm x 500 mm linear rod:
https://www.aliexpress.com/item/WCS12-12mm-500mm-L...
* 4 pcs LM12UU 12mm Linear Ball Bearing:
https://www.aliexpress.com/item/Free-shipping-2PCS...
* 2 pcs Nema17 Stepper Motor:
https://www.aliexpress.com/item/Free-Shipping-3D-p...
* nuts and bolts
* M10 rod
* 1 pcs 10*26*8 6000-2Z radial shaft ball bearing:
https://www.aliexpress.com/item/4pcs-lot-metal-shi...
Everything you need to buy to build this Z-axis is mentioned above, all the other things must be made with a 3D-printer.
Step 2: Design and Print the Parts


I designed this Z-axis so I could easily switch between my rotary tool and my laser by just unscrewing 4 bolts. Well, the only other thing I can say in this step is get your hands on a 3D-printer and print those parts! I used PLA with an infill of 50%.
Attachments


Step 3: Assemble Your Z-Axis


It isn't very hard to assemble this thing, just look at the images and jou'll be just fine. The only thing you need to do before you can really assemble it is cutting the linear rod into two pieces of 160mm.
Step 4: Go Rout Some Things!

I haven't done more than this to this project because I'm focussing on building another lasercutter, but I hope this will be useful for some of you. Thank you for reading this small instructable! i hope you liked this little upgrade for your laser engraver! If you do, please vote for me, I would really appreciate that.
Thanks!

Participated in the
Epilog Contest 8

Participated in the
CNC Contest 2016

Participated in the
Design Now: 3D Design Contest 2016


