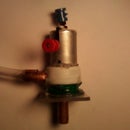
Introduction: Make a Water Block Out of a Heatsink for Less Than $20!
With CPUs and other computer components becoming hotter and more powerful faster and faster; traditional air cooling methods are no longer efficant enough to cool these components. Another way to cool components is water cooling, but this can be very expensive, which is why, in this Instructable you will learn how to create your own highly efficant waterblock for $20 or less! I made my waterblock to cool a 168 watt thermoelectric junction
Step 1: Materials and Tools
For this project you will need:
-a 120V plug-in drill
-some plexiglass or lexan sheets#
-a heatsink with wide spread fins
-JB weld#
-2 brass (or plastic) screw-in barbs#
-a hacksaw
-a thin sharpie*
-a centimeter ruler (this is a MUST I'm living in the U.S.A and even I'm using one; they're more accurate)*
-a large quick-clamp
-a piece of wood with a straight edge
-a utility knife with a sharp blade*
-various drillbits*
-vinal tubing to match the barbs*
-sandpaper*
-a file*
-SOS pad*
In total all of my materials were easily accessable from Lowes and costed $13.00
* item is not pictured
# item was bought
NOTE: plexiglass and lexan are not the same thing, lexan is stronger and more expensive, but when I say plexiglass I mean lexan.
Step 2: Planning Water Routes and Cutting Out Heatsnk
Before any serious work begins, the waters route inside the water block must be planned out. Take your time, you will only have one shot at getting it right. Try to plan a path that does not obstruct the flow to much or create little areas where bubbles could form and become trapped. My design utilizes many holes drilled perpendicular to the fins. Once your design is done, cut out the heatsink and drill or cut until the heatsink fits the design.
Step 3: Cutting Plexiglass and Cutting Barbs
Now measure all of the demensions of the heatsink and trace them onto the plexiglass with the sharpie. use the wood as a guide to score and cut the plexiglas. Most of the time,, the threads on the barbs will be too tall, use the hacksaw to cut them down, make sure they are the same hieght.
Step 4: Polishing the Bottom
use the SOS pad to polish the bottom of the heatsink, go in a back and forth motion until a good shine is achived. To test the integrity of the polish: put a drop of water on a piece of plexiglass, press the heatsink onto it and flip it over. If it sticks you're good, if not polish more.
Step 5: Dry Fit and Gluing
Now dry fit the plexiglass peices, if they are too big use the file to shape them up. if they are too small, re-cut them. remember measure twice cut once :) after you know the pieces are the right size, begin JB welding them into place. Be sure to sand the to parts being joined. It is best to do this part in two steps. Also try to keep the plexiglass clean, it makes of a better overall look when it is finished.
Step 6: Leak Test
Connect your water block to your water pump/source and let it run for a long time (24-48 hours). If it dosen't leak great! If it does, then add more JB weld. Mine leaked and the entire right side came off! D: I re-glued it and it seems to be holding up well.
Step 7: Final Thoughts
It came out much better than expected
did a very good job of cooling the TEC
didn't obstruct water flow
can't beat the price! :D
I love comments, so leave one! :)
total cost: $15 :)
EDIT: 8/19/2010 ok so this thing was a flop, it broke again, except this time on the opposing side, I dont feel like fixing this every time. So I made a soda can waterblock, and haven't had anything go wrong yet :P


