

Introduction: Making Paper Mache Projects Focused on Shapes and Structures

This lesson will be focused on creating paper mache products based on math and visual arts content standards. Students will be instructed how to make paper mache structures out of basic shapes such as squares, rectangles, circles, etc. The students are welcome to make any structure they wish but are shown an example of a city.
Materials will include 8 ounces of flour and 8 ounces of water per student, multiple newspaper that the students will shred into large strips themselves, and various cardboard materials such as shoe boxes, paper towel or toilet paper tubes, or other materials such as straws and balloons.
Step 1: Mix and Shred

Mix eight ounces of flour and eight ounces of water into bowl and stir until clumps are gone. Begin to shred pieces of newspaper into smaller strips and keep them to the side.
Step 2: Begin!

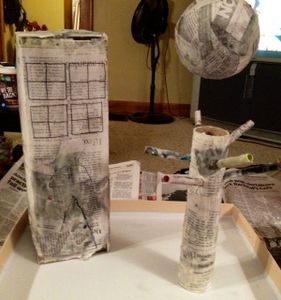
First set up structures as desired on the top of some sort of larger shoe box so it has a solid base. Then take a strip of newspaper and dip into mixture. Once strip is covered in mixture, slide it through the pointer finger and thumb so there is a thin layer of the mixture on the paper and it is not dripping. Place the piece on one of the shapes and lay it flat, then press down so the piece stays. Repeat this process throughout the entire project until each part is fully covered. Two layers should be added to ensure that the entire piece is covered.
Step 3: Let Dry and Then Draw
The paper mache projects will be best if they are dried for a full day, so the students can work on it during the next class period. The next day they can not only add color, but more shapes. In the city example, there are square and semicircle windows added as well as a triangle door. Students can become extremely creative with adding colors and are welcome to use markers or paint. (Paint will probably work best)
Step 4: Lesson Plan


Step 5: Tips and Tricks
It may be better to put slightly a bit more water than flour into the mixture so it is not so thick; it became difficult to maneuver when it is thick. Also really make sure the strip of newspaper is not dripping with the mixture or it will be too difficult to keep together. Another trick is to use paper towels as the second layer so it will be easier for the students to paint and color the project. It will also be handy to keep a bowl of water and paper towels nearby incase the students become flustered or need a break and can clean their hands.


