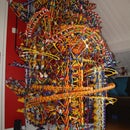
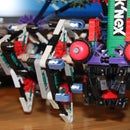
Introduction: Metropolis - Knex Ball Machine Elements and Lifts
Hello everyone,
I wanted to post a selection of elements that I used in my latest ball machine metropolis. I can't post all of them with step by step instructions. But you should be able to make most parts by looking at the pictures in this instructable.
Table of contents
Step 1: The Official Video
Step 2: Flat Spiral
Step 3: Spinning Basket
Step 4: Five Ball Basket
Step 5: Ball Seperator
Step 6: Rattling Stairs
Step 7: Free-fall Spinners
Step 8: Zigzag
Step 9: Catcher
Step 10: Halfpipe
Step 11: Red Double Spiral
Step 12: Two Ball Dropper
Step 13: Small Ferris Wheel
Step 14: Flexible Path
Step 15: Rollercoaster Path
Step 16: Quadruple Arm Lift - The wheel
Step 17: Quadruple Arm Lift - How to set up the wheel
Step 18: Wheel Lift - The base
Step 19: Wheel Lift - Middle part & Motor
Step 20: Wheel Lift - The top
Step 21: Fast Corner
Feel free to comment, criticize or ask anything.
Thanks for looking and have fun building!
~Kairah
Step 1: Metropolis
Step 2: Flat Spiral
Here's the flat spiral, the ball will roll away from the center. It is very hard to get the orange track right. But it's also very cool to look at :)
Step 1: Make the frame
Step 2: Support the frame
Step 3: Add the track
Step 4: Make the ball's entrance
> I used this ball dropping mechanism
Step 5: Adjust supports and track width
> When you make the path wider, the ball gets more speed.
Step 3: Spinning Basket
I modified this from another instructable. The ball will enter the basket, spin 300° and then drops out of the basket onto the next path.
Credits for the idea go to "yardking"
https://www.instructables.com/id/Knex_Pinwheel/
Step 4: Five Ball Basket
This basket releases five balls at once. You can adjust the weight by adding or removing wheels.
Step 5: Ball Separator
When installed correctly this can be used to allow balls to pass one by one.
Step 6: Rattling Stairs
These stairs make a rattling sound. Version one is with white rods and version two with blue rods.
Step 7: Free-fall Spinners
Spinning objects that can be used inside a support tower.
Step 8: Zigzag
This is my favorite part of metropolis, the zigzag!
In the video it is used in path 11 at 9:20.
When you make this, make sure the ball has some speed before it enters the zigzag. Otherwise it will not tip over.
Step 9: Catcher
I used this to catch the ball after the zigzag element.
Step 10: Halfpipe
This half pipe doesn't use a mechanism that drops the ball when it reaches the bottom, so it can be used in very narrow spaces.
Step 11: Red Double Spiral
A double spiral with a thick red edge. The center pieces are connected with an Y-connector (knex man hand). It is very heavy and needs to be supported well enough.
Step 12: Two Ball Dropper
It drops two balls at the same time...
Step 13: Small Ferris Wheel
Step 14: Flexible Path
A path made with flexible rods. You can also use normal rods for straight bits. It's quite fragile so make sure you support it enough!
Step 15: Rollercoaster Path
A fully customizable rollercoasterish path, you can make pretty much every kind of shape with this. It's also very sturdy, the ball rolls very well and that's what makes this path also very fast!
Step 16: Quadruple Arm Lift - the Wheel
The lift consists of wheels that have four long arms on it. I used one 12 Volt motor for two wheels. And connected the two wheels with a long chain.
Step 17: Quadruple Arm Lift - How to Set Up the Wheel
Right after you have made the wheels, it is time to install them in the tower.
You can put a motor directly on the main axle of the wheel, or connect multiple wheels together with a chain like I did. And then put a motor on the chain.
Step 18: Wheel Lift - the Base
I have cut the instructions for the wheel lift in three parts. The base, middle part and top part. You can make this lift as high as you want, and as fast as you want. But keep in mind that if you make it higher and faster, it will probably slow down when it carries over 3-4 balls at the same time.
The base is designed so that that the lift picks up balls one by one.
Step 19: Wheel Lift - Middle Part & Motor
Make it as high as you want. You can add the motor later on (I would put it somewhere in the middle).
Step 20: Wheel Lift - the Top
The orange track connecters can be replaced by yellow ones, depending on your choice of track you want to use.
Step 21: Fast Corner
By making the corner very sturdy and adding an inclined plane, the ball will bounce against the plane and retain its speed!


