

Introduction: Minecraft Basics


Time to start playing! Once your game loads, the first thing you are going to notice is your Heads-Up Display (which will run along the bottom of the screen).

It contains:
- Health - represented by 10 hearts and equals 20 health points (HPs)
- If you get hurt by falling, getting hit by mobs, etc, your health will go down.
- Loose all of your hearts and you die.
- Hunger - represented by 10 drumsticks or green apples as shown here with the texture pack I'm using
- Will be covered more in Battling Hunger to Stay Alive.
- 9 Hotbar Slots - represented by the 9 boxes along the very bottom of the screen
- This is where you would put resources, tools, and weapons you want to use.
- Click keys 1 - 9 to switch between them.
- 1 is on the far left and it goes up to 9 which is the far right.
- Experience Bar - the long black bar below health and hunger
- Fills up with green as you gather experience from doing things such as collecting resources and fighting mobs.
- Does not effect your gameplay until you start enchanting or using anvils which we won't be covering int this beginner class.
- Armor Strength - appears above your row of hearts when you put on armor and is represented by 10 chestplates
- Will only show up once you have put on armor.
- Learn more about this in Combating Mobs.
- Oxygen Bar - appears above your hunger when you are submerged under water and is represented by 10 air bubbles
- If you run out of air bubbles and you will start to lose about 2 HPs a second.
- Once you get above water, your air bubbles will reset.
Collecting Wood
When the game loads, you will spawn somewhere random in the world; this is your Spawn Point (as mentioned previously). You could spawn anywhere, including a barren island. Hopefully, you'll start somewhere with trees nearby as Wood is a basic resource you are going to want to collect right away. You can collect wood just by punching trees with your fist.
While looking at the block you want to destroy, hold down the left mouse button until the block disappears and a floating/rotating smaller version of the block appears. Walk over it to collect it (if you are really close to it, it will just get automatically picked up like you can see in the gif below).

If a tree is tall, I suggest breaking the second and third wood blocks up from the ground and then standing on the bottom one to reach higher wood blocks. When you are done, just jump down, and destroy and collect the block of wood you were standing on.
One thing to keep in mind when breaking any blocks (whether with your fists or tools) is you have to keep hitting the block until you destroy it. If at any point you stop hitting it, the block will go back to being whole and you'll have to start over hitting it to destroy it. Blocks will never be partially destroyed. They will either be solid or broken.
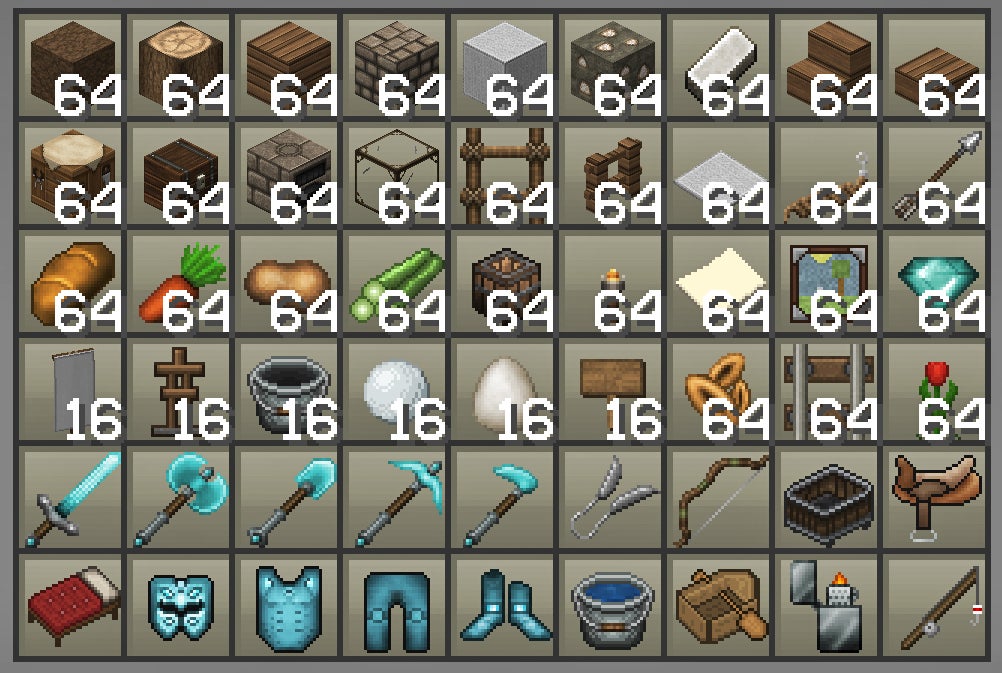
Here is a small selection of items from the game. Many things can stack up to 64 in one spot, but for some you can only stack 16 or even just 1 per spot.
As you will begin to collect more resources, you'll notice that some things will stack within your inventory. You'll be able to stack up to 64 blocks in one inventory spot for many of the basic resources such as dirt, sand, wood, and cobblestone. On the other hand, items like tools can only be 1 per inventory slot. As you collect more and more resources, you'll get a better idea of how many you can stack of each.
You can destroy the leaves on the tree, but once you destroy and collect all the wood, the leaves will just start to disappear on their own. Tree leaves have the possibility of dropping saplings and if it is an oak or dark oak tree, there is a chance the leaves will drop apples as well. Types of trees in the game: Oak, Dark Oak, Birch, Spruce, Acacia, and Jungle.
Begin Crafting

Once you have wood, you can start building some of the basic supplies you'll need. Click E to open up your Personal Inventory which also has a small (2x2) crafting grid on the right. The first things you are going to want to craft are Wood Planks from wood and a Crafting Table from those wood planks. With 1 log, you can get 4 wood planks, and you can use those 4 planks to make 1 crafting table.
Once you place your crafting table, you can right-click on it to use it; it gives you a large (3x3) crafting grid to work with. Making wood planks with the crafting grid is easy because it only requires 1 of 1 resource and you can put it anywhere in the crafting grid to make it work; something you need to keep in mind going forward is that once you need more than 1 resource to craft something, the orientation of the resources in the crafting grid matters for what you want to make. Just having what you need isn't enough, you need them in the right pattern to craft what you want. The resources will usually be in a pattern that makes sense for the item you are making which you will see as we go along.

You already know how to make planks, but you will also need Sticks to make tools. To make 4 sticks, stack 2 wood planks (of any type of tree) on top of each other in the crafting grid. Now that you have some resources to work with it is time to make tools. Various tools will make collecting resources faster and easier, and in some cases, it is necessary to have tools since only some things can be collected by punching them.
As the lessons progress, I'll continue to go over many more items you'll need and how to craft them.
Step 1: Crafting Tools

If you want to easily collect Grass, Dirt, Sand, Gravel, Clay, and Snow you can start by creating a Shovel. A wooden shovel is created by stacking 2 sticks in the crafting grid (one in the center, one in the box below it), and putting 1 wood plank above the sticks.
To easily collect Wood, Wooden Items (such as a door, wood planks, or even the crafting table itself), Pumpkins, Cocoa, Huge Mushrooms, and Vines make an Axe. Stack 2 sticks like you would for a shovel, and then add 3 wood planks, one at the top center, one to the left of that one, and one in the center row of the left column.
Stone and ores will make for better tools, but to collect them, you will first need a Pickaxe. If you try to collect them by punching, you will be able to break the blocks, but they won't drop anything. To make one, stack 2 sticks as you have done before, and line up 3 wooden planks in the top row of the crafting grid. A pickaxe is also used to collect items made of metal (such as iron bars and an iron door), Bricks, Hardened Clay, and Ice.
As soon as you start using a tool, you will notice a green bar appear in the box with the item. This is the tool's Durability. The bar will start out by going the width of the box and will appear green. As you use/damage the tool, the bar will start to shrink to the left and will change from green to yellow to red. Eventually, the tool will simply break as you are using it and disappear.

How to craft a Shovel, Axe, and Pickaxe using various resources.
Unlike basic resources like sand and wood, you will only be able to have 1 tool in each inventory slot; they do not stack. They can start to take up a lot of room and if you happen to have multiple of the same tools that are damaged, you can craft them together to make 1 stronger tool. When you craft them together (put them right next to each other in the crafting grid), it will combine how much durability they have left (plus a little extra) to decide the durability level of the new tool. This is very good to use with tools that are close to breaking. If a tool breaks while you are collecting a resource, the damage done to the resource will reset and you'll have to start over to break it. By combining tools, this will happen less often.
You can only combine two tools at a time and they have to be the same type of tool, but if you have a lot of damaged tools, you can keep combining them until you have a tool that is much stronger than all of the damaged ones. Since fixing tools combines their durability, it isn't a good idea to do this with tools that are still pretty strong as you will lose some of the durability because you cannot go above the max of the bar.
Step 2: Getting Started Mining

Before you start mining, something you want to be aware of is the part layers play in where ores appear in your world. While the game will always generate a unique map, what is significant about the layers will always be the same. The world starts way down below your feet at layer 1 where you'll find Bedrock (a block that cannot be destroyed in survival mode). The next layer worth noting is 62 which is sea level. Though hard to reach in survival mode, the highest you can place a block in the world is 255, way above your character's head (you can fly all the way up there in creative mode). The highest you can actually go is Y=2,147,483,647, but it will take you a very long time to get up there.
These layers are important because most ores will only appear between certain layers and it can get frustrating to continue digging expecting to find a useful ore only to realize it is still many layers below your feet. If you ever wonder where you are, the Debug Menu (F3) will tell you what layer (Y-coordinate) you are currently at.

Now that you have collected wood and started crafting some basic supplies and tools, you can start mining. This is important to start working on fairly early on during your first day because cobblestone and iron make better tools and you will need coal to craft torches for night.
Stone / Cobblestone

Using a wood pickaxe, you can start destroying Stone blocks (will appear solid gray with some texture) to get Cobblestone (looks to be made up of gray stones). This is different than other resources in that you don't get the same thing from the block you destroyed (like when you destroy a wood block, you get a wood block in return). You can find stone in any mountain and if you dig down through dirt and grass you will always run into stone eventually. Don't dig straight down, though, as there could be a cave below you and if you break into it, you will fall and take damage or die, or encounter hostile mobs.
With all of the cobblestone you have collected, you can start making stronger Stone Tools. Just make the tools as you did before using the crafting table, but replace all the wood planks with the cobblestone.
Coal

Now that you have stronger tools, you can mine cobblestone and ores much more quickly. The first ore you are likely to encounter is Coal Ore. It can be found at pretty much any layer and it will always be surrounded by stone. It is also always found in clumps. So, if you find one coal ore, you are likely to find a few others. You must use a pickaxe to break it and obtain coal, but you can use any type of pickaxe to get it: wood, cobblestone, iron, diamond, or gold. When you break a block of coal ore, it will drop pieces of coal which can be used in crafting.
Iron

The next ore you'll encounter while mining is Iron Ore. With iron, you can create even stronger tools that will make mining ores faster, and will also be necessary for some of the rarer ores. You need a pickaxe to mine iron, but unlike coal, you cannot use a wooden pickaxe. You must use one made out of cobblestone, iron, or diamond.
Iron is a little harder to find as it usually generates between sea level (layer 63) and all the way down to the bottom of the world (layer 1). Though possible, it will rarely be found in the next few layers up from sea level. When you break an iron ore block, unlike coal, you will actually get the iron ore block which will have to be smelted (as I will cover in the next lesson) in order to be used.
Below you can see the different types of ore and stone along the right column. On the left are the types of pickaxes that will allow you to mine them.

Pickaxe required to mine each ore (including stone). From left to right: Wood, Stone (made from Cobblestone), Iron, Gold, and Diamond.
Ores on the right going down from top to bottom: Stone, Coal, Iron, Gold, Lapis Lazuli, Redstone, Diamond and Emerald.
Step 3: Rare Ores

When you first start the game, you will most likely only encounter coal and iron in the first day or so, but it is good to be prepared for other ores in case you come across them.
Gold
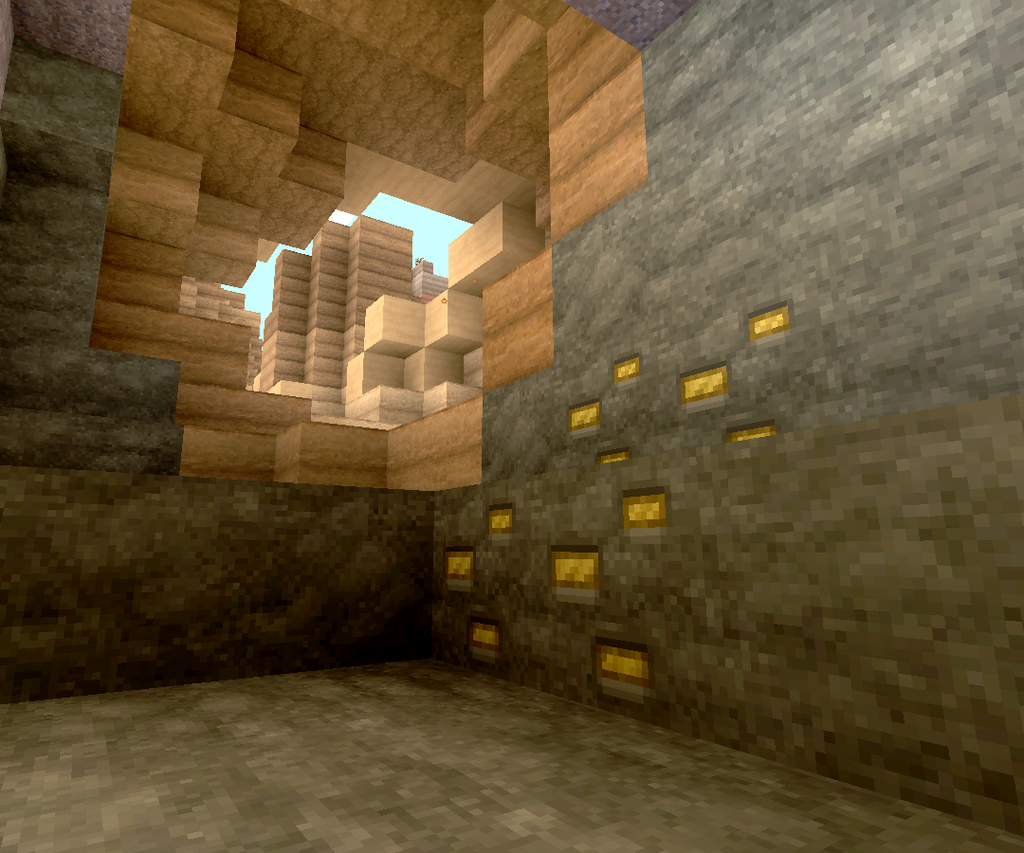
While normally found at layers 29 and lower, show here you can see that gold can also be found in the mesa biome at a higher layer than normal.
Going underground, the next ore you will find is Gold. Like iron, when you break the gold ore, it will drop the block itself which will have to be smelted. It can be used to make tools and while it seems like it would be pretty valuable, it isn't actually very handy to have as it is one of the softer ores which makes for less durable tools and armor. Gold tools can't even be used to mine gold ore blocks. It does have other uses and though it isn't an ore you necessarily want to seek out, if you come across it, it can come in handy with crafting a few random items later on. You will need an iron or diamond pickaxe to mine it.
While commonly found from layer 29 and lower, it can appear higher within the Mesa biome which is made up of red and orange clays. In these locations, you could possibly find it in up to layer 76.
Emerald

Another ore that is commonly found from layer 29 and lower is Emerald. It can only be mined with an iron or diamond pickaxe and will drop emerald pieces rather than blocks when broken, like coal. The main function of emeralds is currency to trade with villagers. Though, they can also be crafted into an Emerald block.
It is very hard to find as it only appears underground in Extreme Hills biomes.
Lapis Lazuli

Continuing down into the world, the next ore to cross your path will probably be Lapis Lazuli at around layer 23 and lower. Like coal and emerald, lapis lazuli blocks will drop pieces. You'll need a stone, iron or diamond pickaxe to mine it properly. This is another of the ores that can't be used for making tools or armor. Instead, it is used for more aesthetic items such as dyes and stained glass.
Redstone

When redtsone is placed on a block, it turns into redstone dust and can be used to create circuits.
You will have a chance of finding Redstone Ore once you make it down to layer 12 and lower. When destroyed with either an iron or diamond pickaxe, it will drop redstone. It cannot be used to make tools or armor, but it can be used in crafting various useful items (including a clock and compass). Also, unlike any other ore, it can be placed on opaque stones as Restone Dust. It is used to conduct redstone power between items such as switches and rails.
Diamond

The last ore, also found at layer 12 and lower, is considered the most useful by many people because it is the strongest: Diamond Ore. You can mine it with an iron or diamond pickaxe and it is a treat whenever you find it because each block will only drop 1 diamond piece. Along with being able to craft a few items, you can make the strongest tools and armor in the game with it.
Smelting with a Furnace

As I have mentioned, you will need to smelt Iron and Gold before you will be able to use them. Smelting is very easy. You will need a Furnace which is crafted with 8 cobblestones in all spots except the center.
You will need the ore you want to smelt and a fuel such as coal. Just stick them both in (ore on top and the fuel source underneath) and watch it work. I will be covering this more in Building a Shelter.
Step 4: Death

Although it is disappointing, you may find yourself dying. Don't despair; unless you are playing Hardcore, you can pick up from your spawn point and continue! There are many ways you can meet your demise including being hurt by mobs, starvation, burning to death, or even drowning.
If you are playing hardcore mode, when you die the game is simply over and you can return to the main menu to start a new game. If you are playing survival, you will die and respawn with a full health and hunger bar, but you do not respawn where you died. Rather, you either appear at the original spawn point of the world or, if you have built and slept in a Bed, that becomes your new spawn point and will be where you appear instead. It is a good idea to build and sleep in a bed to reset your spawn point whenever you are in a safe place as it is really irritating to travel long distances and then die and have to start back where you first began.

One thing to keep in mind is if you place a bed and sleep in it, but destroy that bed and don't replace it (probably to carry it with you) that spawn point is gone and you will reappear at the world's original spawn point. If you plan on traveling a long distance, it is best to leave the bed you slept in last and just build a new one when you get to the point you want to camp out again.
Also, when you die, you drop everything you are holding and wearing. Luckily, you can pick these items back up, but you have to go back to where you died to get them. Unfortunately, you only have so much time as items that have been dropped will eventually disappear. So, don't wait too long to reclaim your belongings. If you died by fire or cactus and your items touch these after dropping, they will be destroyed and you won't be able to pick them back up.

Step 5: Stay Protected!

No that you know what to expect when you start playing, you need to prepare yourself with what the night has to offer.
In the next lesson, you'll learn about building shelters to keep you safe at night and store everything you've been collecting and crafting.


