

Introduction: Mini Float Powered by LEGO and Android


This was an assignment that my 5th grade teacher gave to us instead of a state report. Every kid was assigned to build a float that could move. Most kids used wagons, skateboards, or R/C cars. I decided to use a cell phone and my LEGOs to power mine. I am a ten year old that designed this. This mini float contains a LEGO Mindstorms Kit and an Android device.
Step 1: Parts Check

In this project, we will use a LEGO Mindstorms Kit, an Android phone running NXT Remote Control, a shoebox, 4-3 inch nails, 1 posterboard, and whatever you need to make your special float. The only tool we will need is a hot glue gun.
Step 2: The Float

In this step, you will design your float on the piece of posterboard. It can be whatever you want it to be. I made mine New York themed for my school assignment.
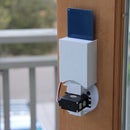
Step 3: Bluetooth

In this step, we will pair both the NXT with the Android Device. Turn the Android on and go to settings. Go to wireless and networking and select bluetooth. Turn discoverable mode on. Turn on the NXT and search for bluetooth devices. You should come up with your phone's name. Select on the NXT and then it should come up with a code. Enter that code in the Android and you shold be paired.
If you have any questions, please ask them below.
Step 4: Installing the App on Android

In this step, we will install the LEGO Mindstorms Remote app onto our Android device. Search NXT Remote Control in the Android Market and you will see the app. Download the app.
Step 5: The Base

I made a base that I thought was stable. Just make any LEGO Mindstorms base with the NXT facing down and having extra connections at the top (please refer to step 7.)
Step 6: Testing the Base

Now let's test the base by running the LEGO Mindstorms Remote app on the Android. Turn the NXT on and test drive the base.
Step 7: The Shoebox


In this part, you will be connecting the float to the base with the shoebox. With both the layers attatched, drill holes however big the nails are. Unattatch the layers and drill 4 holes to fit the long legos on the bottom. Once finished, hot glue the legos to the holes. Insert the connectors into the long legos to attach the base. To finally attach the float, hot glue the lid to the bottom of the posterboard.
Feel free to leave questions.
Step 8: Securing

In this step we will secure the box. Place the box lid on top of the box. Insert the four nails into the holes that you drilled.
Step 9: Test Drive!
You are almost done! Use the app to control the NXT that is driving the float. Be sure NOT to drive it TOO FAST or else it might fall over.
Step 10: Float Parade!
Now you're finished! Drive your float around the living room, make some modifications, or have a mini float parade with your action figures.

Participated in the
Toy Challenge


