

Introduction: Mini- Lathe Chuck Maintenance
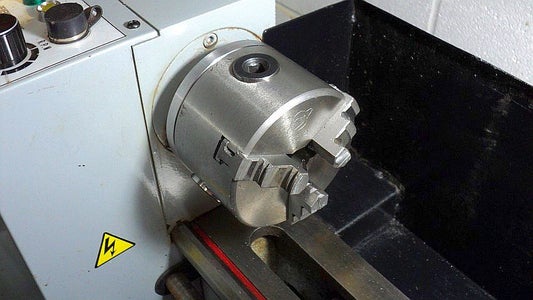


Scrolling 3- jaw chucks on the mini- lathe, or a full- sized lathe for that matter, can become dirty and contaminated during normal use, and must be broken down for a thorough cleaning to keep a high accuracy when holding parts. The classic symptoms are a grinding feel when adjusting the jaws in or out, or a noticeable loss of accuracy when turning or gripping work. Just as bad is no lubrication at all, so it's best to catch these conditions in the early stages before permanent damage is done to this precision component, and it really should be routinely done as a preventative maintenance task. There are two types of chuck mounting schemes that are most common for the mini- lathe: threaded back plate and bolt- on. My machine uses a bolt- on chuck and so this type is what I will discuss in detail, however most of the following procedure is applied to either design.
Step 1: Safety First


Disconnect power to the lathe before beginning this procedure.
Mild cleaning solvent will be used, ensure adequate ventilation is provided along with any desired personal protective equipment.
To protect the lathe ways, use a board, rag pile, or Lathe Chuck Cradle when removing it from the spindle or re-installing.
Step 2: Encoding and Disassembly


Scrolling chucks use a set of numbered jaws which must go back in a particular slot. I identify my jaws with a I or a II slot cut on the face edge, and a corresponding punch mark on the chuck body. I leave #3 assembly blank as it's codification is not necessary since it will be the only unmarked jaw and chuck position. Further, the chuck body should also be aligned with the backplate of both types, screw or bolt. I simply used a punch mark opposite the #1 jaw for this purpose. If you have never done this, then the reassembly- remount step would be a good time to rotate it through the 3 or 4 mounting positions, recording the run-out figures with a dial indicator and then marking the best choice for future reference and cleaning. Don't expect “0.000”, as most 3- jaw chucks aren't made that accurate, but mine indicated in at .003” [.0762mm], measure for this 1st step. The next step is to find the optimum key position to use when mounting work.
When chucks are assembled at the factory only one key position is constantly used during the jaw grinding operation, usually it is either the #1 jaw or the keyhole inline with the logo if the chuck has one. The other keys will be of lesser accuracy if tightened. The way to determine this and the previous step is to use a dial indicator and a short stub- I use a center-less ground dowel pin- to locate and mark this key. On my chuck, following the above steps, I have runout reduced to .0015”, and marked it with red paint spots.
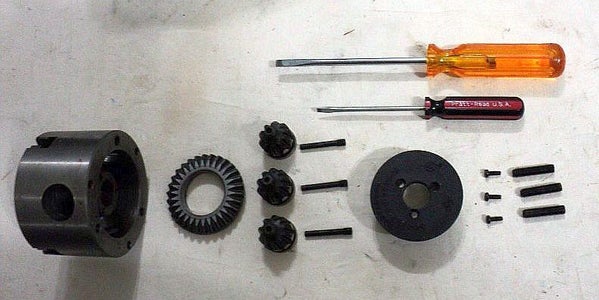
As the chuck is disassembled, put the parts in order of removal, and take an image shot before doing the actual cleaning. This will be helpful for reassembly after cleaning and inspection.
Step 3: Cleaning


I use Kerosene for cleaning; it is inexpensive, mild, flushes out all particulates, and can easily be clarified to reclaim nearly all of it for reuse; mineral spirits would work just as good too. An old toothbrush is put to it's final use here as well as rags and toilet paper.
A cheap aspirator syringe works great for flushing out the crud from tight places, and a simple hand lens is employed to visually inspect for cleanliness and impacted debris.
The last image is of the schmutz washed out from my chuck assembly. I let it settle, and when clarified pour it off into a bottle and use it as a cutting lube for aluminum or other shop cleaning chores.
Step 4: Lubrication
A simple oil is what most chuck manufacturers will recommend. Use of a light wipe of oil during reassembly will prevent a spray pattern emerging when you first turn your chuck at high speed. You will want to stand off to the side and run up the lathe at it's highest speed before doing any work, a rag held near the outer edge of the chuck will stop the excess oil from hosing down the work area as it slings off. Also, run a wad with some solvent down the inside of the spindle tube before re- mounting the chuck, cleaning any swarf that may be resting in there.
Step 5: Reassembly

Put it back together in the reverse order of disassembly and remount on the machine.
Working with jaw #1 at the bottom 6:00 position, rotate the scroll plate around until you see the tapered end of the scroll just move past and away from the slot. Insert #1 jaw, and turn the scroll plate to lock in the jaw. Continue on to jaw #2 and then 3, doing the same procedure. Don't rotate the chuck, just work in this position, it's the easiest way to get it all back together. Wrench the plate until all 3 jaws meet in the center, and your chuck maintenance is done.
Step 6: Parting Thoughts
It takes me about 30- 40 minutes from start to finish, a small investment of time for a large reward of component life. Your first time will no doubt be longer as you absorb the steps and nuances involved, but it will be very much worth it.
Further details on how this chuck design can be optimized are here:
and here:


