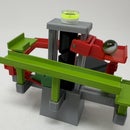
Introduction: Money Maker!
Money Maker is not really a money maker, it's a simple illusion that appears to convert a lower denomination bill (or blank paper) into a higher denomination bill. My first Money Maker came in a Magic Kit I received when I was young, and by using it I was able to impress my friends and family with my new found ability to "make money"
As usual, I probably forgot a file or two or who knows what else, so if you have any questions, please do not hesitate to ask as I do make mistakes in plenty.
Designed using Autodesk Fusion 360, sliced using Cura 3.1, and printed in PLA on an Ultimaker 2+ Extended and an Ultimaker 3 Extended.
Step 1: Parts.
You will need a 20" long by 2 3/4" wide strip of black material (e.g. heavy duty lawn trash bag, cotton, silk, felt, etc.) for the axles.
I printed all parts at .15mm vertical resolution with 20% infill. I printed "Chassis.stl" with supports. I printed "Gear Axle (18 teeth).stl" on a raft to avoid filing the individual gear teeth. Print 2 each of "Axle.stl", "Cap Axle.stl" and "Knob Axle.stl". Print 4 "Gear Axle (18 teeth).stl". Print 1 "Chassis.stl".
Prior to assembly, test fit and trim, file, sand, etc. all parts as necessary for smooth movement of moving surfaces, and tight fit for non moving surfaces. Depending on the colors you chose and your printer settings, more or less trimming, filing and/or sanding may be required. Carefully file all edges that contacted the build plate to make absolutely sure that all build plate "ooze" is removed and that all edges are smooth. I used small jewelers files and plenty of patience to perform this step.
Step 2: Assembly.
Place two "Gear Axle (18 teeth).stl" into "Chassis.stl" as shown, making sure the hexagonal holes in each gear align with each other. I used a small amount of petroleum jelly to hold the gears in position during this step.
Slide one "Axle.stl" between the two gears as shown, then secure in place with two "Cap Axle.stl".
Place the remaining two "Gear Axle (18 teeth).stl" into "Chassis.stl" as shown, making sure the hexagonal holes in each gear align with each other. Again I used a small amount of petroleum jelly to hold the gears in position during this step.
Slide the remaining "Axle.stl" between the two gears as shown, then secure in place with two "Knob Axle.stl". At this point, make sure the axles and knobs turn freely.
Place two 2 3/4" lengths of tape, one on each end of the 20" strip of material you chose, one facing up and the other facing down. Attach one end of the material to the axle with the knobs as shown, then roll the strip onto the axle until the free end is close to the remaining axle. Slide the free end between the two axles, then secure in place on the remaining axle using the tape strip as shown.
Step 3: Operation.
Preload Money Maker with the bill(s) of your choice. In the first photo, I've inserted a $5 USD bill into the exit side of Money Maker. Once inserted, turn the knob counter clockwise as shown until the bill is entirely inside Money Maker.
Now insert a different bill (I've inserted a $1 USD bill) or blank paper into the entrance side of Money Maker as shown in the third photo, then turn the knob clockwise. As the knob is turned, this bill will wind into Money Maker, and the original bill will exit.
Hope you like it!


