

Introduction: MuseScore 1.2 Tutorial #1: Creating a Score


Hello! This tutorial will be the first in a series of how to use the program MuseScore 1.2! MuseScore is a program connected with an online website that lets you create musical scores and pieces. The program is free, and you can create an online account that can hold up to 5 scores for free also! You can upgrade to a Pro account if you enjoy MuseScore, because it has a lot more online features and can let you post as many scores as you wish! Anyway, I'm here to help you understand how to use MuseScore better. Enjoy! This is Part 1, where we will learn how to create a brand new score.
Step 1: Opening MuseScore 1.2

After downloading and installing MuseScore, which you can do at www.musescore.org, make sure there is an icon on your desktop. If there isn't, go to your home menu at the bottom left corner of the desktop, and search programs and files. When you find Musescore, right click and copy, then click and paste onto your desktop. Great! Now double click the icon on your desktop. The MuseScore 1.2 Logo box comes up, and then the default screen opens.
Step 2: Create a Score

When the main menu sceen pops up, go directly to the top left corner, and you will see an icon that looks like a piece of paper. Click it to create a brand new score. You can also go to File-New, or Control-N.
Step 3: Name You Score, Etc.
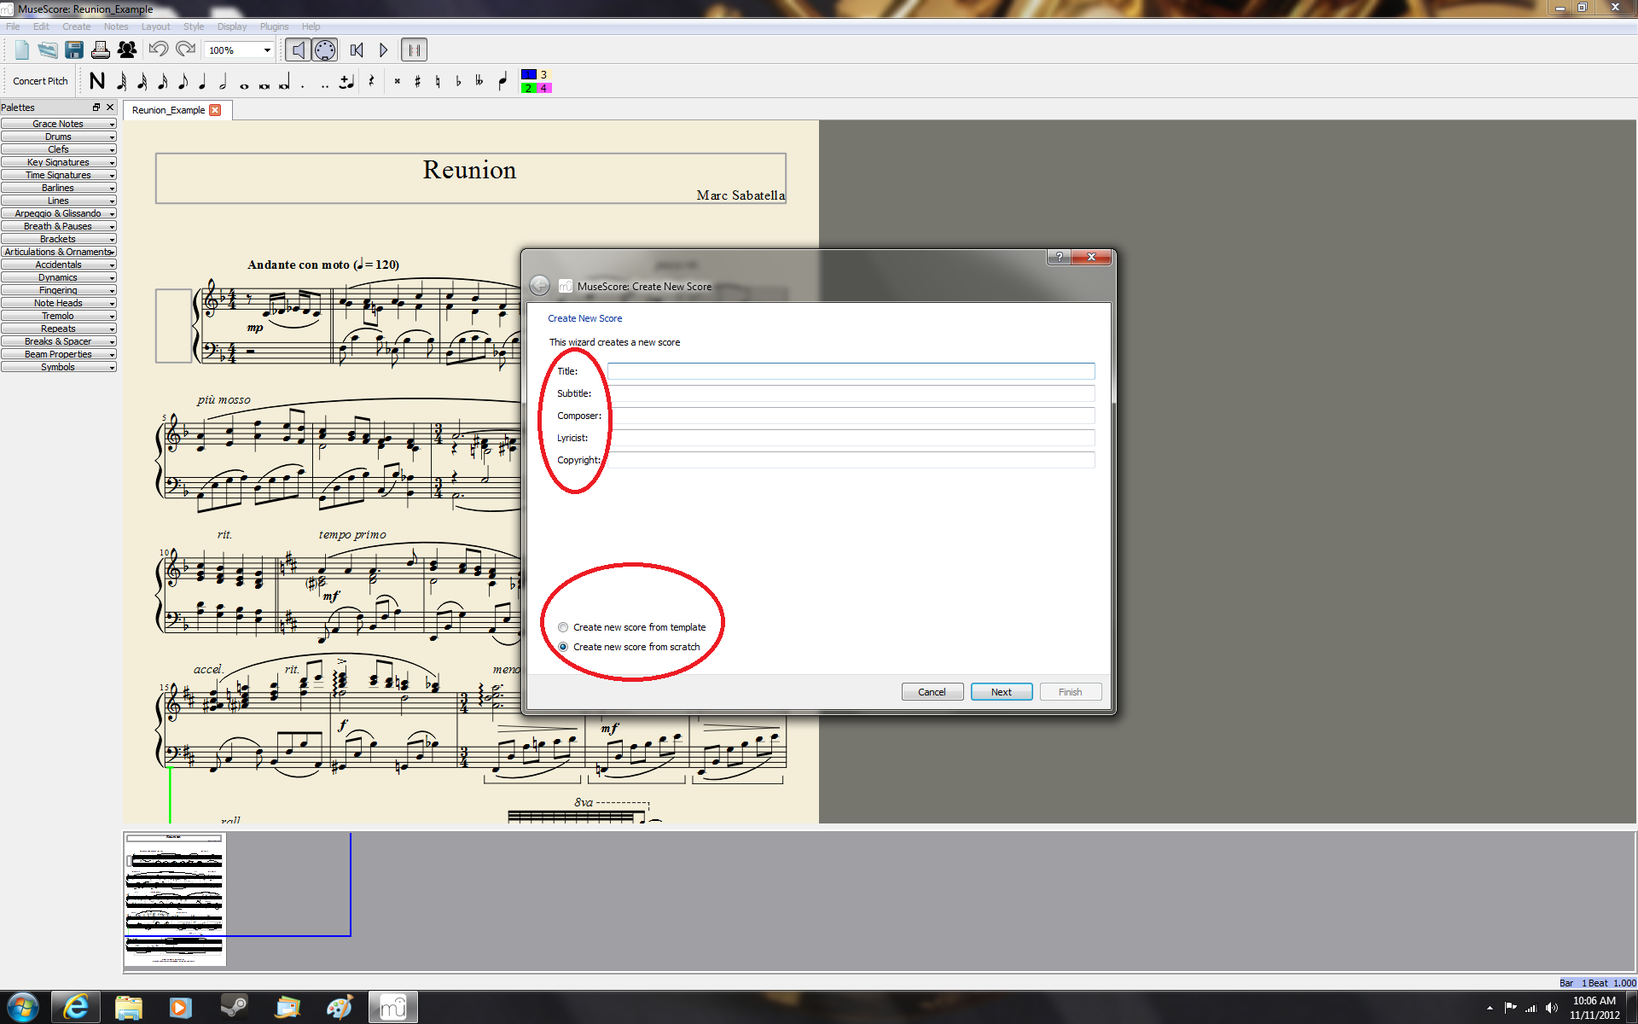
The New Score wizard will appear. In the first section, you can input the Title, Subtitles, Composer, Lyricist/Arranger, and Copyright Date. You can also click whether you would like to Create a Score from scratch, or from a template. For this example, I am going to create the song Twinkle Twinkle Little Star. I am going to create a score from scratch, but I will get to creating a score from a template. Finish choosing your options, then click Next.
Step 4: Creating a Score From a Template

If you clikced "Create a score from template" on the first wizard screen, then this window will pop up when you click Next. There are a bunch of different types of bands that you can create scores for, such as Jazz Combo, Chamber Orchestra, or Concert Band. If you click any of these, the score with all of the instruments in these types of bands will appear when you finish the score wizard. The Text Style also changes, for example, if you click Jazz Big Band. I personally do not like creating from a template, because there aren't that many options, and I like to customize with my own instruments. But if you are creating a score with a lot of instruments, it will be easier to do this because a score with a lot of instruments need to be formatted so they all fit on the screen. I will get into formatting in a much later tutorial. But for now, I will go into cfreating a score from scratch.
Step 5: Creating a Score From Scratch

This option is the default option, and I find it the best. You can double click the types of instruments to open lists. If you want even more instruments, click Show More. A whole lot more instruments pop up, ones you probably didn't know existed! In many keys, too. Double clicking an instrument or pressing Add will put the instrument onto the score list. You can see the instrument name and the staff it is on to the right. If you have more than one instrument on your score, you can group and re-order them by clicking on the instrument and then pressing up or down. Add Up or Add Down is another way to add instruments. This is if you want to add instruments above or below a certain instrument and you don't want to keep clicking up or down.
Step 6: Creating a Score From Scratch (cont'd.)

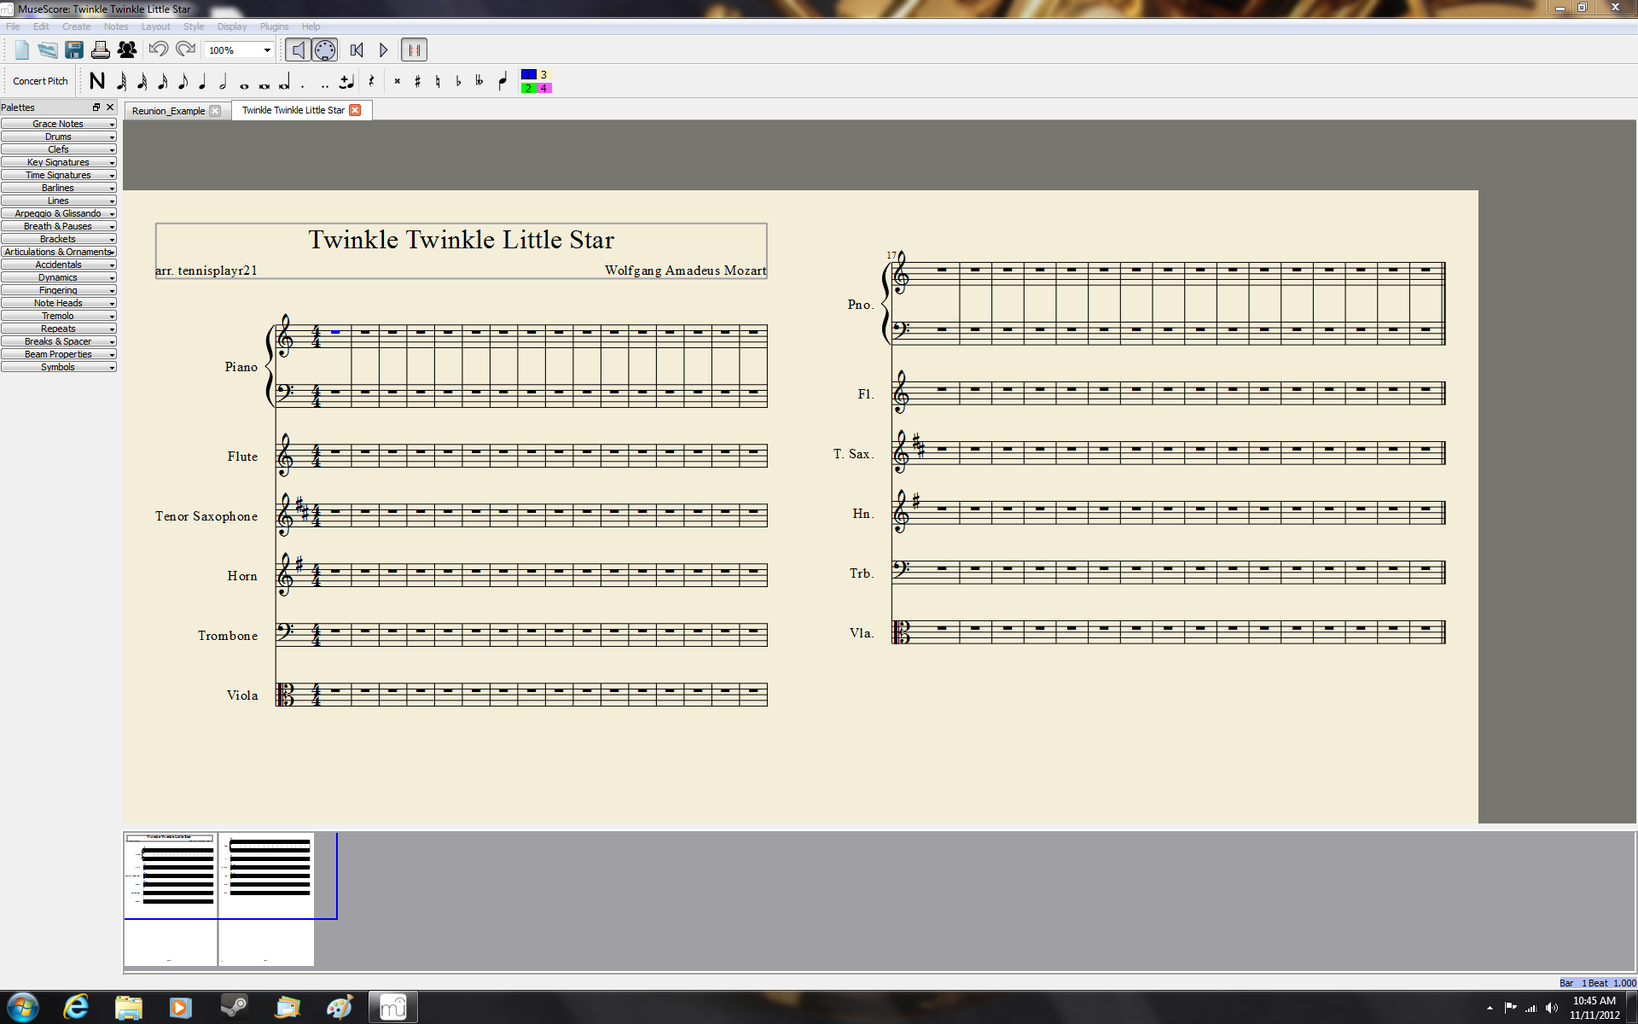
For my song, I want to have a variety of instruments. Some high and low woodwinds, low brass, strings, a piano. You can see how I have a variety of clefs, too. No percussion yet, I will create a totally spereate tutorial on percussion, later on.
Step 7: Creating Your Score's Key Signature

The next step is to create a key signature. You can create a score key signature here if you know how to transpose keys for other instruments. You can always delete the entire key signature from each isntrument after creating the score and personally add them in manuaklly one byu one if it makes it easier. If that's what you want to do, just click the open key signature of C Major. Fortuantely for me, my song is in the key of C Major. Click next when you are finished.
Step 8: Final Step: Time Signature

Almost done! Your final step is to create the time signature. This is very easy. Figure out what the time signature is, then go up or down on the number bars shown. If your time signature is in 2/4, 3/4, or 4/4, just change the first number. If your time signature is in 3/8, 6/8, 9/8, 12/8, change both numbers, etc. You get the idea. You can also add a pickup measure if you want, just click the check box, and do the same number thing for the pickup measure. Also, if you know the number of measures you want in your score, you can change that too. But you really can just keep it at 32, as you can add or delete bars with ease later in the score editing process. Click finish, and see how your empty score looks!
Step 9: New Score=Finished!
Great! Your score should look boring and blank, but now comes the hard work- writing, creating, editing, and everything else! You can see how easy it is to create a score on MuseScore. Be sure to watch my next tutorials for MuseScore which will go into manual note input, percussion input, text, the Pallettes, playback, formatting, publishing, and much more! Thank you, I hope this helps you!


