Introduction: NIXIE TUBE DRIVER MODULES - Part I
What I had been looking for was a way to easily deal with multiple nixie tube digits in various projects that I was working on. I really wanted an easy way to connect many digits together with minimum digit spacing, and have the digits controlled by a simple serial interface. You'll find all the schematics and board layouts are available through the links in this instructable, released under a creative commons license.
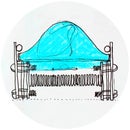
Voila, the nixie tube board that I came up with supports two IN-12A type nixie tubes via two printed circuit mounting phenolic sockets. The nixie tube board is designed to be supported by a nixie driver board below it, which permits a microcontroller ( Arduino, etc.) to address the two nixie tube digits, and via a shift register chain, multiple pairs of nixie tube digits. The edge connecting header pins easily allow the multiple digits to be physically connected and may be powered by an external high voltage supply. This densely packed configuration permits minimum digit spacing while threading power and serial data connections to all elements.
Step 1: Parts List
1 - printed circuit board
2 - IN-12A nixe tube
2 - IN-12A nixie tube socket
2 - straight 12-pin male header (1x12)
Step 2: Board Layout
The nixie tube boards can be assembled in less than half an hour. Note carefully to orient the nixie tube printed circuit board with the component side up. This is the side that will receive the two nixie tube sockets. The reverse side of the board receives the two 12-pin male headers. Also notice that there is an indent indicating pin 1 on each of the nixie tube sockets. This pin 1 corresponds to each pin 1 marked on the printed circuit board. Although the orientation of each socket has no effect on their function, this indent is present for reference, and allows you to quickly orient the nixie tubes.
Step 3: Assembly
The following images offer a few hints that will assist with the insertion of the nixie tubes and the nixie tube sockets into the printed circuit board. This is the helpful part that you should not skip reading!! Before inserting nixie tubes or nixie tube sockets, ensure that each nixie tube will be oriented correctly. The numeral 3 is uppermost in the digit stack, and should help make this clear when inserting the nixie tubes into the nixie tube sockets. Most nixie tubes have a mark of some kind on pin 1, just inside the tube, letting you know how to insert the tube.
Step 4: Inserting the Nixie Tubes Into the Sockets
While it is possible to first fully insert the nixie sockets into the nixie tube board for soldering, it is then the more difficult to insert the nixie tubes into the sockets. To make this process less difficult, first partially insert the sockets into the nixie tube board, and then fully insert the nixie tubes into the sockets. The sockets can then be fully depressed into the board.
Step 5: Inserting the Sockets Into the Printed Circuit Board
It is very difficult to adjust the nixie tube sockets once they have been soldered to the printed circuit board. A good strategy is to first anchor a socket by soldering two opposing pins. In this way, the socket will not shift before all pins are soldered.
Step 6: Sockets Inserted
Use care to apply even force around the tubes and sockets to well seat them into the nixie tube board. Once the sockets are seated uniformly as shown, they can be soldered with best results.
Step 7: Final Soldering
The two straight 12-pin male headers should be inserted into the side of the board opposite the nixie tube sockets. If both of these headers are inserted into the nixie tube board at the same time, they can be the more easily soldered while held in place by the weight of the board.
Step 8: Assembly Options
If you prefer to use female tube pins instead of phenolic nixie tube sockets, Mill-Max makes a tube pin receptacle compatible with the nixie tube board. See Digi-key part number ED5024-ND. If you choose to use these pins, however, you will have to increase the vertical spacing between the nixie driver board and the nixie tube board using taller header pins. For multiple pairs of digits, note the use of a simple external nixie tube power supply can suppor tup to eight pairs of IN-12A nixie tubes.
That's it for the tubes themselves. I'll post the driver board next so you can see how serial data and power can be threaded through to all the boards. It makes for a great solution and permits all possible variations with external microcontroller code. More on this very soon...
Participated in the
The Instructables Book Contest


