Introduction: Neoprene LED Light Pouch
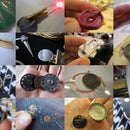
This soft LED light pouch is easy to make and runs with two AAA batteries. The design is super simple and fits really well with the LilyPad components. Though you can also modify a regular LED and slide switch to be sewable by soldering little loops on the end of their leads. The light is cute and small and soft but not really bright enough to be used as a headlight for biking so I'd appreciate suggestions as to what else it could be used for.
Link to post on HOW TO GET WHAT YOU WANT:
http://www.kobakant.at/DIY/?p=2139
Here is a video of the completed pouch
Step 1: Materials and Tools
MATERIALS
* 1.5 mm thick neoprene with polyester jersey laminated to either side >> sedochemicals.de/
* LilyPad sewable LED >> www.sparkfun.com/commerce/product_info.php?products_id=8735
* LilyPad slide switch >> www.sparkfun.com/commerce/product_info.php
* Conductive thread >> www.sparkfun.com/commerce/product_info.php
* Stretch conductive fabric >> lessemf.com/fabric.html
* Fusible interfacing
* Regular thread
* Two AAA batteries
TOOLS
* Stencil
* Fabric pen
* Scissors
* Iron
Step 2: Trace and Cut the Stencil
Copy the stencil depicted in the photographs. The measurements are important so that the pouch will fit tightly around the two AAA batteries and make good electrical contact.
Using a fabric pen, that will disappear over time. Trance the stencil onto the
Step 3: Iron and Fuse Conductive Fabric
Adhere the fusible interfacing to one side of the stretch conductive fabric and cut out small rectangles about 0.5 x 1.5 cm in size. Then fuse these to the neoprene (the side which will become the inside) as shown in the photos. Be careful not to use too hot an iron or it will fry the conductive fabric. A slight gold discoloration is normal.
Step 4: Sewing Components On
Thread a needle with conductive thread, taking the thread double. Hold the components in place and sew them on tightly to the side of the neoprene that will be the outside. The conductive thread needs to go all the way through the neoprene and only make contact with the patch of conductive fabric directly behind it. Never making contact with both conductive patches. To ensure good contact sew at least 3-4 times through each hole. Cutting the conductive thread and starting new after each hole. At this point it does not matter which side you put the switch or which the LED and it also does not matter which way around either of these are mounted.
Step 5: Sewing Neoprene Pouch Together
To sew the neoprene pouch together, thread a needle with regular thread, taking it double and start by sewing the two straight sides together as shown in the photos. Then turn the pouch inside out and begin to sew the ends. You can put batteries inside the pouch to make sewing easier. Be sure to put the batteries in the right way around so that their plus and minus match up with the LED plus and minus. When you are finished the batteries will be locked up inside the pouch:-)
If all is well then the LED should light up when you flick the switch.
Step 6: Freeing the Batteries
To free the batteries simply take a pair of pointy sharp scissors and pierce through the neoprene and then cut a hole about 1-2cm in diameter. It should be possible to remove and replace the batteries through this hole. But don't cut the hole too big or else the pouch will become too loose and contact between the conductive fabric patches and the battery ends will not be steady.


