

Introduction: Number Munchers: Factoring Edition


Project Introduction:
**Unfortunately my code is currently being debugged 5/17/17. You are obviously welcome to give it a go and try to modify the program and find the errors. My apologies.
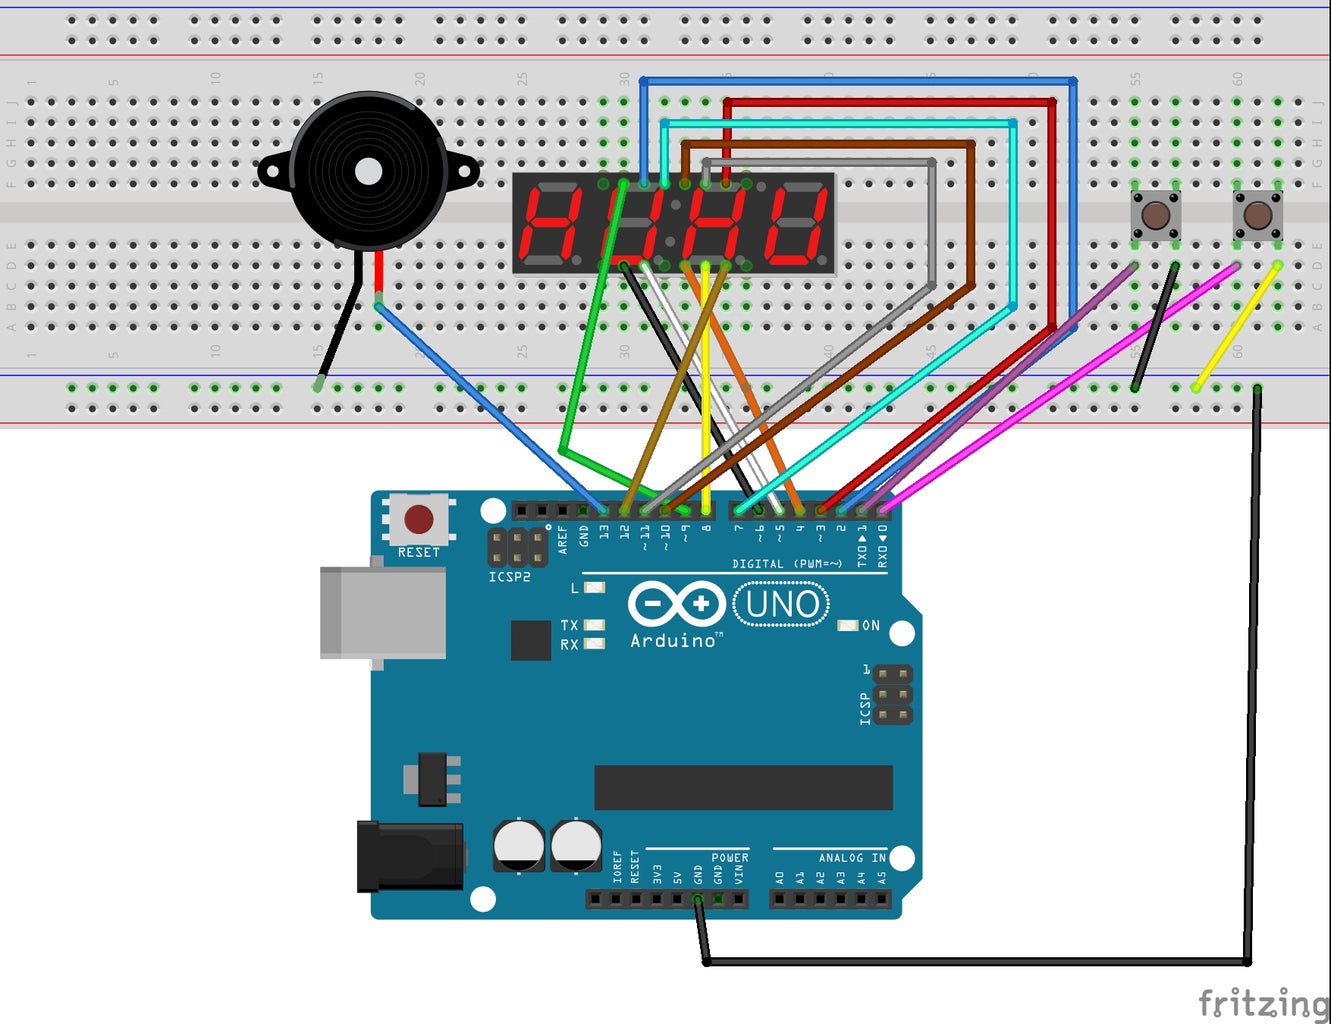
This is a rudimentary version of Number Munchers where the player sees a random two digit number display for 3 seconds and then a random single digit factor for 3 seconds. The button to the far right is pressed if the player believes the single digit is a factor of the first number, and the button to the left is pressed if it’s not believed to be a factor. The player will have 3 seconds to respond following the 3 seconds the factor is displayed. The buzzer will sound with a high frequency if the response is correct and a low buzzer sound if incorrect.
I chose this project because I was obsessed with it as a young learner in my elementary math classes. Although I could not get the characters displayed in this beginner tutorial, the learning behind how to incorporate the math to control 7 segment digit displays, random number generations, and modulo calculations challenged me at my current ability level.
Level: Beginner
Materials:
17 male to male jumper wires
1 - 4 Digit, Segment Display
2 Pushbuttons
1 buzzer (piezo speaker)
Tools:
1 Arduino Uno
Arduino Create software
Step 1: Getting Random Numbers on Your 4 Digit, 7 Segment Display.

This episode of Anything Arduino from Kristian Blasol was highly informative in understanding the programming behind a seven segment number. The code to get a random two digit number and a random 1 digit factor is here.
Step 2: Write Math Portion of the Code to Check Modulo or Remainder.

Random numbers are assigned to the ones and tens places of the two digit number and then combined. A random number is then assigned as a possible factor and the modulo or remainder is checked using the % operator. The conditional statements allow you to assign easier checks for the code to the buzzer.
* Full code for this step mixed with the buzzer linked in step 3. Note that the code also prints to the Serial monitor so you can see it functionality being printed.
Step 3: Add Buttons to Answer Yes It’s a Factor, or No It Is Not!

Here is the code for the buttons combined with the random number generation in step 2. In the diagram, the button on the right will be used for "correct" and the left for "incorrect".
Step 4: Add a Buzzer to Add Play a Correct and Incorrect Tones.
This code, a slightly modified version of Sketch 11 in SparkFun’s Inventor Kit, will play tones with of multiple frequencies and beats.
Step 5: Final Merging of Code and a Finished Product!
Hopefully each element of the project made sense and you can modify it to make your own :)


