

Introduction: OV7670 Arduino Camera Sensor Module Framecapture Tutorial


Description
The camera module is powered from a single +3.3V power supply. An external oscillator provide the clock source for camera module XCLK pin. With proper configuration to the camera internal registers via I2C bus, then the camera supply pixel clock (PCLK) and camera data back to the host with synchronize signal like HREF and VSYNC. The OV7670 camera module is a low cost 0.3 mega pixel CMOS color camera module, it can output 640x480 VGA resolution image at 30fps. The OV7670 camera module build in onboard LDO regulator only single 3.3V power needed and can be used in Arduino, STM32,Chipkit, ARM, DSP , FPGA and etc.
Specification
- Optical size 1/6 inch
- Resolution 640x480 VGA
- Onboard regulator, only single 3.3V supply needed
- Mounted with high quality F1.8 / 6mm lens
- High sensitivity for low-light operation
- VarioPixel® method for sub-sampling
- Automatic image control functions including: Automatic
- Exposure Control (AEC), Automatic Gain Control (AGC), Automatic White Balance (AWB), Automatic
- Band Filter (ABF), and Automatic Black-Level Calibration (ABLC)
- Image quality controls including color saturation, hue, gamma, sharpness (edge enhancement), and anti-blooming
- ISP includes noise reduction and defect correction
- Supports LED and flash strobe mode
- Supports scaling
- Lens shading correction
- Flicker (50/60 Hz) auto detection
- Saturation level auto adjust (UV adjust)
- Edge enhancement level auto adjust
- De-noise level auto adjust
Step 1: Material Preparation
In this tutorial, you will need :
1. Arduino Uno Board and USB
2. OV7670 Arduino Camera Sensor Module STM32
3.10K resistor X 2
4. 4.7K Resistor X2
5. Breadboard
and you will be using Arduino IDE and Java.
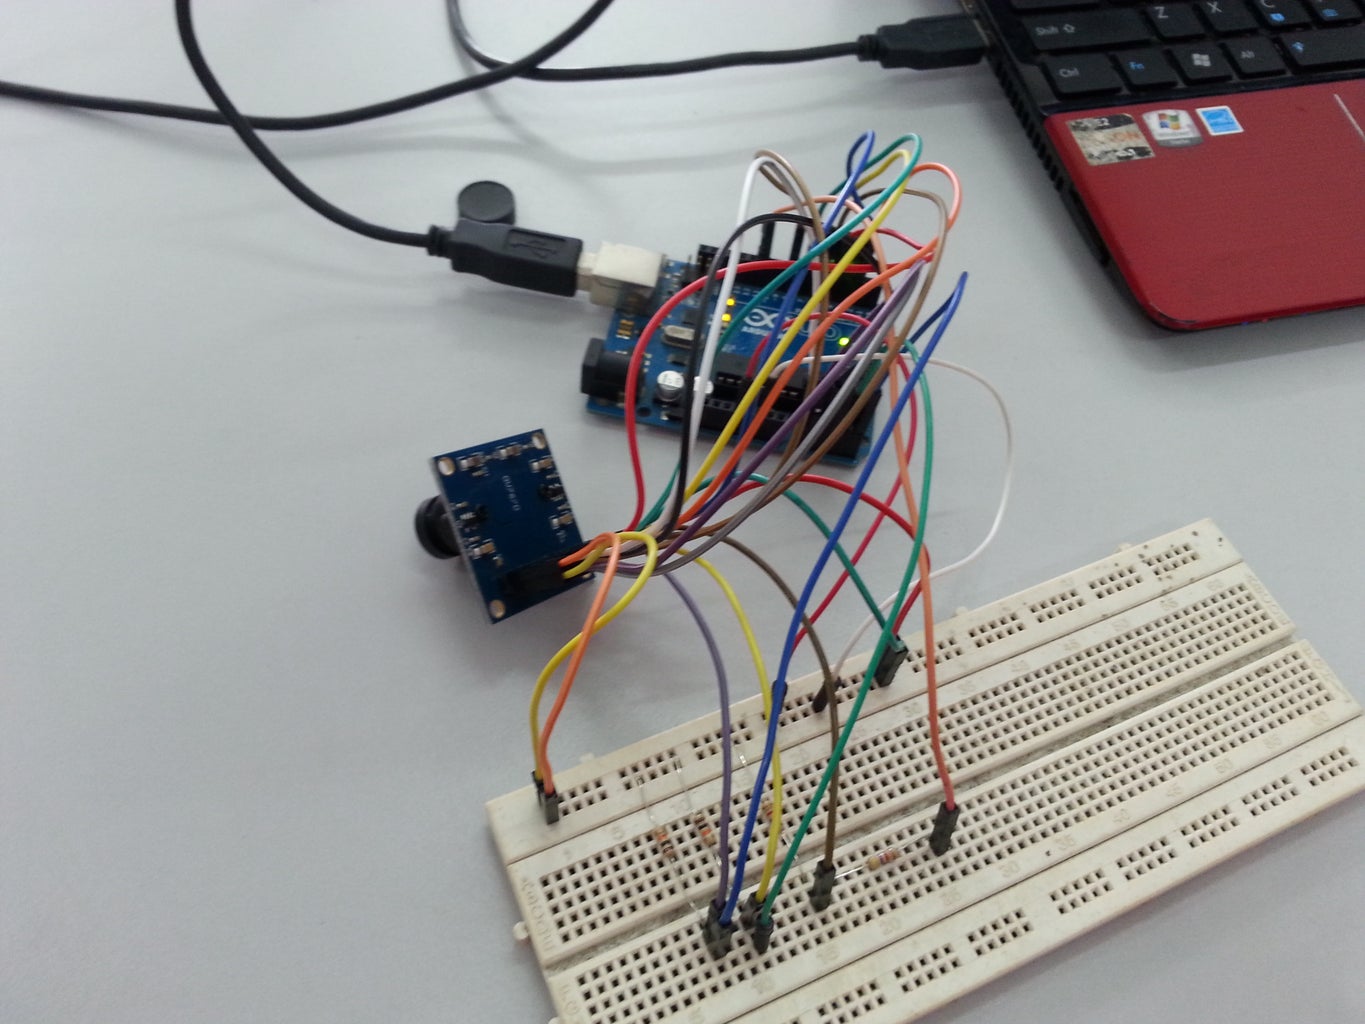
Step 2: Pinout Connection


Connect your circuit as illustrated on the picture above.
Step 3: Java


You have to download this to be able to interface this camera sensor module on your pc.Open the zip file and install to your computer. By default, this will be install to your c drive in your program files folder. As for mine, it is stored in C:\Program Files\Java\jdk1.8.0_74. You can refer picture above.
NOTE : This jdk-8u74-windows-i586.rar file is quite big.
Attachments

Step 4: Sample Source Code

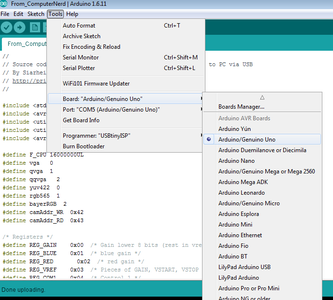

This sample source code is originally from this link. Download this sample source code, open it on your Arduino IDE, connect your Arduino Uno Board to your computer and upload it. Select the correct board and port before uploading this source code. Refer image above for help.
NOTE : Don't mind that it does not recognize some libraries in the beginning of the file. If it bothers you, comment the whole line out with //
Attachments
Step 5: Checking Your Port

Find out what USB port your Arduino is connected to, something like COM4 or COM5. You could check it on your Control Panel > Device Manager > Ports (COM & LPT) > right click > Properties > Port Settings > Advanced > COM Port Number > /Select Your Port Number/. You can refer the image above for help. As for mine, it is port COM5.
Step 6: Com_#.rar


Depending on what port number your Arduino is connected to, download the corresponding file. COM1 = com_1.rar , COM2 = com_2.rar and etc. Open your com#.rar on WinRaR, extract/copy the 'code' folder from com_#.rar, go to Local Disk > Program Files > Java > jdk1.8.0_74 > bin and paste it there. you can refer the picture above for a better understanding.
Step 7: C:\out
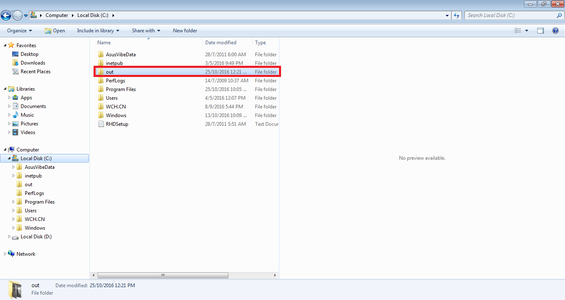
You have to create a new folder on your c drive / Local Disk (C:). This will be your camera module sensor's taken picture's destination. Name this folder as out (it could be anything though).
Step 8: Extra.rar


1. Download and extract the Extra.rar file below and open it. As you could see, there is src folder, lib folder and "win32com.dll". You have to copy and placed "win32com.dll" in the "C:\Program Files\Java\jdk1.8.0_74\jre\bin" directory.
2. Then, open the lib and you could see the "comm.jar" and "javax.comm.properties" in it. Copy and paste the "comm.jar" in "C:\Program Files\Java\jdk1.8.0_74\jre\lib\ext" and "javax.comm.properties" in the "C:\Program Files\Java\jdk1.8.0_74\jre\lib" directory.
NOTE : it may ask for administrator permission, just proceed anyway.
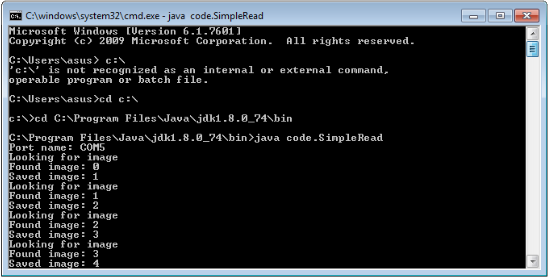
Step 9: CMD

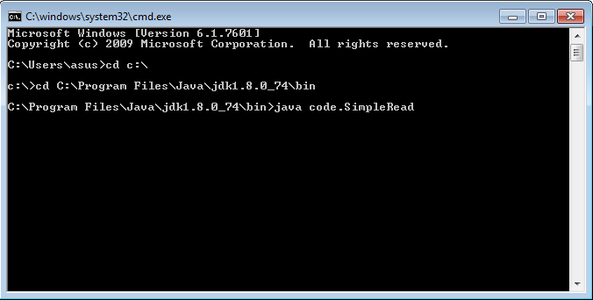
Open cmd and open the folder wherein the code folder is by writing its address. mine is "C:\Program Files\Java\jdk1.8.0_74\bin". Click enter and it will give u "C:\Program Files\Java\jdk1.8.0_74\bin>". Now, write "java code.SimpleRead". It supposed to be like this---> C:\Program Files\Java\jdk1.8.0_74\bin>java code. SimpleRead. You can refer image for help.
Step 10: Result
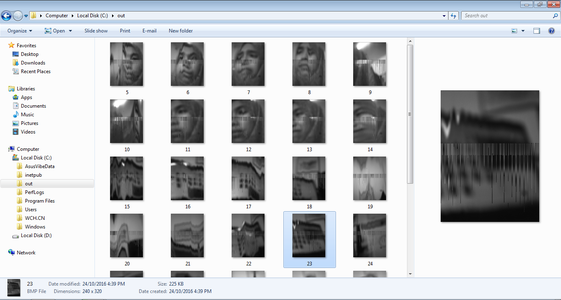


You can see the picture taken from your OV7670 Camera Module Sensor in your our folder in c drive.
Step 11: Troubleshooting


1. If your cmd cannot find images, try switching the USB of the arduino from a USB2.0 to a USB3.0 (blue socket) or vice versa.
2 If you receive scrambles pictures, you need to edit the sample source code. Edit line: wrReg(0x11, 12); try changing the 12 to 11/10/9/13. Upload it to the arduino and run the cmd code again.


