

Introduction: Optimize Your Turkey: Perfect White Meat and Succulent Dark Meat


Thanksgiving has got to be the best holiday of all: not only is it focused on gratitude, family, and a big meal - but also the foods of Thanksgiving are my personal favorites - especially turkey.
Now, turkey and I have not always been on speaking terms. My mother, who could turn a chuck steak into something approaching filet mignon, was hopeless with the big bird. Not surprising, since she came from a culture that once used fowl in its spectator sports - our Thanksgiving turkeys invariably had the interior texture of a soccer ball. At the time, I thought I just didn't like turkey, and choked it down smothered in gravy.
One day I had a revelation when a friend cooked up turkey perfection: juicy white meat, dark meat sliding off the bones...I resolved that henceforth, all turkeys would be like this one!
I learned that the challenge of perfect turkey is that it needs a different final temperature for the white meat (145) and dark meat (165) To make sure my turkeys are perfect every time, but still give you that Normal Rockwell moment at the table that we all crave, I came up with the following solution:
Step 1: Snip the Skin on the Drumstick
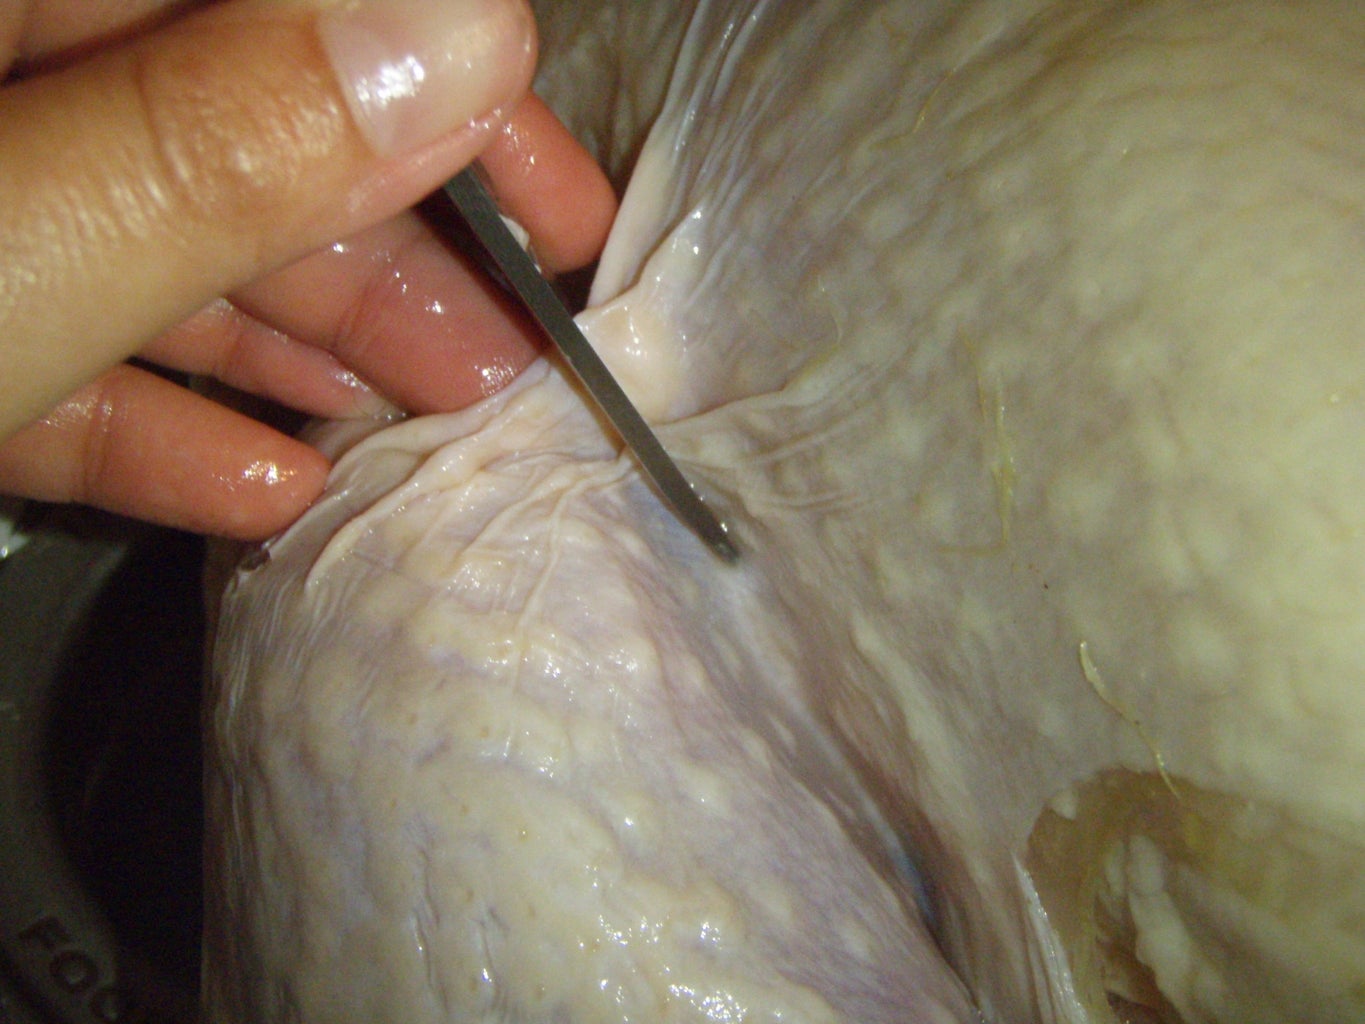
Using a good pair of kitchen shears, cut through the skin between the breast and the drumstick until you release the thigh. You will need to stretch the skin over the meat on both sides and skewer it, so make sure you have slack on both sides. Repeat for the second drumstick.
Step 2: Cut Between the Thigh and the Breast

There is a small strip of meat that connects the ribcage to the thighs. Again, using your kitchen shears, cut all the way through to the backbone on each side of the turkey.
Step 3: Snap the Backbone

Bend your turkey in half to snap the backbone by pulling pull the top and bottom of the backbone towards each other until the part between the breast and the thighs snaps. If there is any remaining tissue connecting the two halves of your turkey, cut it with kitchen scissors.
Step 4: You Now Have a Two-part Turkey!

At this point, pre-heat your oven to 350 degrees, and prep your turkey (salting, seasoning) the way you would normally.
Step 5: Stretch the Remaining Skin to Cover the Breast and Drumstick


If you like to stuff herb butter under the skin, do that first. Using skewers or toothpicks, secure the skin around your breast meat and on the tops of the turkey thighs.
Step 6: Prepare Your Roasting Pan and Roast the Dark Meat

I usually set my turkey on a bed of aromatic vegetables, so they flavor the drippings. Keep in mind that you will need something to prop up the back of the turkey (like a big leek or carrot,) so assemble the entire turkey on your roasting pan, and then remove the turkey breast and put it back in the refrigerator. Put a roasting thermometer in the meatiest part of the thigh, and another in the meatiest part of the breast.
Roast the dark meat (You can even stuff the turkey - and the stuffing will cook properly! Just mound it in place before you remove the white meat and roast it with the dark meat) at 350 degrees for 30 minutes.
Step 7: Reassemble Your Turkey, Finish Roasting, Rest, and Serve!

Set the breast back on the spot you prepared for it, and continue roasting until the thermometer reads 165 in the dark meat, and 145 in the breast. Turn up the heat to 450 degrees for a few minutes to crisp up the skin, and once it is golden brown, remove your perfect turkey!
Your turkey should rest for 20 minutes, tented with foil. At this point, you can move it carefully to a serving platter (if you've stuffed it, scoop the stuffing into a serving dish) and take off the skewers; the skin will stay put of its own accord after cooking. You will still need a small prop behind the turkey to rest the back of the breast, so keep a carrot or leek handy for this purpose.
Carving this beast is significantly easier since the work of separating white from dark is already done for you! Enjoy your perfectly-cooked turkey!
Looking for more recipes, tricks and tips? Come visit us at Quips, Travails and Braised Oxtails!


