

Introduction: Orange Pi PC - Get Started!


Orange Pi PC is a low budget development board created by Shenzhen Xunlong Software Co. as a Opensource Project. You'll have access to the PCB and Schematic Projects accessing http://orangepi.org
In this instructable I'll show you how to make a simple setup with all you need to start using Orange Pi PC.
First of all you'll need an Orange Pi PC board. You can buy one from the official page on AliExpress.
And you will need:
- Energy adaptor 5V/2A
- 2.SD-Card (I've used a 8GB Class 4, but if you have a better/greater SD-Card, feel free to use it).
- HDMI Cable
- A USB keyboard (mouse optional but recommended if you'll use the GUI)
- A Linux or Windows host computer - I'll cover the Linux way to do this
So, let's start!
Step 1: Prepare Your SD-Card

You'll need some files to do the service.
First of all the OS image. I'll pick the Lubuntu 14.04 image that is far more stable than other OSes available, both from the official page and from loboris page (loboris is a developer from Orange Pi Community highly involved on preparing OS images for Orange Pi boards).
You can have the official images from here and loboris images from here.
- Download the Lubuntu 14.04 image from here: https://www.dropbox.com/s/xso6hctke875of1/Lubuntu_...
- Plug your SD-Card in the host.
- Open a terminal and discover what is the "address" of your SD-Card using the command: fdisk -l (maybe you'll need to execute this command as sudo or su).
A possible output is (it is in portuguese because I'm brazilian =D ):
Disco /dev/sdc: 7,2 GiB, 7742685184 bytes, 15122432 setores
Unidades: setor de 1 * 512 = 512 bytes Tamanho de setor (lógico/físico): 512 bytes / 512 bytes Tamanho E/S (mínimo/ótimo): 512 bytes / 512 bytes Tipo de rótulo do disco: dos Identificador do disco: 0x2b1c25d6
Dispositivo Inicializar Início Fim Setores Tamanho Id Tipo
/dev/sdc1 40960 124927 83968 41M 83 Linux
/dev/sdc2 124928 15121408 14996481 7,2G 83 Linux
So, the address for the SD-Card is /dev/sdc.
- Unmount partitions of the SD-Card using: umount /dev/sdc* (change * to the numbers shown on fdisk output)
- Decompress the image executing: unxz Lubuntu_1404_For_OrangePiPC_v0_8_0_.img.xz
- Flash the image to SD-Card executing: dd bs=1M if=Lubuntu_1404_For_OrangePiPC_v0_8_0_.img iflag=fullblock | pv | dd bs=1M of=/dev/sdc oflag=direct - it'll take a time to conclude
- Execute sync to assure flushing all data to SD-Card
- Plug off and plug in again your SD-Card, and now you'll see two partitions (a smaller one to boot files and the bigger one is the root system)
- Download scriptbin_kernel.tar.gz from here: https://mega.nz/#F!wh8l2BjK!OBep3nMldBletvNNwkH2J...
- Untar the file using: tar -zxf scriptbin_kernel.tar.gz
- Enter the new directory and copy the files script.bin.OPI-PC_720p60 and uImage_OPI-2 to the boot partition of SD-Card
- Now exclude uImage and script.bin files from boot partition and rename script.bin.OPI-PC_720p60 to script.bin and uImage_OPI-2 to uImage
- Eject the SD-Card
Now you have a ready-to-go SD-Card with Lubuntu installed for Orange Pi PC!
Step 2: Connect Cables and SD-Card
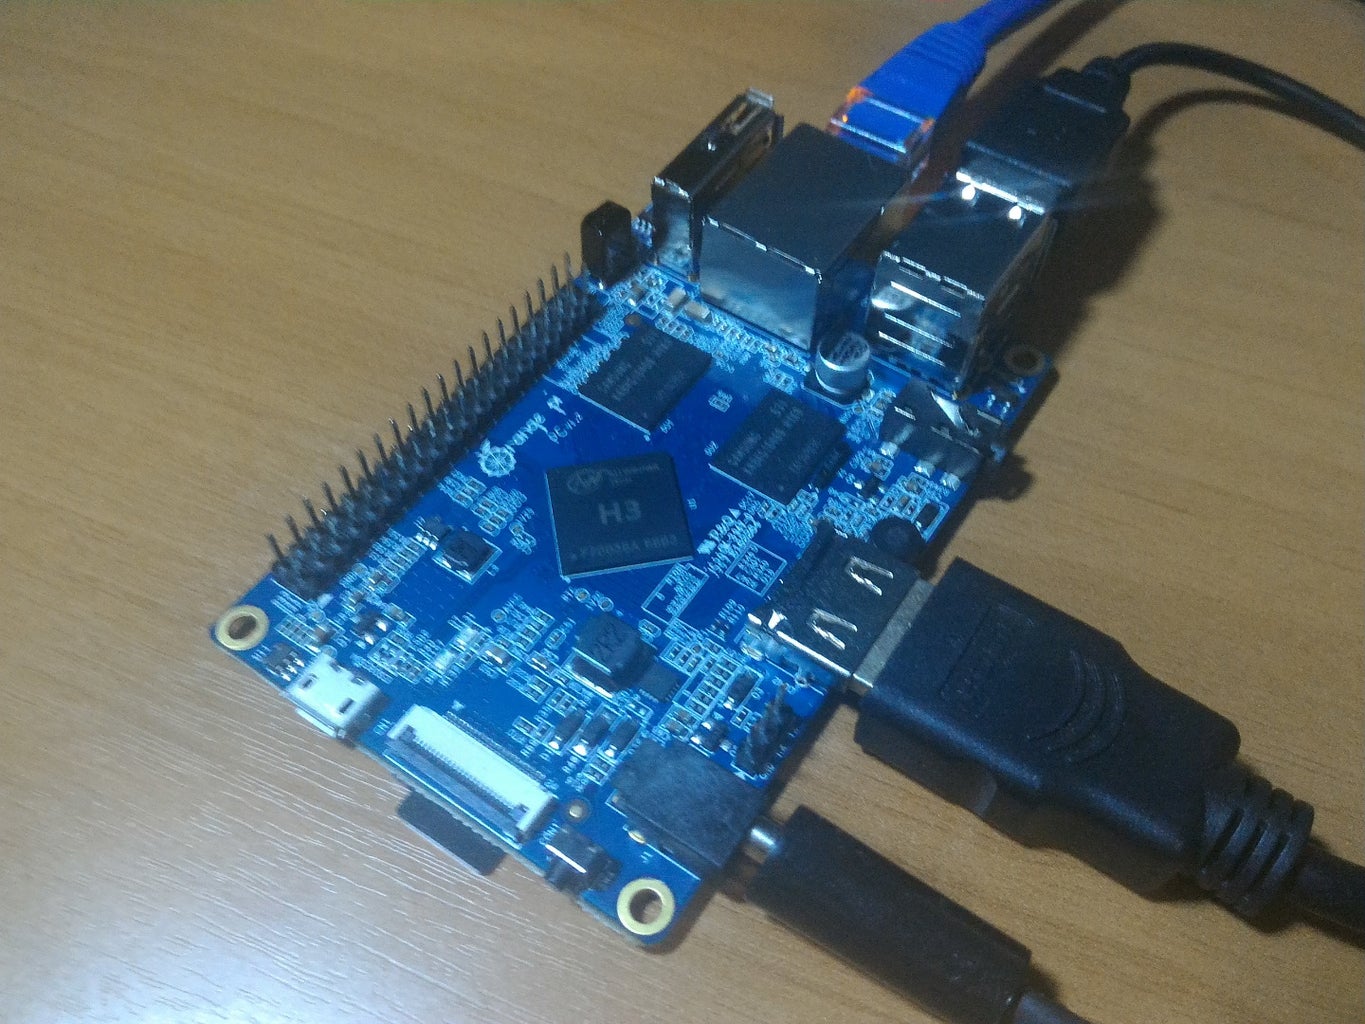
- Plug your SD-Card on the SD socket below the board
- Plug your USB keyboard on one of the USB ports
- Plug your ethernet cable and connect it to a router or your internet provider device
- Plug the HDMI cable and connect it to your monitor or TV
- And finally, plug the power cable and let's see what happens!
Step 3: We're Almost There...


Wait for the boot process (it can take a long time in the first time, so have patience).
As soon it concludes, a login screen is showed. As I connected just the keyboard, and I'm not a great fan of GUI (I'm not using it for entertainment, so feel free to connect a USB Mouse and check the interface), I'll just type Ctrl+Alt+F1 and change to a plain terminal login screen.
The user and password for this image is orangepi. Change the password or add a new user executing adduser and passwd.
Update the system with: sudo apt-get update and sudo apt-get upgrade.
Step 4: Enjoy!
And now you have a functional Orange Pi PC.
More infos and reviews on my personal blog: CoreHacking http://corehacking.com
Hope you enjoy it and keep hacking! =D


