

Introduction: PACMOD MIDI DJ Controller


For my son’s birthday I made him a DJ controller designed to resemble an old cabinet arcade machine. What follows is a brief overview of the process to make it, including code.
The Teensy was chosen as the brains because of the way it handles USB. Not only does it have native USB, rather than the FTDI USB-to-serial interface that turns making use of the port a series of work-arounds, but as you’ll see in the code the MIDI library makes writing the firmware a trivial pursuit.
Caveat: I found out later that my scaling of the sliders is off & doesn’t allow for full travel in Traktor. Since the controller is away at college with my son I haven’t had access to fix this. I’m certain that it’s just a matter of changing the scale factor, though.
The parts list:
Teensy 2.0 CPU from PJRC
7-inch sloped enclosure from iProjectBox
Sanwa Arcade Buttons from DJTechTools
Joystick from SparkFun
Slide potentiometers from SparkFun
Pot knobs from SparkFun
Panel adapter cable from AngledCables (When I made this 2 years ago AngledCables was about the only source for this adapter cable. Looking online recently I've decided to purchase some from AdaFruit at a much better price.)
Step 1: Enclosure


Once all the parts were in hand the placement of the buttons was measured and marked out in pencil. Once the holes were cut I used a Dremel to put in the 4 indentions that index the buttons and keep them from rotating.
Drilling the mounting holes for the joystick was pretty straight-forward. The slots for the pots were marked out and small holes drilled at each end. A small cut-off wheel on the Dremel connects the dots.
Wiring used quick-disconnects that were both crimped & soldered
After programming, I had the enclosure powder coated for about $40 at a local shop and mounted everything. The final step was to apply a vinyl decal made by friends at Innovative Tint & Graphics.
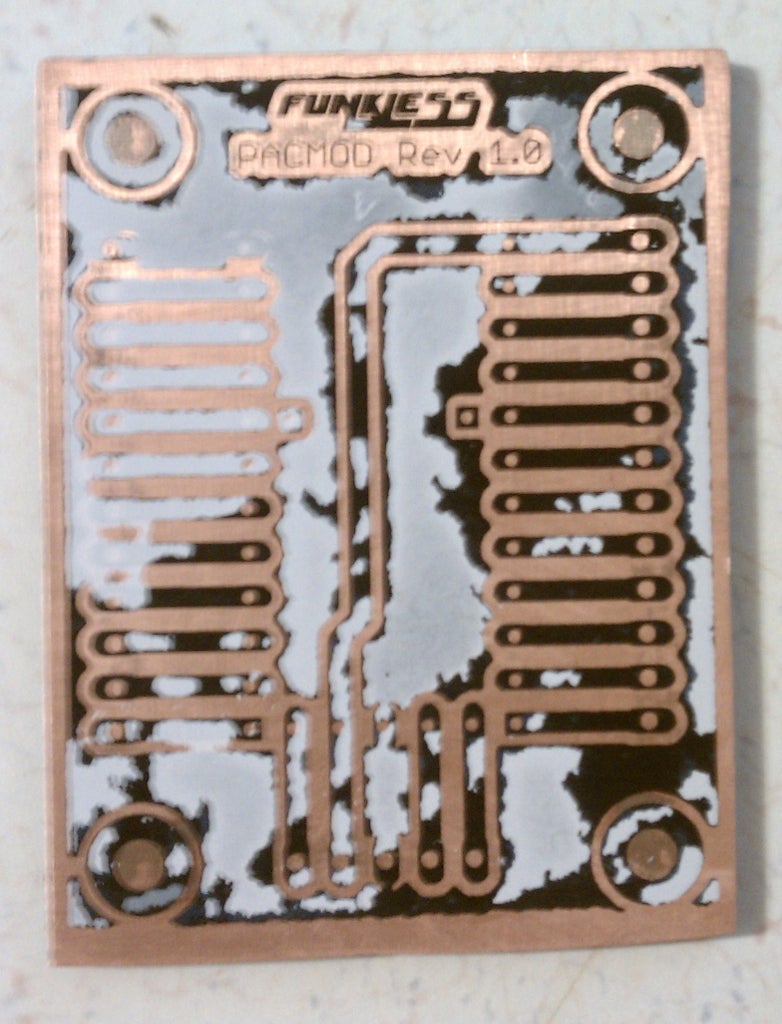
I etched a custom PCB as a breakout for the Teensy that used tall female headers as a socket for the microcontroller. I've been using a standard 24-pin IC socket with the same measurements for the Teensies in more recent projects.
Step 2: Firmware


The mapping tried to make use of as much of one for an existing controller as possible, just switched to a different channel.
You’ll want to go over to the Arduino playground and pick up the debounce library Bounce.h to include. It’s a very handy way to easily debounce mass inputs as demonstrated below.
I think the comments and naming make everything pretty clear as to what’s going on. I’ve even left in some junk that was really only part of the development and debugging. The line Serial.begin(38400) is one of these things. It doesn’t need to be there for the code to function. It was just used for the Arduino debugging statements that are now commented out.
If you’re not familiar with Teensy, there’s a good primer on the PJRC site. The most important thing if you’re going to be using the Arduino environment is the Teensy Loader. Be sure that Board and USB Type in the Arduino IDE Tools menu are set correctly as in the image.
Possible changes you may want to make in the code:
* The MIDI channel that the PacMod responds to is midi_ch if you want it to be something other than 3.
* The scaling of the analog pin value in relation to the desired MIDI cc value is analog_scale, set to a value of 8 in the code to give a range of 0 to 128. To change it change analog_scale to ( 1024 / yourDesiredMaxValue ). If you change analog_scale you may also need to change analog_threshold, which is the amount of change on a Teensy analog pin that constitutes sending a MIDI message.
* The MIDI note numbers that are triggered by the buttons are outlined in the array digital_note[] so changing these values will change which notes are mapped to which buttons.
* The MIDI continuous controller numbers mapped to to pots are in array analog_control[] so you can change these as well.
Attachments


Second Prize in the
DIY Audio

Participated in the
A/V Contest

Participated in the
Instructables Design Competition


