

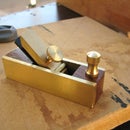
Introduction: PVC Easel


Hello all! So this time around, I was on the way back to my house from a job when my ride decided to make a pit-stop at Home-Depot. Instinctively, I found myself once again in the 'Plumbing' aisle, and all at once I had an idea.
Just recently (as of May, 2011) my little brother (6) had discovered that he loved painting, deciding (if only for now) that he wanted to be a painter when he grew. Now, not being one to stand by as a child has a dream to be nurtured, I grabbed a bagful of fittings and a ten foot long pipe, and got right to work. (it's not pretty, but it works)
After an unusually stress-free build, and a couple of quick refinements, I was finished, and had it ready by the time my little brother had returned from school. (I did not use any PVC glue/cement, as I plan to upgrade this thing as [if?] my brother progresses in his craft.)
Step 1: Tools and Materials

Tools:
-Miter Saw (or anything else to cut the PVC down to size)
-Tape Measure (trust me, it makes this a lot easier)
-Tin Snips
-Tape (I used blue masking (painter's) tape this time around)
Materials:
-(2) 1/2" PVC 90* Elbows
-(6) 1/2" PVC T-Fittings
-(2) 1/2" x 1 1/2" PVC Pipe
-(2) 1/2" x 4" PVC Pipe
-(5) 1/2" x 9 3/4" PVC Pipe
-(1) 1 1/2" x 11" Aluminum Corner (Don't know what it's really called, but I think it's for drywall. Substitutable either way.)
Optional:
-(4) 1/2" PVC Coupling
-(4) 1/2" x 4" PVC Pipe (or longer, depending on the size of the child using it, and whether or not they will stand while painting)
-(1) 11 3/4" x 9 1/4" Cardboard (sizes are approximate, and you can use any other flat material in place of cardboard)
-(1) Binder Clip (the wider the better, mine tends to pinch thin paper a little too much)
Step 2: Assembling the Frames

First, cut down your PVC pipe to the given lengths on the previous step. (I used a miter saw, but you can you any tool you feel comfortable with.)
I laid out how the pieces should be assembled and tagged each piece to show it's length in the image provided. Set up your pieces according to the image and simply press-fit them all together, making sure to get them nice and snug, while at the same time keeping each frame flat.
Again, you can use PVC glue, but I anticipate a number of modifications being made to this design that require me to dry-fit everything for now. It holds surprisingly sturdy in any case.
Step 3: Joining the Frames


At this point, you should have two frames: One shaped like a square (Rear) and one that is U-shaped (Forward). To join them, simply take the U-shaped (Forward) frame and pull the top apart (sort of like a stethoscope) and just pop it into the open ends of the T-fittings on the Rear Frame. Easy as cake, piece of pie, and all that... =P
[note] The smaller (1 1/2") pieces of PVC pipe are deliberately made shorter than normal, so that the easel can open and shut easily.
Step 4: Installing the Tray


To make the tray that holds the media up on the easel, take your aluminum corner (note the extra lip on mine) and cut it so that the ends of the corner just reach where the center of the outermost pipes would be (see image). Next, attach it the easel using tape, glue , screws, or anything you're comfortable with (I used tape), ideally only up to the top of the T-fittings behind it. Take the time now to grind down and round all the sharp edges and corners that are on the tray (after all, we don't need the little ones hurting themselves here).
Keep in mind that while I initially started by using a "tape log" to hold it in place, I quickly switched to a stronger bond, by taping directly from the corner to the Forward Frame (see title image).
[note] If you use anything other than tape to secure the tray onto the easel, you can cut the tray to any length you'd like. But if you plan on using tape like I did in the final version, it's easiest to make the corner-piece end where I had mentioned.
Step 5: Keeping It Open


Next, we'll add a strap of some sort to keep the easel open but without letting it do the splits. You can use anything for this, string, chain, rope, a belt, innertube, whatever you have on hand. I had tape, so that's what I used.
Making it was as simple as taping from one of the lower pipes (in my case the one behind the tray) over to the other lower pipe, wrapping around, running it underneath (as in taped together) the first length of tape, and then finishing off right back where you started (overlap is your friend).
Step 6: Final Notes


If all has gone well, you can use the easel as-is at this point, or you could add a couple of finishing touches. I put a piece of cardboard as a backing plate and taped it on securely, and then added a binder clip (not pictured) to the top to hold papers and such to the easel. You can now use this to post simple bulletins or for the little ones to paint on.
Note the second image: This is a close up of one the feet I attached in step 4. Now, the reason I discuss them here is because one, they are optional, and two, they are designed to grow (if this is used as a young artist). Later, when my little brother decides to paint standing up, these little legs will be replaced with some about nine inches long, which will have a tray placed between them to hold his little paints, and brushes, and towels, and water, and such. And then one last extension underneath those to bring it all up to his height.
Any questions or comments are welcome, but let's try to be nice people.
Thank you for your time, and if I've made at least one person smile, it will have been worth it...


