

Introduction: Paper Embossing


This is a very easy technique that everybody can use at home with very simple tools, you can use it for your greeting cards!
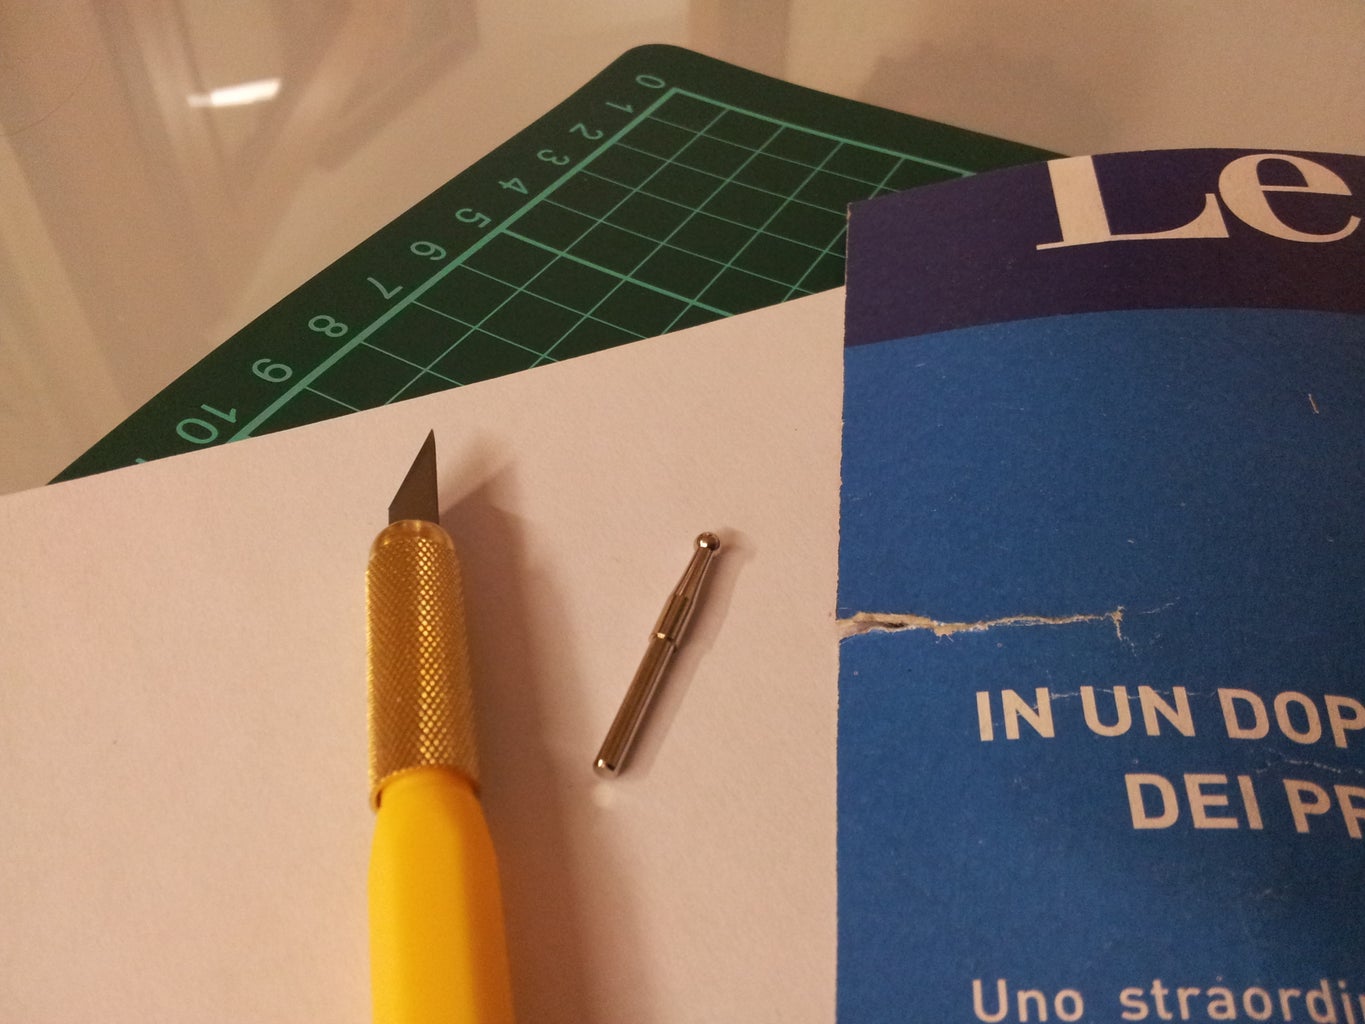
Step 1: Tools


- Exacto knife;
- Stylus with round point or anything with a round point (actually my knife becomes a stylus chaging its point);
- Cutting mat (optional, you can use an old newspaper);
- Light table (optional, you can use a window).
Step 2: Material

- Paper;
- Cardboard paper;
- Tape or glue.
Step 3: Design the Image


If you are an artist you could draw your design by hand on a piece of paper, if you are not you can use the computer.
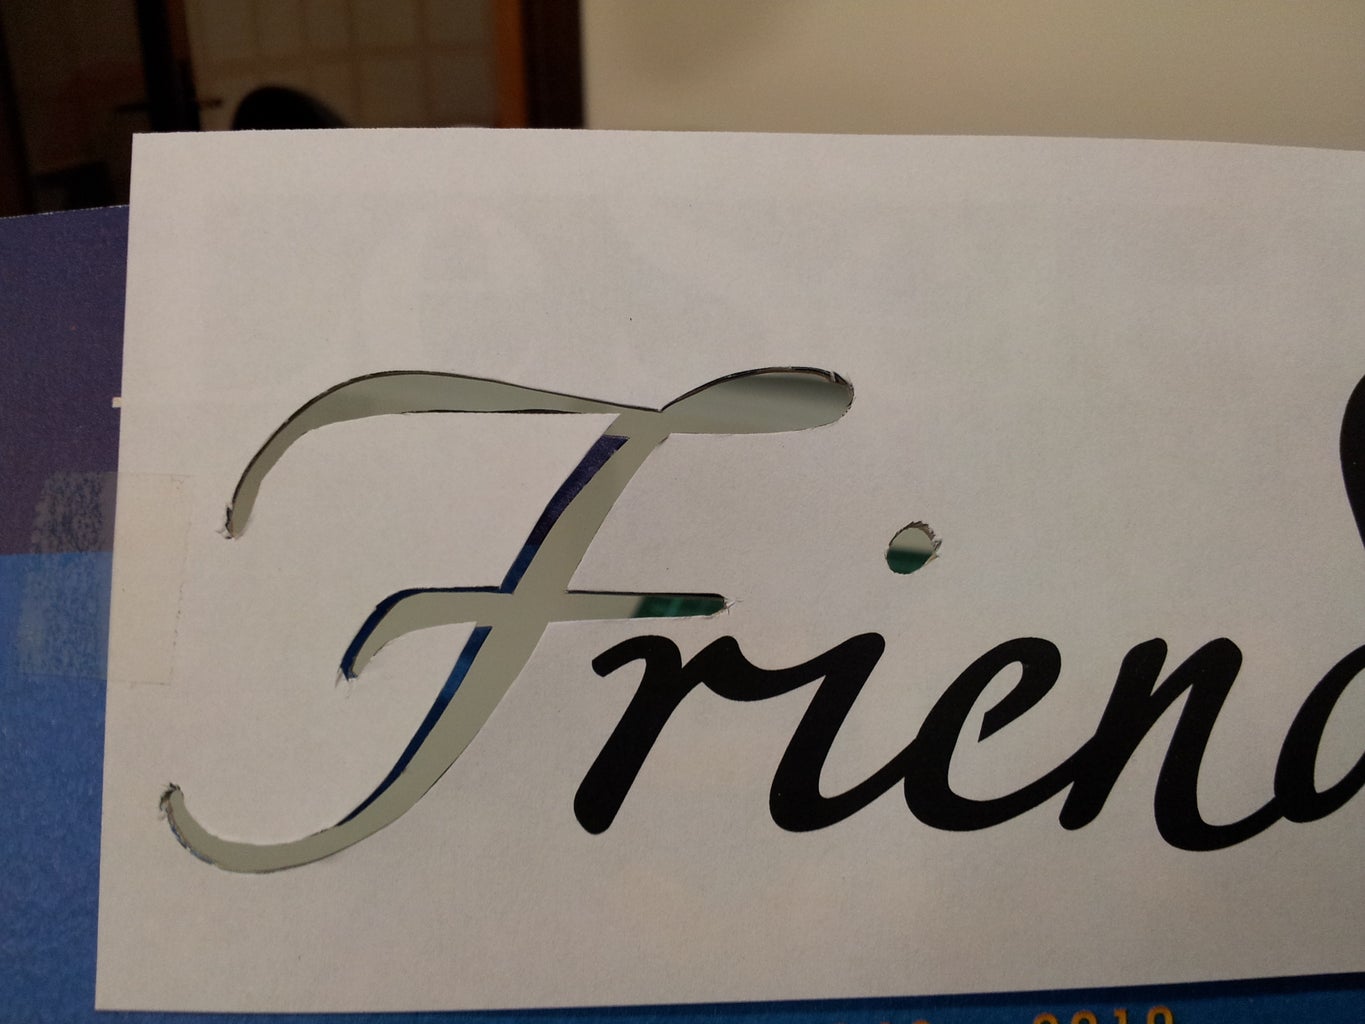
I decided to try with a simple word "Friend" and the beautiful font Zapfino.
Since the Zapfino has many variants for its glyphs I exploited this feature using different variants of the letters. A software that I have that can show variants is XeTeX, that is free and open-source. Using the fontspec package of XeTeX I created an image with all the variants of the glyphs in the word "Friend," then I chose the best combination, for my taste.
I then modified a little bit the design with Inkscape, that is free and open-source, to avoid enclosed areas. Enclosed areas in the design will be detached when the cardboard will be cut and that is a bit annoying for me. I also thickened the drawing to make the cutting easier.
Step 4: Cutting


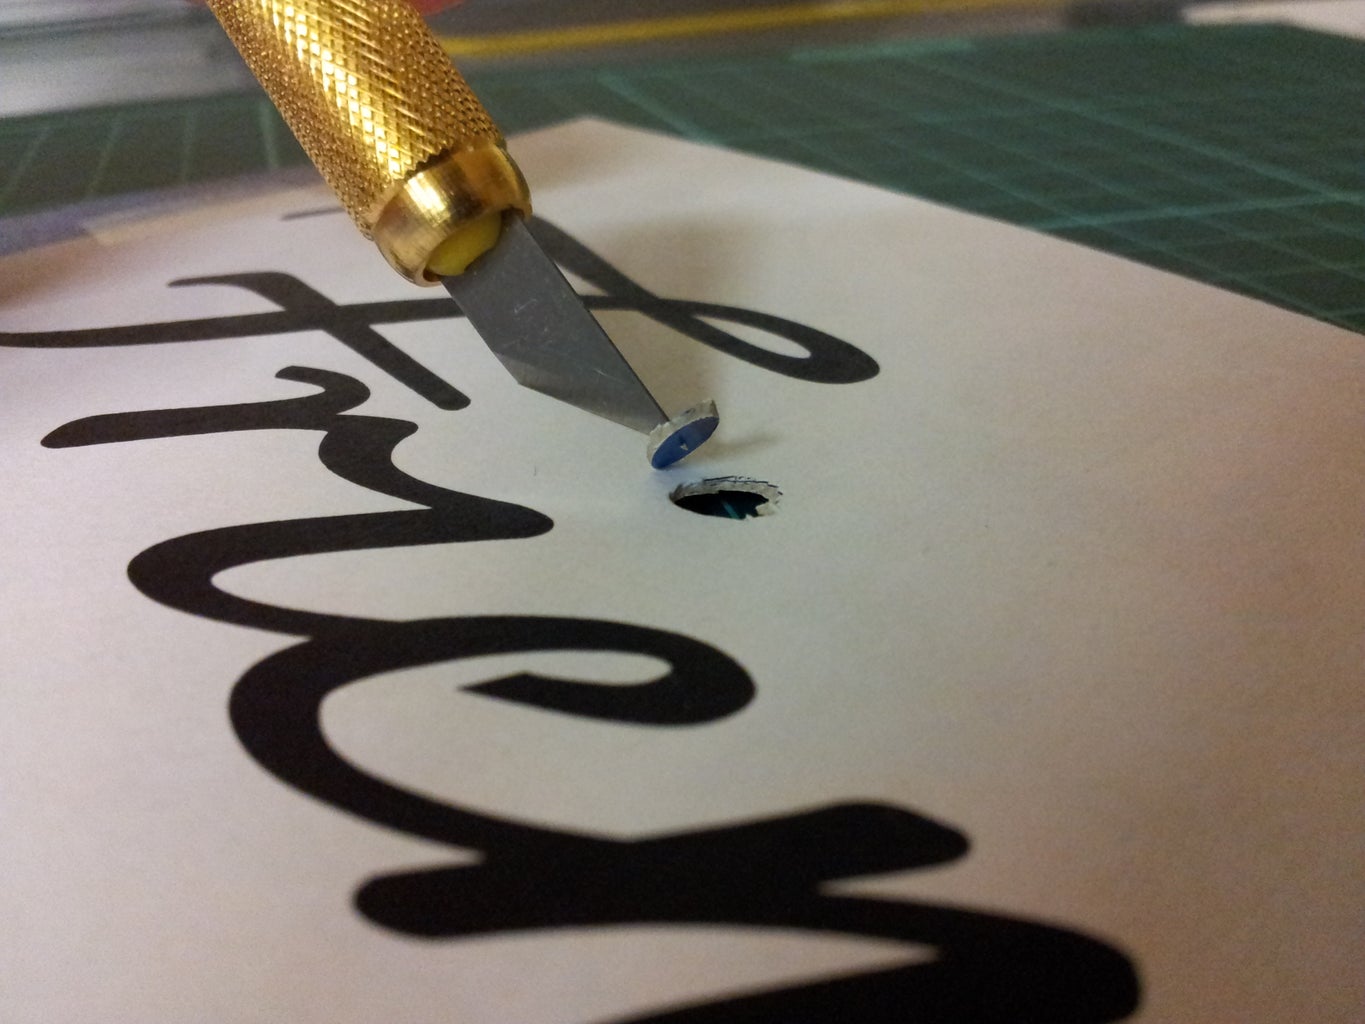


I printed the design and sticked the piece of paper on the cardboard with the tape.
Holding the paper firmly on the cardboard with my hand, I started to cut along the boundary of the black regions. The hardest parts are the ones with the higher curvature, you may need to help yourself cutting also from behind. When cutting around a thin part you may break the sheet so hold it firmly with a finger.
Step 5: Embossing


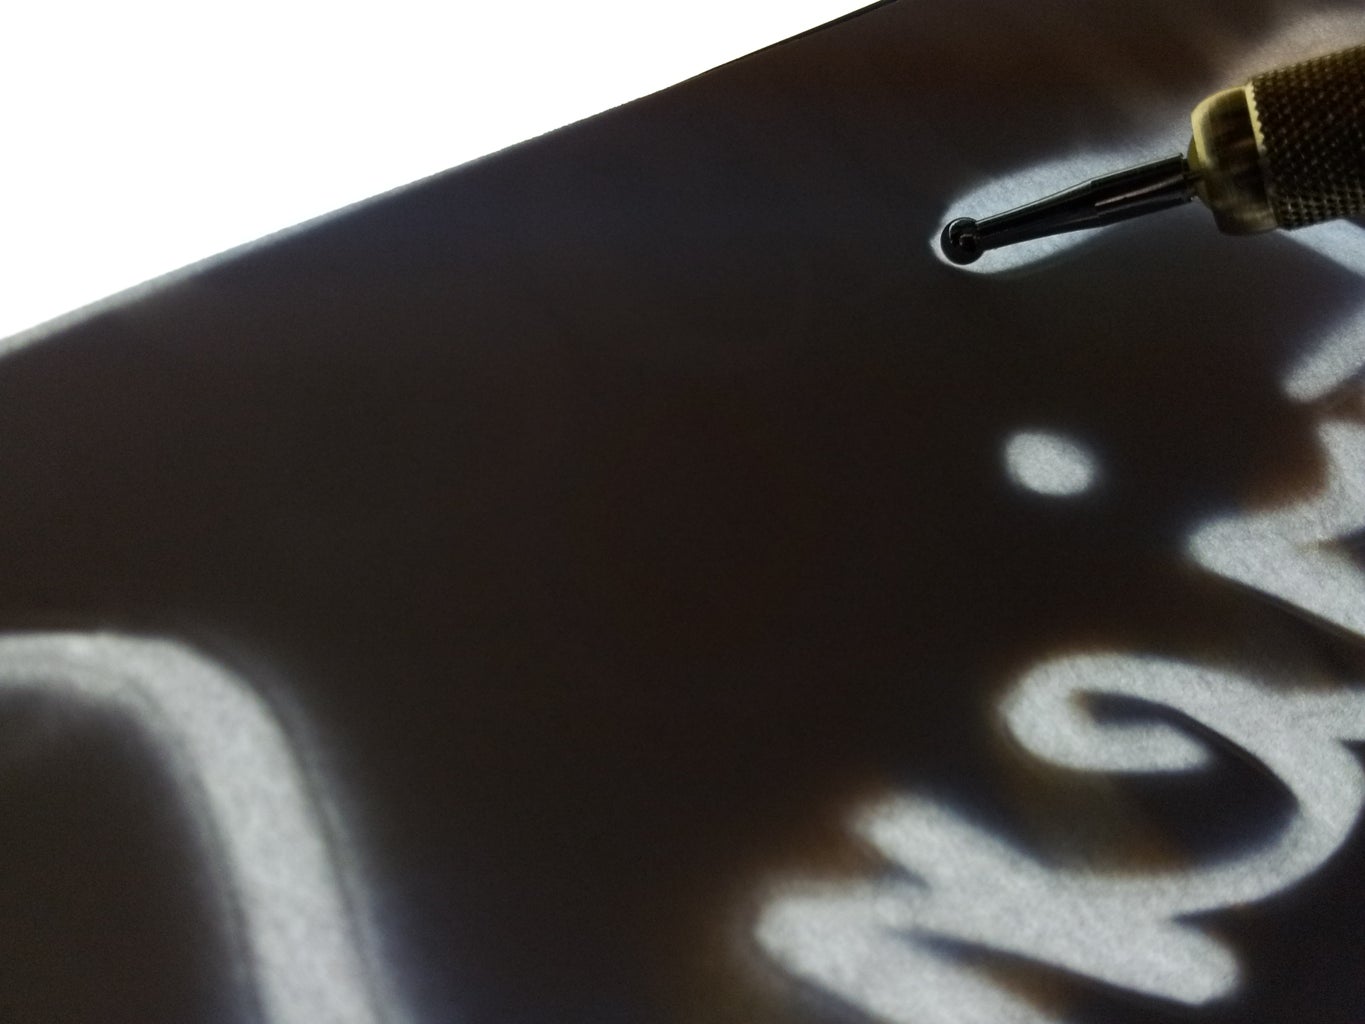


Take the printed paper off the cardboard and reverse the cardboard. Put on the cardboard the new sheet of paper that you want to emboss. Now with the stylus you should trace on the paper along the edges of the cardboard, on the inside of the design. You should not press too much or you will tear the paper (especially on narrow parts), instead press a little and repeat a few times.
This procedure is really facilitated by a light table underneath the paper, but it is not mandatory you could use a window in a sunny day.
Step 6: Done!


With super easy to find tools you can create an expensive looking effect on your letters, greeting cards or even business cards!
Happy embossing

Participated in the
Holiday Gifts Contest


