

Introduction: Papercraft Airship: Hull Part 2


This is part 2 of the hull for the LZ 200 series. This part takes almost as much time and is more annoying maybe. I though it was. But bare in mind it makes the vessel look much more awesome.
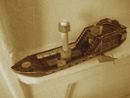
Step 1: Cannon Placment

The Image below shows the placement of the cannons on the ship.
The image should be self explainable.
Step 2: Ladder for the Mast


First on page three there should be a large rectangle labeled 66. cut out of it three pieces 1 5/8 inches long and 2/8 wide.
Second slowly bend then roll up the pieces until they are round like rope.
Then open add glue and roll up again nice and tight. It looks nicer if you glue it.
arrange together like in picture 4 so that they will fit into 30B and 30C.
Step 3: Steps for Ladder


First Cut out 30B and 30C and fold in half.
Second Insert the ropes into the fold and glue together.
Third Cut out more from 66 but only long enough to stretch across the long ones. but only make them 1/8 inch wide.
Fourth Glue to the ladder. until it looks like picture three below.
Step 4: Ladder Final


First glue the ladder to piece 30 that is on the top of the mast. It should correspond to the ladder image on piece 30.
Second Glue to the hull straight down as shown in picture two.
Third Make another ladder do the same to the other side.
Step 5: Flag and Ropes


First cut out and assemble 25. then glue 26 to the top of 25. Then glue the completed piece to the top of the captain's quarters just behind the railing's solid part.
Second make more rope. 1 piece 2/8 inch wide and 3 3/8 inches long. 2 pieces 2/8 wide and 2 1/8 inches long.
Third Glue the long one to bottom of piece 30 and other side to top of the flag pole.
Fourth glue the 2 shorter pieces to the bottom of 30 next to the ladder. let dry. then glue to the hull as pointed out in the third picture below.
Step 6: Bronze Piping.


First roll into pipes pieces 36. cut a right angle in four of them and the remaining two as short as the shorter side of the the cut pieces.
Second glue to the hull as shown in picture below. Do to both sides.
Third Cut out and assemble piece 35. then cut them in half on a angle so that they are straight out when glued. Then glue to hull just like shown in pictures below.
And that is it for the hull.


