

Introduction: Planning a DIY Home Automation System


The purpose of this instructable is not to tell you how you can do whatever you'd like your home to do. Instead it has been written to make an idea a reality but also turn madness into sanity by understanding the limits (technology, cost, time required, safety...).
There a lot of very good guides and articles on the web to understand many things in very extensive details. This is not what we want. We want the big picture. What are the basic skills we can learn or improve. What we should touch.
This covers basic things like :
- What is home automation? First check if that actually matches your expectations.
- Where to start? Pretty easy, start where you are, probably at home. Do you know it inside out?
- What can I do? About anything but you need to plan and know your limits. This includes staying alive (works any day, including evenings).
- What are the pieces of this puzzle? More complex, there are many shapes and it's very easy to lose some pieces. We'll try to just keep our sanity.
- How to put that together? That's getting more concrete, we are actually DOING it. H*ll yeah!
Also, this instructable is now also available from my personal page : http://stuffblog.dullier.eu/
Step 1: What Is Home Automation?

Googling "home automation" returned 33 millions results. This is either more than enough or just too much.
The first result, Wikipedia article (of course), states :
"Home automation or smart home[1] (also known as domotics or domotica) is the residential extension of building automation and involves the control and automation of lighting, heating (such as smart thermostats), ventilation, air conditioning (HVAC), and security, as well as home appliances
such as washer/dryers, ovens or refrigerators/freezers that use WiFi for remote monitoring. Modern systems generally consist of switches and sensors connected to a central hub sometimes called a "gateway" from which the system is controlled with a user interface that is interacted either with a wall-mounted terminal, mobile phone software, tablet computer or a web interface, often but not always via internet cloud services."
What does it say?
- Smart home : Making the house "aware" of itself or giving it ability to do things.
- Residential : By focusing on DIY, don't try this at work :) Seems to be what we want to cover.
- Building automation : Indeed, as a lazy geek, I want a computer to make what I don't want to do myself. Typically checking the garage door, turning heating on/off and so on. Great!
- Switches and sensors : Look at this like eyes and fingers of the home, without both that won't do much.
- Central hub : So that clever home needs a brain? Interesting. One brain to rule all things. That'll be the controller.
- Interacted : The home can have its own life but we want to be part of it. That's our place. Wait, how to chat with a house? These are the devices/nodes.
- Internet cloud services : I don't like that, some machine somewhere shouldn't know about me having the washer on. But that's personal. Don't forget "there's no such thing as the cloud, its someone else's computer". Wait, a service is much more that a computer. Traveling by plane is more than having his own plane. However the DIY aspect will refrain external help/cheating.
So if we summarize we end up with : I want to put a screen to order my home appliances to do what I want. Pretty much what we would expect.
As a friendly reminder, we are not going to cover technical aspects like protocols, vendors, suppliers and the likes. This is a DIY project. As myself a hobbyist, I don't know all details of the items composing that galaxy. Knowing my house is where I want to start. As such I'll share mostly about my personal experience.
However I will simply ignore all bundled solutions from the market as this is not what we want. This guide might still come handy if you just want to go through basic concepts.
Note : We don't care about size of your home. Sky is the limit. Most of this article was written by having a few devices on my desk.
Step 2: The Big Picture

Checklist :
- Do you already have some ideas?
- List what you want to model : Building, floors, rooms, systems, appliances...
- List what you DON'T feel comfortable with : Maybe you want to skip security equipments or access control.
- Put priorities : For true DIY, you'll be alone most of the time. Focus on achievements.
- Evaluate cost : Eliminate what you think is over-expensive or not worth it.
- Evaluate skills : I'm currently unable to design anything in 3D, still that's a skill I'd like to acquire.
If you are this far, you should now have a pretty good idea of what you want to achieve. For this instructable I'll assume things about my own experience :
- Home has roughly 15 rooms. That's quite a lot to "just start something".
- I'll focus on heating : monitor temperature and turn heating on/off.
- I'm using cheap D1 Mini clones from Ali Express. A few months ago I even didn't had a soldering iron.
- I want to actually use that, I'll try to reach to "3D printed enclosures installed around the home". Not yet achieved...
- There is some dimension of "wife acceptance". This has to be useful AND usable.
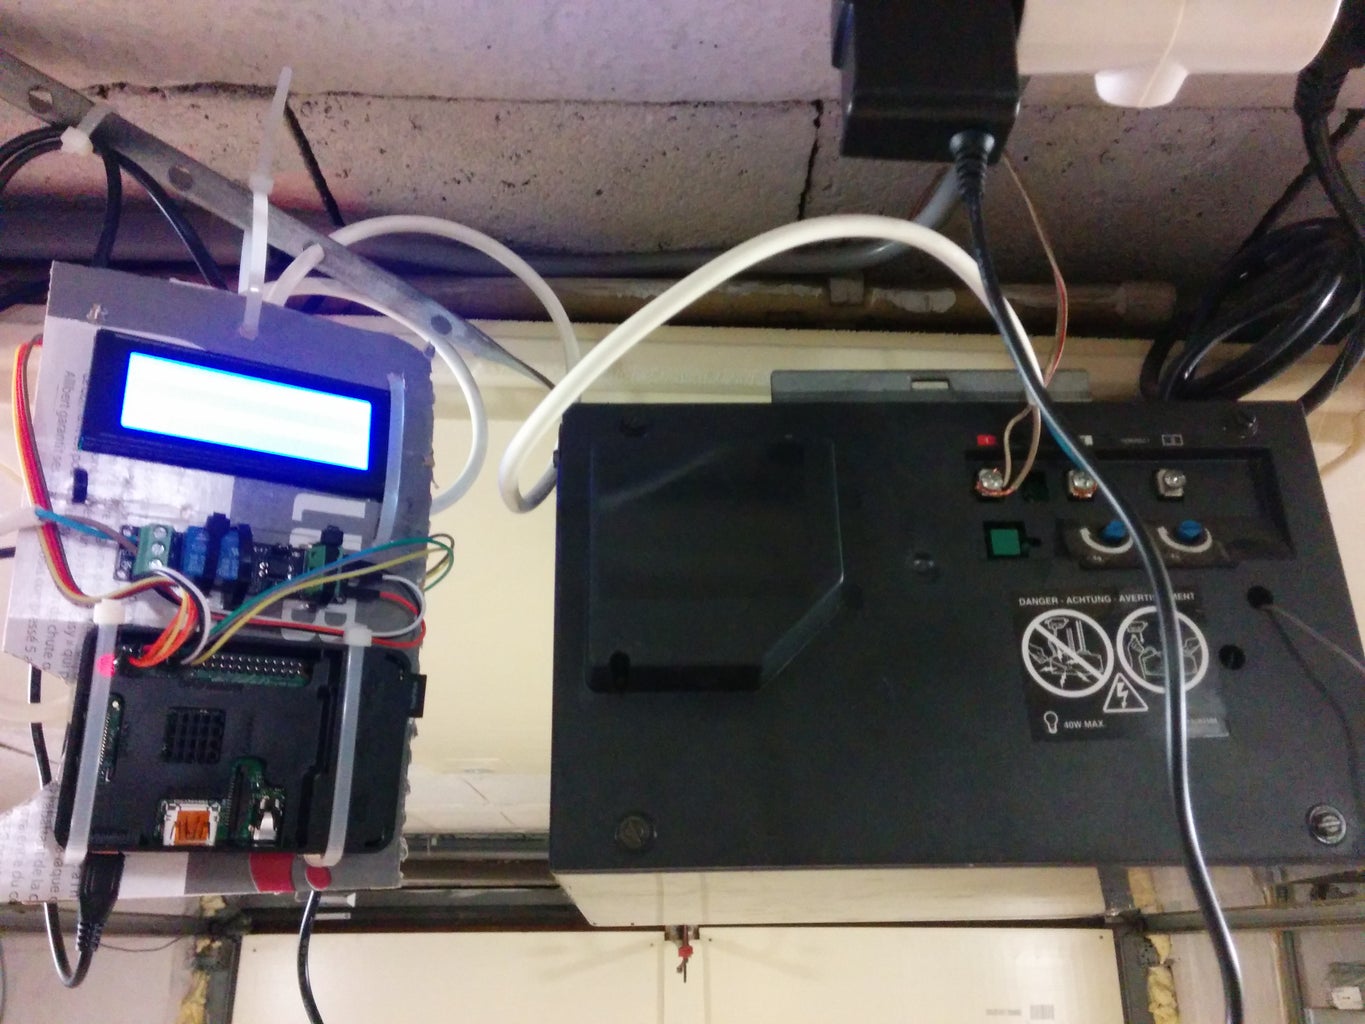
Note that I've in the past created a Garage Door Opener based on a Raspberry Pi, a LCD display, a pair of switches and a relay. Some Python code glues that together. To some extent I'm interested to merge this into this instructable to have a proper architecture. That's part of "wife acceptance", home automation should be done from one single interface.
Step 3: Modeling Your Place
Tools
Automating your home requires some planning. The best starting point is to know your place inside out.
This may seem pretty basic but deciding where to put a valve on a tube is definitely something to be planned.
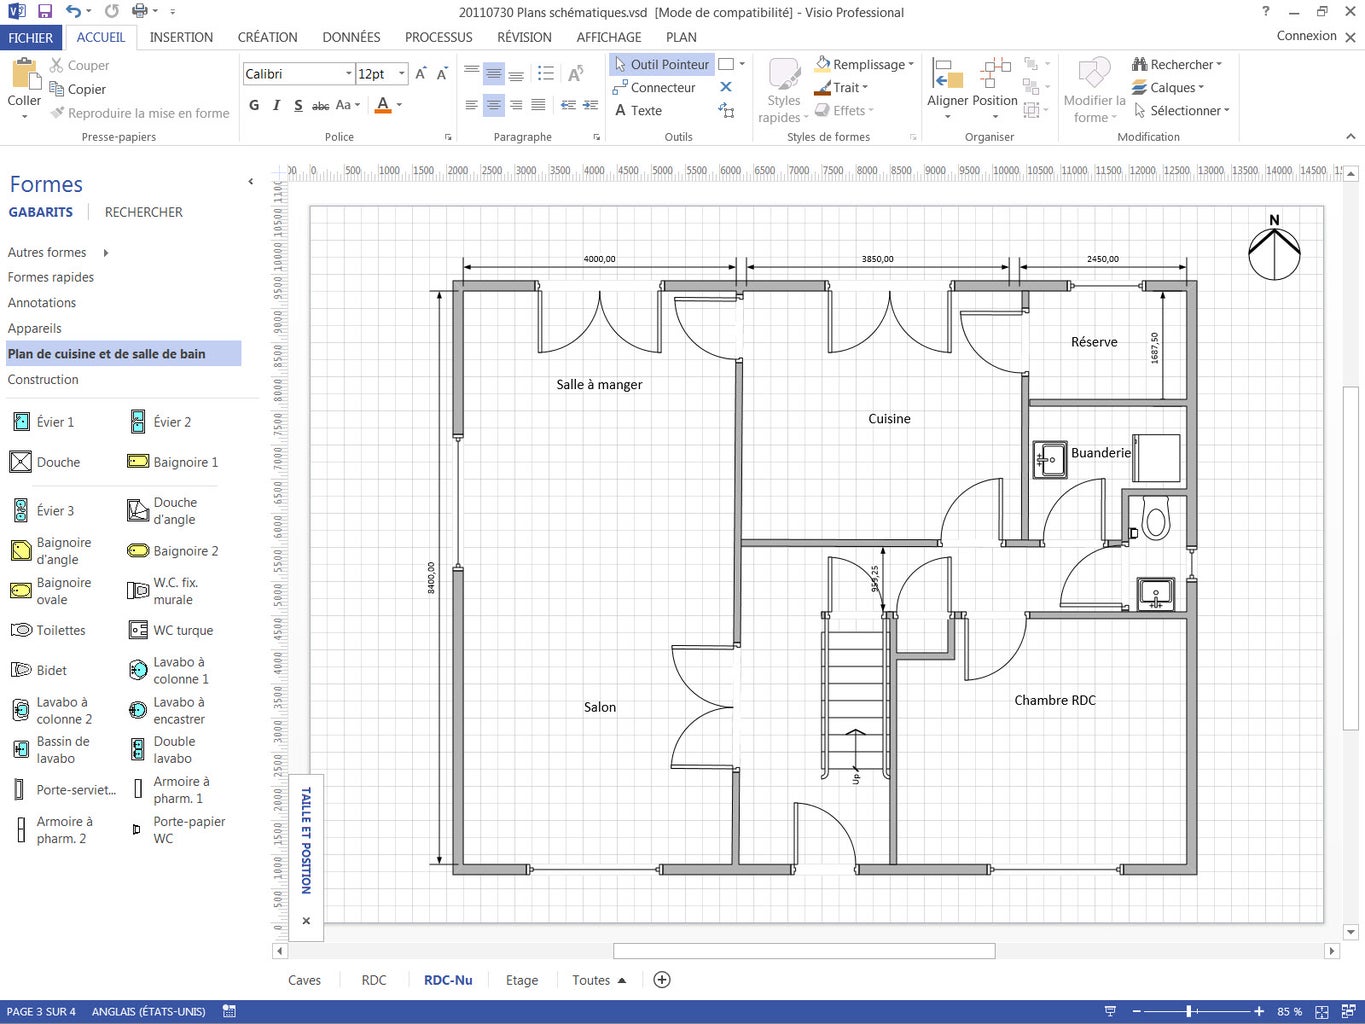
We often see floor plan in home automation systems, so that looks like a good starting point. What are the rooms of the house? This can of course include external elements like a patio, a pool or Christmas lights.
As I have Visio, that's what I used to design a 2D plan of the floors. Note that it's not required, maybe not even adviced, to model your place in 3D.
If you don't have Visio, look after free alternatives at Google.
If you want to go the "physical way", check out this instructable : Physical Home Automation Interface.
At this point, it will already be clear about what you do NOT want to model. That is probably the first achievement.
What to do?
What I did was to re-use a schematic I made when I bought the house. The schematic contains the rooms, dimensions, doors and windows. This is just the structure and is enough to get started.
The lesson learn
It falls to basics. If you want to do something a little of planning is required. This is exactly at this exact start that I created the instructable. I wanted to document my own intellectual process. In no way is it perfect but it's mine.
As a DYIer, you should be proud of your achievements. The schematics also proved useful multiple times to plan a new living room, replacing the kitchen and so on. Again, planning, planning, planning.
Disclaimer : I'm not the kind of "just do it", I need some level of certainty to proceed. I'm not seeking for perfection but I hate the "it's good enough".
Step 4: Modeling Devices


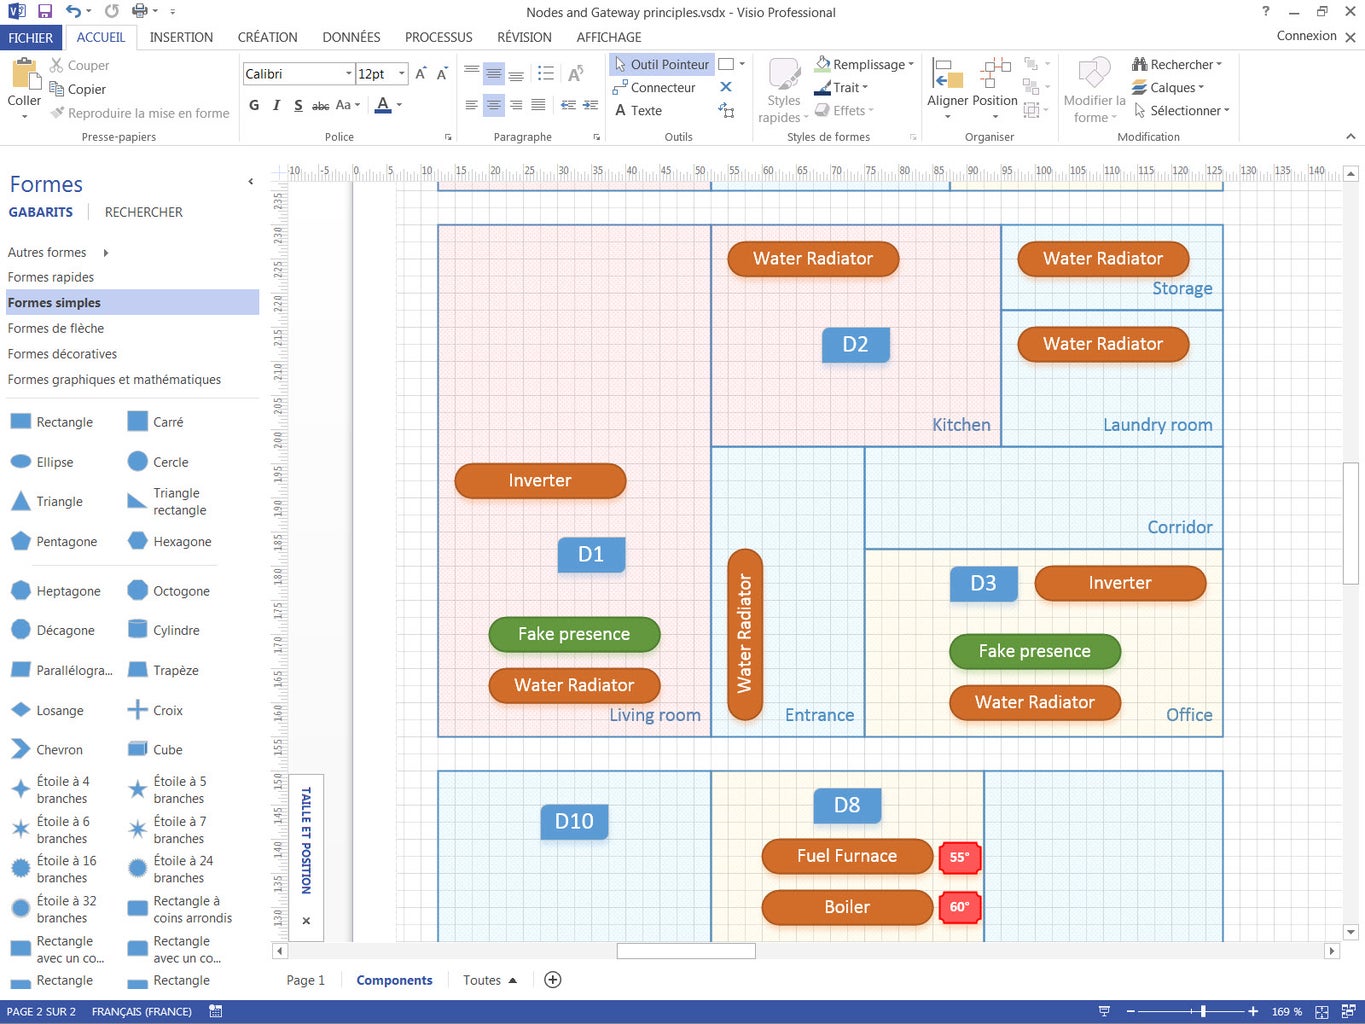
Out of the detailed drawing I actually rebuilt a raw schematic to highlight rooms, devices and "features" (appliances, roles, heaters...). This proved a good approach, I never before had imagined WHAT I actually needed or wanted to automate.
Start by simple things like lights. The usual natural items are:
- Standing lights
- Electrical plugs
- Heating
- Curtains
- Doors
- HVAC Inverters
- Air vents
- ...
You can even include pumps for your aquarium, lights for your pool house or garden. Sometimes even Christmas tree. Why not. What about a DIY home theater with all of this? Maybe next time :)
Before putting too much effort on designing absolutely everything, what are your priorities?
About heating, this can be as simple as turning a heater on/off in the bathroom or controlling the furnace, pumps, radiators valves... Really, scope it.
In my case I first wanted to be able to monitor my home. In the first place I limited myself to temperature of the office. After all, that's the closest to my computer. Later I wanted to extend to living room monitor and after that to control HVAC accordingly.
Still here? Draw that on your main model, it'll help a lot to have the whole overview and not pieces all around. Make sure to give each a name/code to identify them.
Step 5: Understanding : What Can Be Monitored?


Many things...
I've reused an image (this is even the FIRST result of Googling "home automation node types" images) from the excellent Uber Home Automation w/ Arduino & Pi instructable from electronichamsters to illustrate this chapter. This was for me the very first step in understanding DIY home automation, however I've gone different routes regarding how to do it.
...from anywhere...
When I've written "know your place inside out", I also meant when not at home.
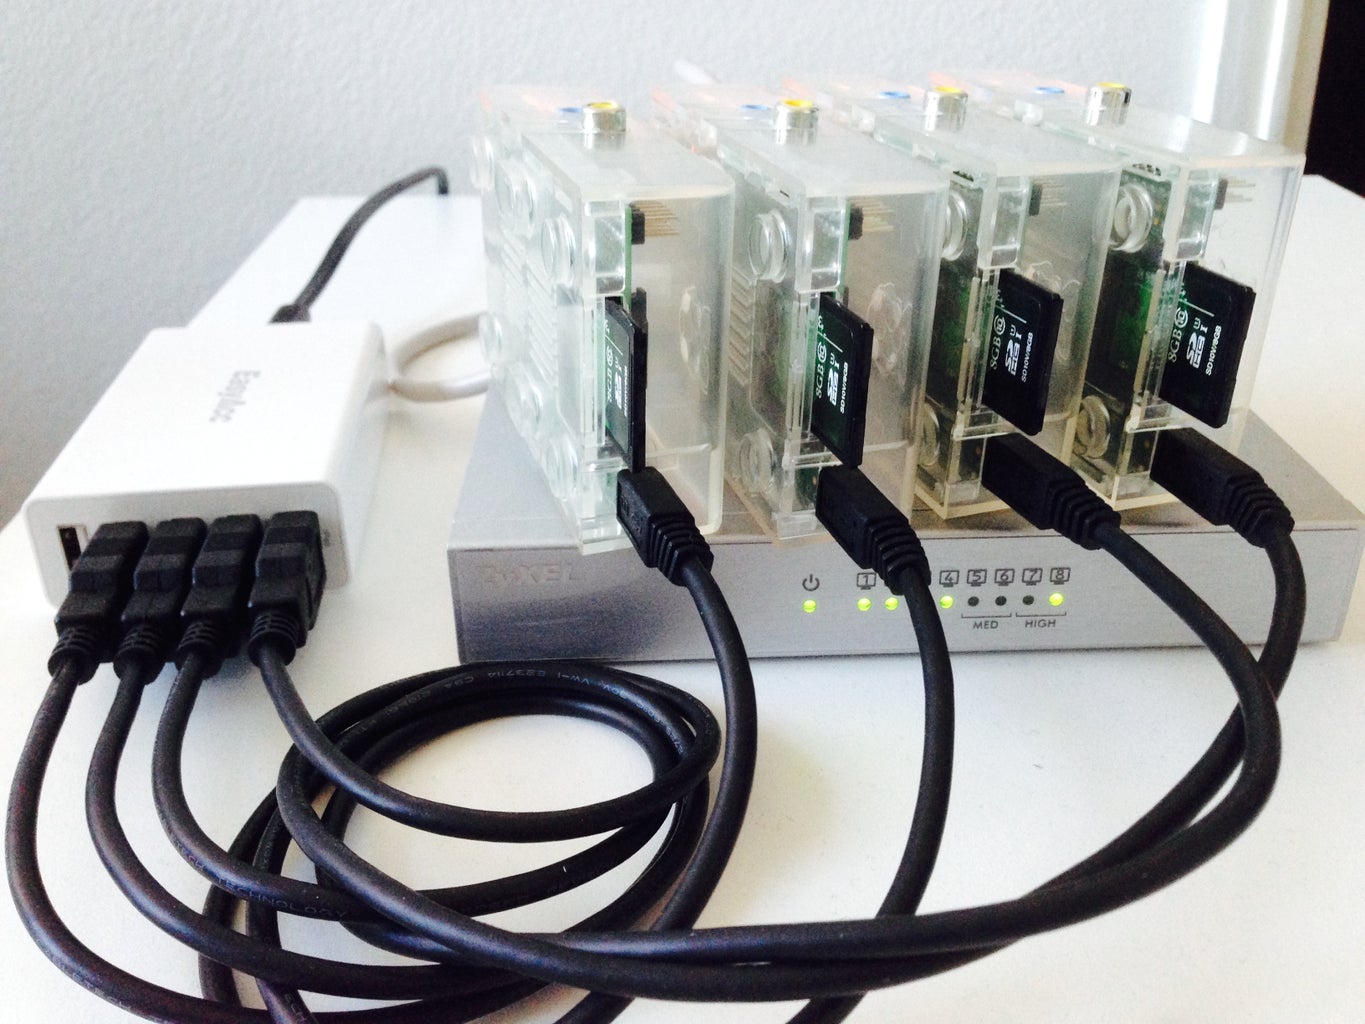
I'm not referring to "the cloud". Yes the cloud can know everything about your life, but again, I don't want to rely on it. So "from anywhere" does not mean simply pointing to some random IoT platform provider (again, Google returns 26M results). I'm referring to my "private personal cloud hosted at home" :) This might seem insane, remember, it's just a private Raspberry Pi "cloud" (simpler than this) behind a VPN (provided by Synology VPN Server).
...with many types of sensors...
Basically home automation puts a computer in control of you home. It has to be aware of what's going on.
Monitoring a home means we need an interface between the physical world and a computer model. How to turn physical information (what is the temperature?) into data (Living Room temperature is 21.4° C)? We are going to involve (lots of) sensors.
From a technical point of view (spoiler : this is not the topic of this instructable), there are many many many many sensors. My own experience is about Arduino and ESP8266 devices. Googling Arduino sensors returns 568'000 results. When I just don't know, I switch to the images search.
One random result is a "SunFounder Ultimate Sensor Kit" from SunFounder. Yes 37. That should be fairly enough to monitor "a simple home". Disclaimer : I bought pretty much all of my own stuff at Ali Express from random (highly ranked) sellers.
...even some items you don't even "touch"!
As I have solar panels installed, monitoring power production and consumption is premium but this won't be covered. For this I have a few CT sensors. OpenEnergyMonitor has a very extensive solution for this.
Step 6: Understanding : What Can Be Controlled and How?


So...
Now that we have the overview of whatever we'd like to control, what can we actually control?
Obviously, as long as it is electrical, there is some kind of interface; whatever what it is.
The basic stuff includes power on / off states only, for this we are likely to use relays:
- Standing light, the power plug
- Ceiling light, the light switch
- Standalone electrical heater, the power plug
- Electrical boiler, the power switch
More advanced topics should be grouped by actuator type:
- Infrared remote control : Television, set-top TV box, hi-fi system, inverters, roller shutters...
- Water valve : Tank filling, plants watering, garden waterfall, fuel heating, well...
- Locks : Open your alley gate, lock that garage
- PWM : Dim lights in living room, motors with precise control
- Custom stuff : RGB for LED strips, surveillance cams...
Being concrete
Once we put all that together, we can start designing scenes:
- Indoor
- Entertainment (Movie/Music/Party): Power on TV / audio surround / player, close crtains, dim lights
- Practical : Leaving home for work or holidays
- Security : All lights ON, loud music...
- Low power mode : All lights OFF, HVAC at minimum, turn TV off...
- Outdoor
- Day: Close curtains to prevent heat from direct sunlight
- Night: "I'm home but it's fake"
- Welcome: Alley lights for guests
- Security : All lights ON
- Garden watering
- Pool heating
Just like the rest, as long as you can control it somehow, there's room for automation.
Back to some pragmatism, what can we achieve?
For this instructable I will focus on controlling heating when either away or present:
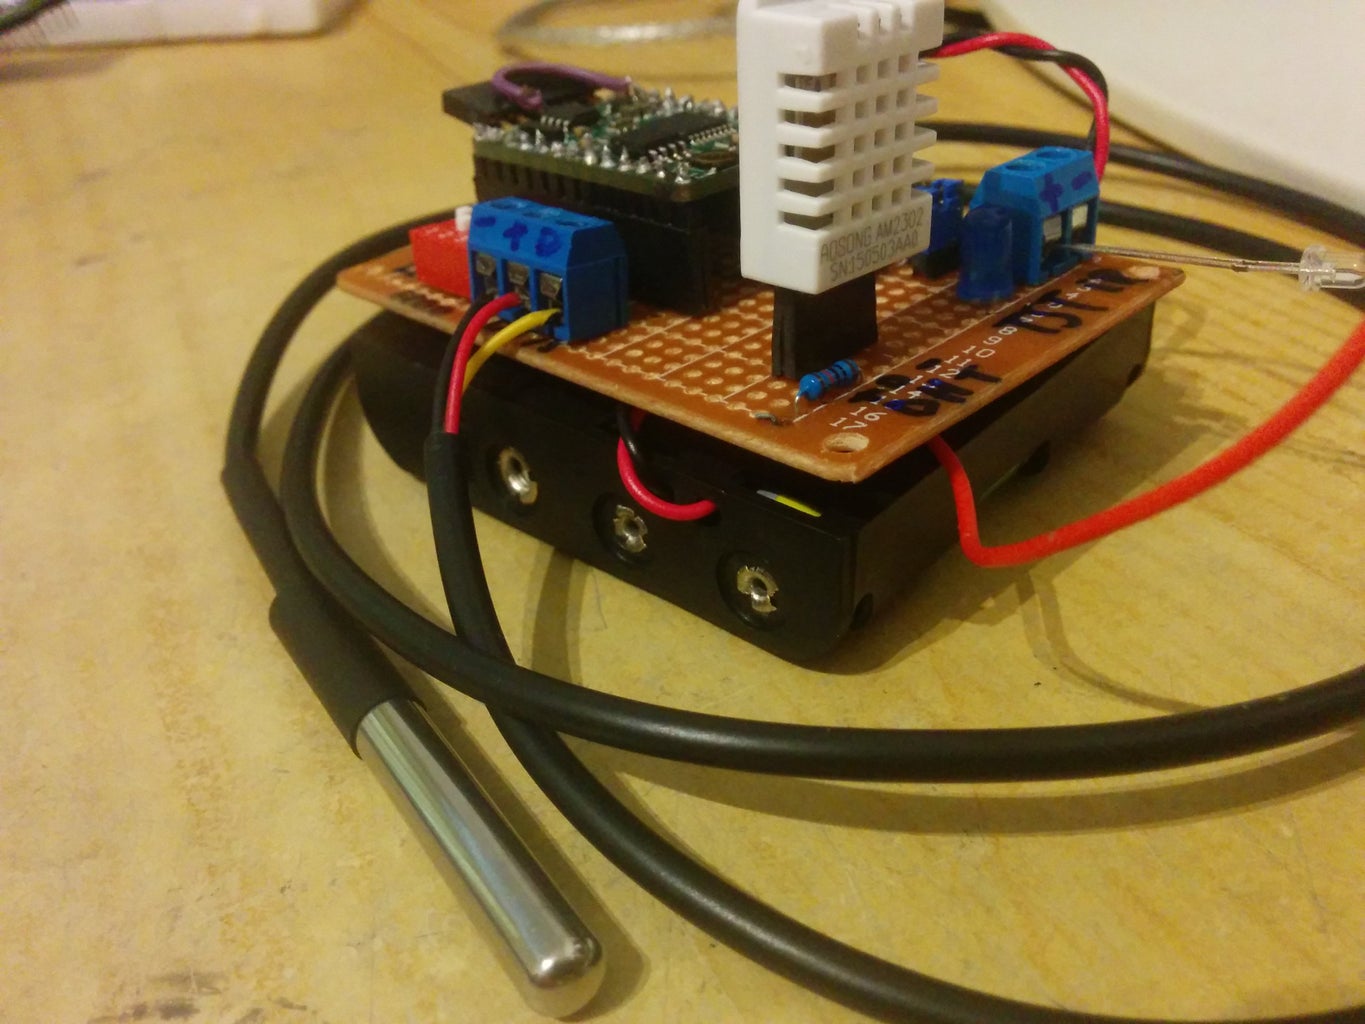
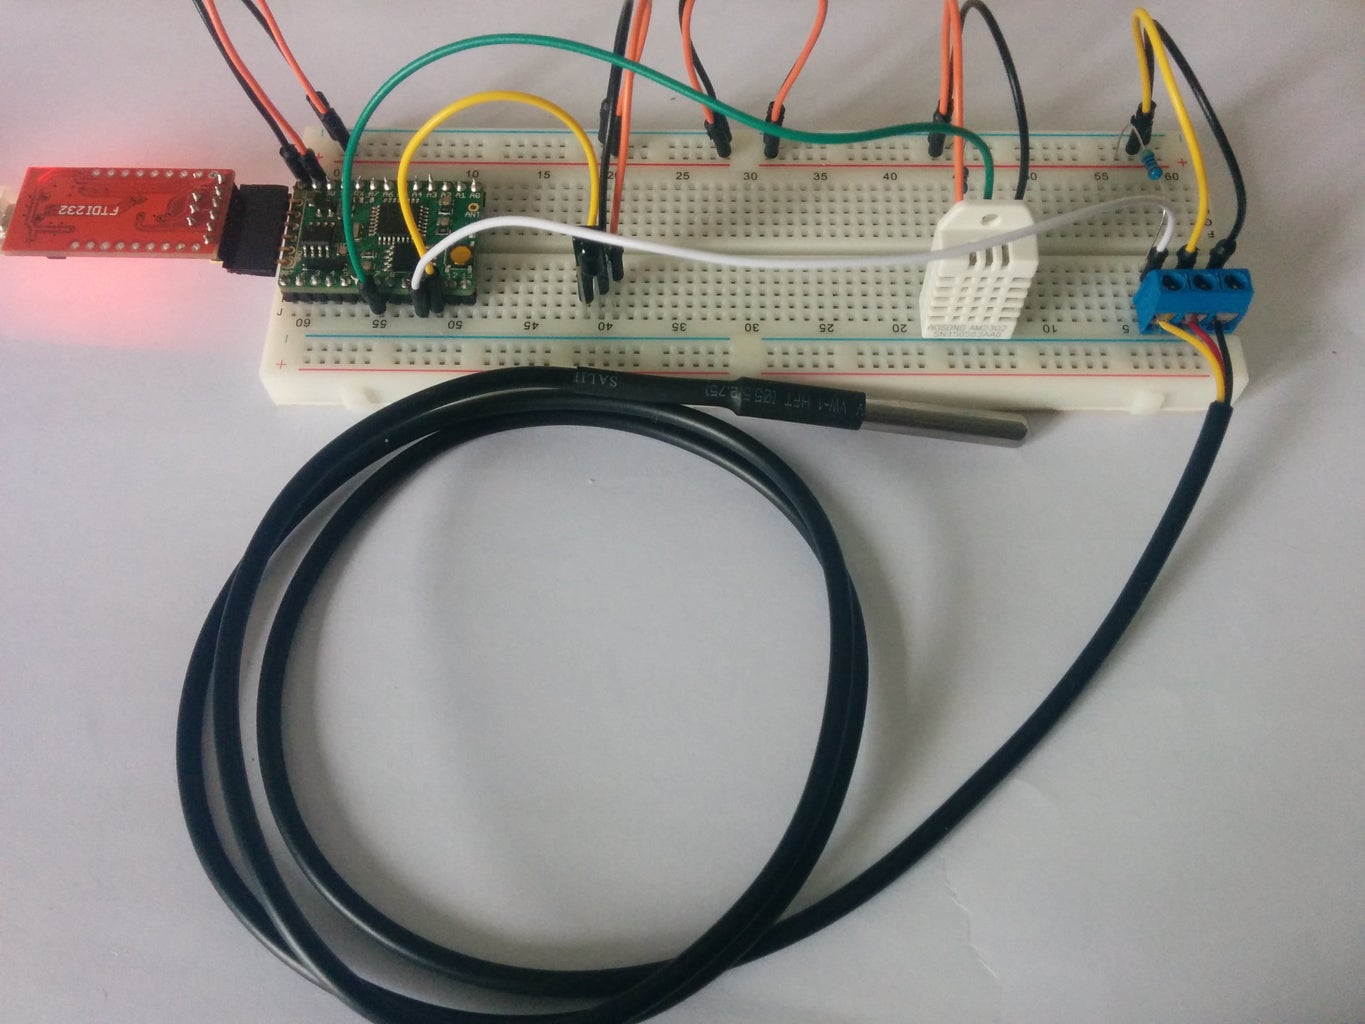
- Prevent a cold bathroom in the morning : relay to turn heater on/off, DHT22 for room temperature
- Prevent from overheating unoccupied rooms : DHT22 for room temperature, PIR for motion sensor
- Turn heating on before getting back from work/vacations : DS18B20 for pipes temperature, relay to turn heating system on/off (I'm currently dreaming of solenoid valves but that's getting insane)
Step 7: Safety Moment


Before going any further, don't forget that a few bits in a software can cause havoc in your home. You probably don't want to keep your door open while away, nor do you want to have water all around due to a faulty piping connection. Still, this is nothing compared to burning down your home to ashes.
Any modification to your home must be studied, planned and executed by a knowledge person.
You can easily run into a nightmare if you use an underrated component putting fire from main AC.
NEVER EVER DO ANYTHING YOU ARE NOT CONFIDENT WITH.
If you do something very dangerous once, is it riskier than doing the same tricky thing every day? You probably don't want to know.
Step 8: The Theory and Practice of a Controller, Its Devices, Where They Are and How to Communicate
Some theory
Home automation assumes there is a controller allowed to know about everything. It will also forward your orders to the home.
Devices will be spread all around the place. Better know where you want them to be.
Once we have a smart controller in the place, it must be able to communicate with the devices.
WiFi is the natural way to go even if not so common. There are so many protocols around its hard to chose.
Disclaimer
Yes this is getting technical, sorry. I anyway want to show actual stuff, so we need physical and software components. Again I'm mentioning what I'm actually using. Sorry there are so many ways out there to solve such topics :-O
Taking that to the next level
There are now many ways to communicate between "controller" and the different "nodes". About planning, already define how that should work within your home. Defining the communication medium will help define where to put controller and devices.
- Connections between controller and devices : Wireless or wired?
- Power supply : From wall outlet, battery powered or solar charged maybe?
- Case : Is it a test on your bench, alpha hardware where cables can lay around or do you want to integrate it into furniture/appliances?
As explained below, for the sample, we'll make use of Homie-ESP8266. This is a firmware for ESP8266 controllers using WiFi and MQTT. It is described like this by its author:
"An instance of a physical piece of hardware (an Arduino, an ESP8266...) is called a device. A device has device properties, like the current local IP, the Wi-Fi signal, etc. A device can expose multiple nodes. For example, a weather device might expose a temperature node and an humidity node. A node can have multiple node properties. The temperature node might for example expose a degrees property containing the actual temperature, and an unit property. Node properties can be ranges. For example, if you have a LED strip, you can have a node property led ranging from 1 to 10, to control LEDs independently. Node properties can be settable. For example, you don't want your degrees property to be settable in case of a temperature sensor: this depends on the environment and it would not make sense to change it. However, you will want the degrees property to be settable in case of a thermostat."
Summary
You need :
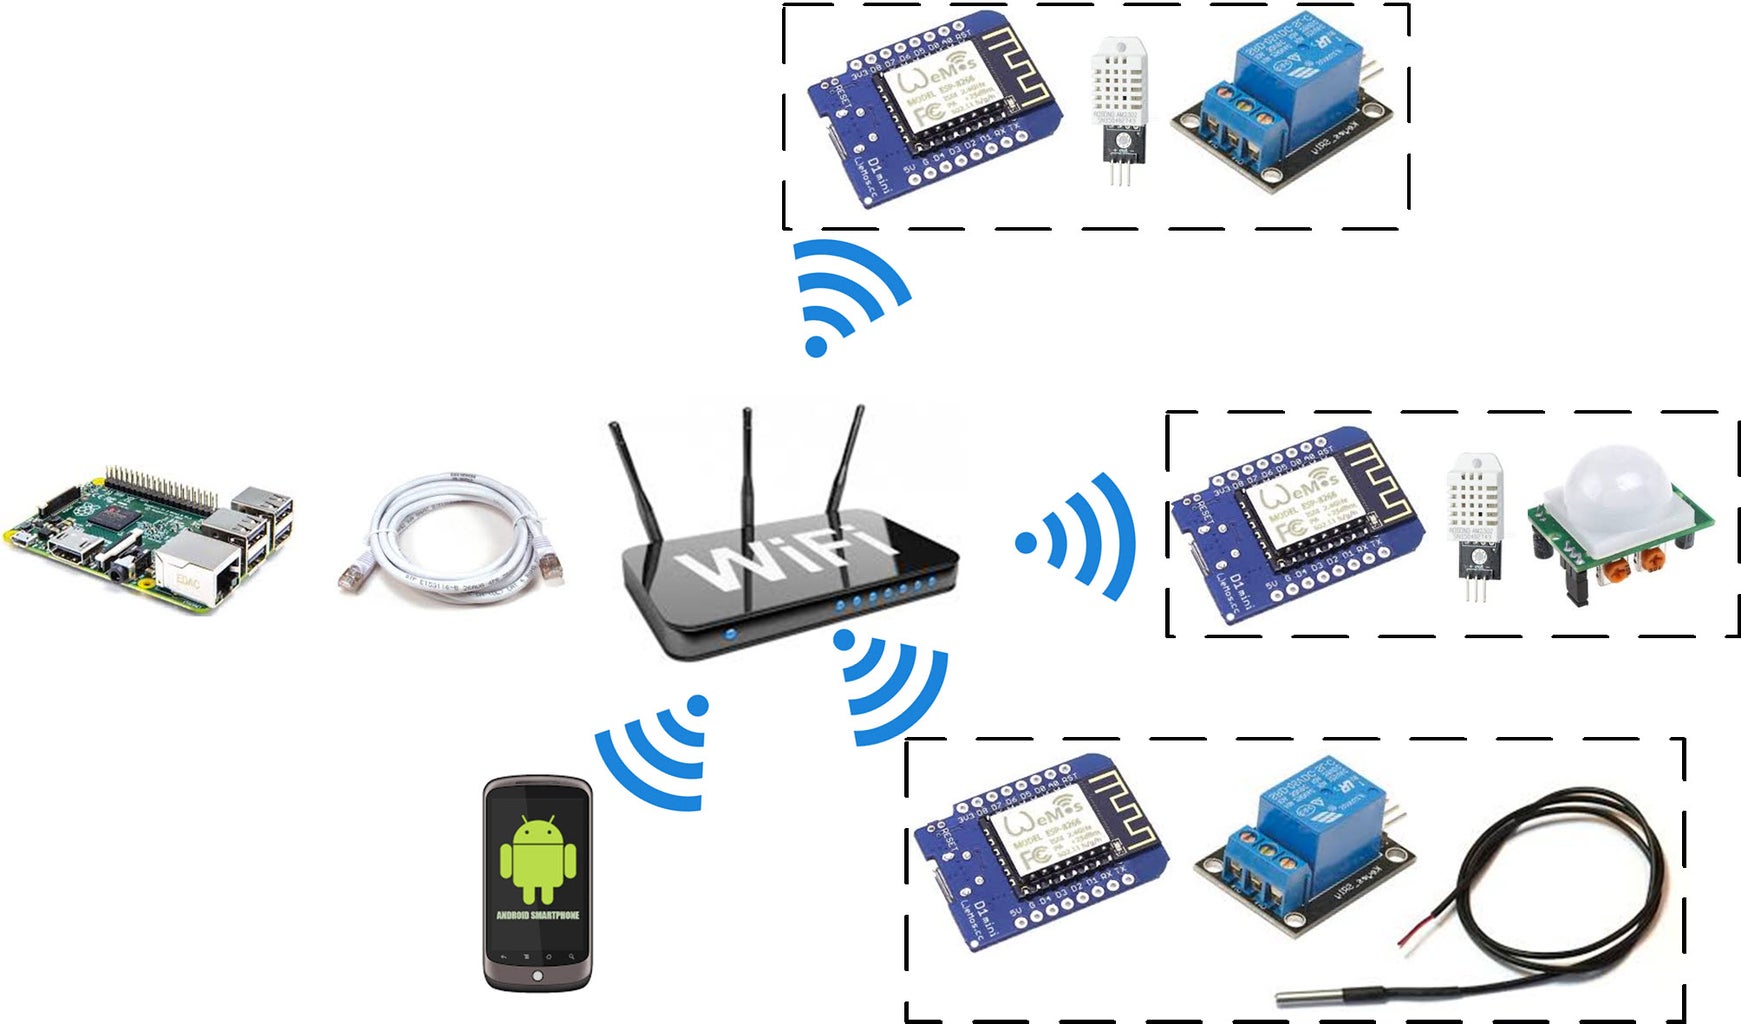
- One central controller, hosting your home automation server. I'll use PiDome on a Raspberry Pi.
- One or more devices to monitor and interact with your home. I'll use D1 Mini and Homie.
- A network to connect all that together.
- Decide how to power devices (battery, adapter, from a host appliance...). For testing I'm using either computer's USB port (and serial debug) or a phone charger.
Step 9: About the Controller...

Hardware part
We'll use a Raspberry Pi to act as our home overlord. The RPi will be in charge of:
- Holding the data about the home
- Aggregating the data from the devices
- Presenting the data to the user
- Sending orders to the devices
From a hardware point of view, the RPi alone is enough to do all that. It is nearly self-contained and will run happily from your basement (Hey! Is that your first ever home data center in the basement?! :-D).
Get some bundle (RPi, power supply, SD card...) and you're set.
Note about WiFi: It is possible to run the RPi over WiFi, however I find it far more stable to connect it to your home router using standard RJ45 cable.
Note about RPi Zero: The exact hardware choice you have to make depends of what you want. A RPi Zero seems to be also pretty much as good as a RPi 3 for this job. The Zero is a lot cheaper but requires way more small parts to get the job done. It is however the best choice when it comes to embedded devices. The latest Raspberry Pi Zero W now even comes with WiFi and Bluetooth!
Software part
The RPi being a single-board computer, it is quite limited in term of disk/cpu/ram. For this purpose we rely on lightweight Linux centric operating systems. For this job, Raspbian is probably our best choice as it is kind of the default OS for a RPi.
Speaking about home automation means you need that extra software to manage the devices. My choice is PiDome (download).
Step 10: About the Devices


Hardware part
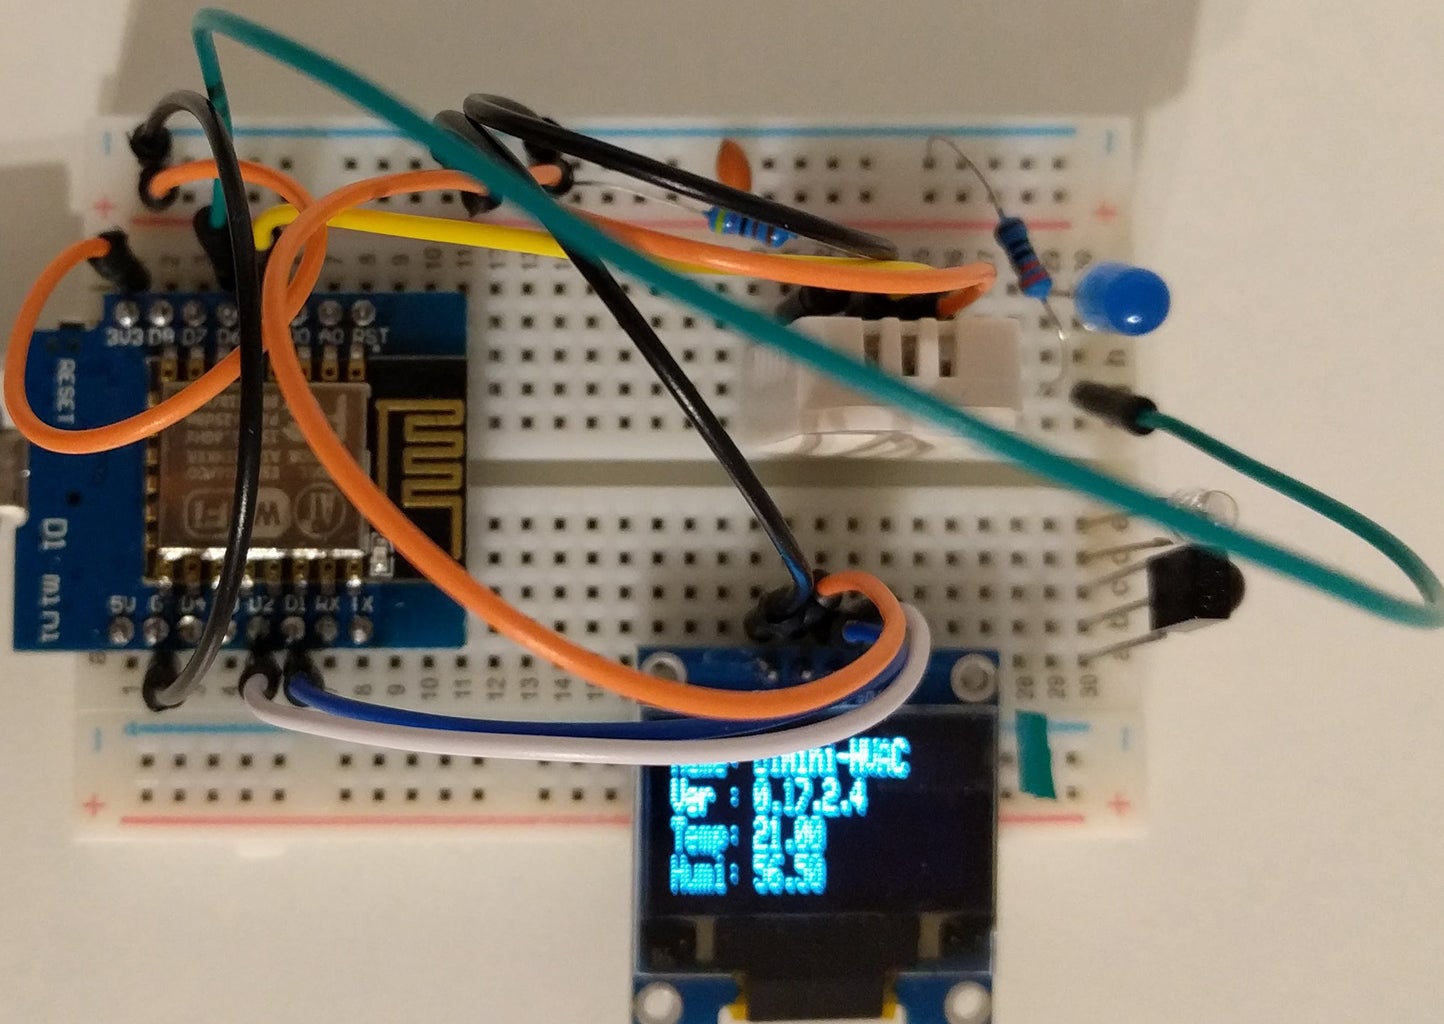
Following steps will rely on Wemos D1 Mini (or cheaper clones :)). These micro controllers are based on a ESP-8266 modules. This bundles on a single small board (34.2mm * 25.6mm) : WIFI, CPU, RAM, Flash, Digital pins and an analog pin in a 10 gr package. If you need more flash space, check Wemos D1 Mini Pro. You can buy shields for it to add relays, DHT22, button, OLED screen... One of them is the battery shield which allows the device to run completely wireless.
Having a few mini solderless breadboards and jumper wires will help prototype your future proof home. If you want custom cases for your devices, knowledge about 3D design and access to a 3D printer will increase your geekness level even further. But what could be home automation if you don't get some sensors, LEDs, resistors, capacitors and so on?
I've included my "office device" in the picture, it's a simple breadboard + D1 Mini + DHT22 + OLED screen. The LED and IR stuff are currently unused.
Software part
As the ESP-8266 is a pretty common chip, you'll find plenty of sketches for it. I'll just be lazy and use the excellent Homie for ESP-8266 software from Marvin Roger. However this instructable is not a guide to Homie.
Step 11: Devices Enclosure


Enclosures are about what you would expect. I've already mentioned things like breadboard, cardboard (like my Garage Opener alpha model), up-cycled boxes (my Garage Opener in a screw box), project boxes or 3D printer enclosures. As usual the limit is your imagination.
Keep in mind you will have to fit in the electronics you plan to deploy. No matter how bigger that can be, smaller means a no go.
If you monitor environmental items like temperature or light, make sure to position it wisely. Putting a sensor in plain sun is probably what you want to prevent at (nearly) any cost. Placing a PIR sensor is the same story, make sure the range is fine and that it covers whatever you expect it to.
Below assumptions are based on a standalone, battery powered, temperature / humidity monitor.
A typical device will have to bundle:
- A microcontroller, for our examples that's a D1 Mini, size : 34.2mm * 25.6mm
- Between 0 and many sensors, let's take a DHT22 : 27mm x 59mm x 13.5mm
- Power supply, the D1 Mini requires 5V, using a Battery Shield looks like a plan : 34.2mm * 25.6mm
- Battery pack, for the battery shield, we'll have a look at a 3.7v Lithium battery pack : 40mm * 25mm * 6mm
- Some space for wires, switches, LEDs... Just grab a few assortments from AliExpress (LEDs, jumper wires, resistors).
Again, just chose the way you feel comfortable with.
Note to myself : Time to learn some 3D design :-(
Step 12: Final Words

When time came to write this final chapter I was wondering "What has been achieved?".
The answer is pretty simple and follows the topic : Save yourself some time and plan things. This will make the whole project a lot more consistent. Home automation is not as simple as buying a wireless power socket at the local store. This is so much more.
At this stage I'm still wondering what are the savings. Do we really care?
Was this instructive? Quite a lot, achievement acquired!
Please check my other instructables, I'm planning to write more practical ones. I quite liked taking time to write this one.

Participated in the
Microcontroller Contest 2017

Participated in the
Sensors Contest 2017


