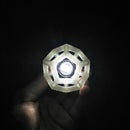
Introduction: Platonic Solid Bike Light Fixture Remix
This instructable is a remix of my previous instructable: Platonic Solid Bike Light Fixturehttps://www.instructables.com/id/How-to-make-a-Platonic-Solid-bike-light-fixture/.
The fixture created will fit directly to a Bontrager Glo bike light. They can be purchased on Bontrager's website for around $12.
In this remix, I designed the bottom edge of each platonic solid to act as the fitment disc that I made in the original Platonic Solid instructable. In order to do this though, I had to design the platonic solids from scratch in Rhino CAD, instead of using someone else's platonic solid design.
This instructable with guide you through the steps of how to design the platonic solid bike light fixtures from beginning to end.
You will need: Rhino CAD program, some design skills, and access to a 3D printer.
This specific instructable is only for a dodecahedron, but you can use these methods to make a tetrahedron, octahedron, and hexahedron- you choose!
You can also check out my other instructable for an easier way to make one if you are not as experienced in Rhino or CAD drawing.
Access to a 3D printer is easy if you dont own one, there are companies like Shapeways that will print your design for you and ship it to you!
Step 1:
First, you will need to open Rhino. Make sure the program is set to millimeters, you can change it by going to file>settings>units.
Now, we will begin designing. I'm going to highlight how to design a dodecahedron because it is relatively easy, all you need to know is the dihedral angles of the platonic solid- that is, the angle between each geometric shape that makes up the solid.
For the dodecahedron, the dihedral angle is 116 degrees and 34 minutes.
First, we'll need to make a pentagon that we can copy and angle in relation to itself to begin forming the solid.
To create the pentagon, click on "Polygon: EDGE" and change the number of sides for the polygon to 5.
Click on the edge of the grid, and decide how long you want the edge to be. The edge distance doesn't matter because we'll change the size later.
Now that you have your first pentagon made, we're going to rotate it.
Type "Rotate3D" and press enter. select the polygon, then check the box that says "copy" and select the edge that you are rotate on, in order for it to rotate correctly, click on the left point of the first edge, then the right point of the same edge, press enter, then type in the dihedral angle which is: 116d34' . press enter. Now that you have already done this once, repeat it for each of the edges of the base pentagon, then move to the subsequent edges to create a closed form.
Step 2:
Now that you have made the frame of the dodecahedron, we need to delete the duplicate curves that were made during the formation of the solid. To do this, highlight the entire form, and type in the "Explode" command. Now you'll be able to click each curve (line), if when you click it, a box comes up asking you to choose between two curves, delete one of them as long as they are in fact duplicates. Do this to all of the curves, until the whole structure is made up of singular lines, no duplicates- this is crucial for the booleaning process- if there are duplicate curves, it wont work.
Now that we have no duplicate curves, we can pipe the curves into being solid tubes that we can boolean union together.
First, we will need to create the fitment pentagon on the bottom (where the light will be fitted to the platonic solid), to make this, we have to have thicker pipes on the bottom than on the rest of the form.
Next, hold shift, and select the five curves that make up the bottom pentagon, then type the pipe command and hit enter. Check the "diameter" box, and type 4.000 in the value box and press enter.
Next, drag the highlighted curves NOT THE PIPES, away from the form, off to the side, and click in a blank area so the pentagon isnt highlighted anymore.
Now, Select all of the curves above the first pipe bottom (the rest of the dodecahedron frame) type the pipe command, hit enter, and change the value to 2.500 and hit enter. Just like the first piping, take the highlighted frame of curves and drag it out of the piped form somewhere to the side and make sure it isnt highlighted anymore.
Now we're almost halfway through.
Step 3:
Next, we have to boolean the pipes together.
Most Rhino programs have a tolerance for how many objects can be booleaned at one time, so to get around this, we'll boolean together only a few pipes at a time.
First, highlight the pipes that make up the bottom pentagon, and boolean union them together.
Next, highlight the bottom pentagon and the five pipes that emerge upwards form the five points of the pentagon and boolean union them together. For the rest of the pipes, boolean one pipe at a time to the already booleaned mass until you have booleaned the whole thing.
Step 4:
The next step is boolean differencing the size of the light from the base of the dodecahedron frame so it will fit over the light.
To do this, create a cylinder using the cylinder command, check the diameter box, type 25.4508 and press enter, when choosing the height, make it slightly taller than the bottom base pipes of the dodecahedron.
Once you've made the cylinder, drag it into the center of the dodecahedron, and highlight the cyclinder and the dodecahedron. From here, use the align command and align the two shapes by their vertical centers and press enter.
The cylinder will be in the center of the dodecahedron, so use the front view and drag it down to the center of the dodecahedron base, be careful and be sure to not move the cylinder left or right, just straight down.
Once the cylinder is aligned with the center of the base of the dodecahedron, click on the boolean union tool icon and choose boolean difference, select the dodecahedron (the form that you will boolean the cylinder out of) and press enter, then select the cylinder and press enter, the shape of the cylinder will now be cut out of the dodecahedron.
We're close to being finished!
Step 5:
Now we have to create the holes that the screws and nuts will fit into.
To do this, we neet to first create a cylinder.
Type the cylinder command, press enter, and enter 2.34 for the diameter, press enter.
Make the length of the tube long enough to go through one pipe of the base pipe of the dodecahedron.
Next, highlight the cyclinder and rotate it 90 degrees using the rotate command.
using the front view, drag it over to the base of the dodecahedron and position the cylinder so it intersects the front base pipe at the meeting of the quadrant lines (where they make a cross). it doesnt have to be perfectly positioned, but try to get it as close to perfect as possible, refer to my pictures, they'll help with this step.
Next, type in the Arraypolar command, and array the bolt cylinder around the center point of the base of the dodecahedron, type 5 in the number of arrays you want, so there is a bolt hole for each side.
once you've arrayed them, boolean difference the cylinders from the base of the dodecahedron, and now you have your bolt holes!
Now we have to make the hexagon that will be the nut catch.
To do this, click on the polygon tool icon, and type 6 in the number of edges box, and check the "edge" box. Next, choose the point at which to start the hexagon type in the length the edges should be, which is 3.36, then press enter.
Next, we need to extrude the hexagon to the depth of the nut. type "extrudecrv" in the command box and press enter, highlight the hexagon and press enter, then type 2.47 in the value box an press enter.
Now that you have your nut catch hexagon, rotate it 90 degrees, and drag it to the interior of the base of the light fixture.
Drag it so that it is centered with the holes for the bolts, and so that the hexagon intersects the base of the dodecahedron enough to where there is only a small sliver protruding into the interior space where the light will go.
Now, polar array the hexagon just like you did with the bolt cylinder so that now you have a bolt and nut catch like you'll see in the pictures I have provided.
Step 6:
You're basically finished now! All you have to do is save the file, then export it as a .stl file. From there, you can send it to a 3D printing company or print it yourself if you have a 3D printer!


