

Introduction: Play Custom Melodies on Arduino


I was tinkering with my Alarm Clock/ Timer Shield, and I decided to make a custom alarm melody for it to play. I was able to work out this method of reading sheet music and making Arduino code and I think it may help other non-musicians do the same. I am really not a musician at all, so please excuse any incorrect terminology.
The Arduino site has a great tutorial showing how to create music with a speaker attached to Arduino. Of all the tutorials I have found, this one on the Arduino site is the best method to make the Arduino play music. I did find one issue with lack of rests between notes so I made a slight change to the pitches.h header they posted to allow for better rests.
Step 1: Select Your Music

A lot of songs have already been coded for Arduino, if you look around long enough, you might find other people have already done the work for you. I know you can find a lot of Christmas songs around and all the easy songs like Twinkle, Twinkle Little Star. If you can't find the song you want, find it in sheet music and you can convert it yourself.
In this case, I wanted the Super Mario Bros. theme song to play through the Arduino. On a few sites I saw people talking about it, or posting links to things that didn't work, so I decided to make my own.
Step 2: Add the Speaker

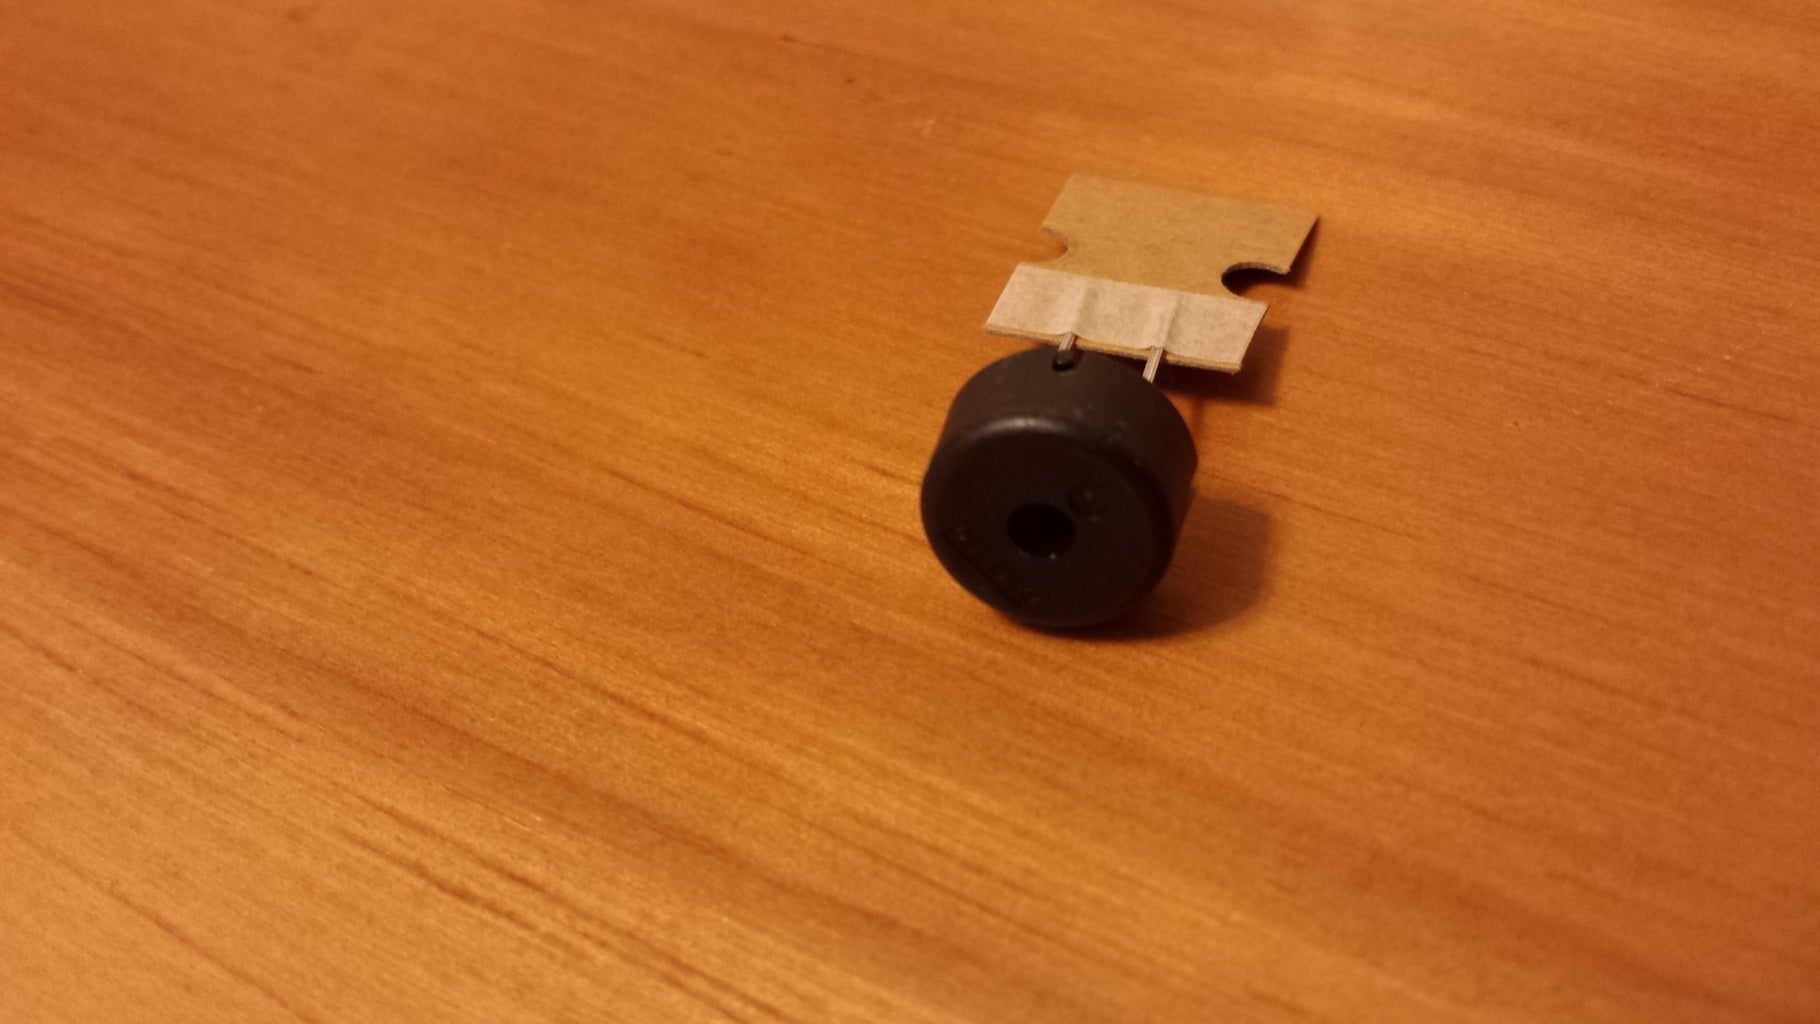

Adding the speaker to Arduino is the easy part. According to this guide, you should add a 100 ohm resistor, but I have read other places that you don't need it. Just connect the negative pin on the speaker to ground and the positive speaker pin to any of the PWM pins on your Arduino. For an Arduino Uno, these are 3, 5, 6, 9, 10, and 11.
Step 3: Test the Music


I haven't read music since recorder class about 25 years ago, so I am just a little rusty. This site has a really good tutorial on reading music. I brushed up on half and quarter note and rest symbols so I could read the sheet music.
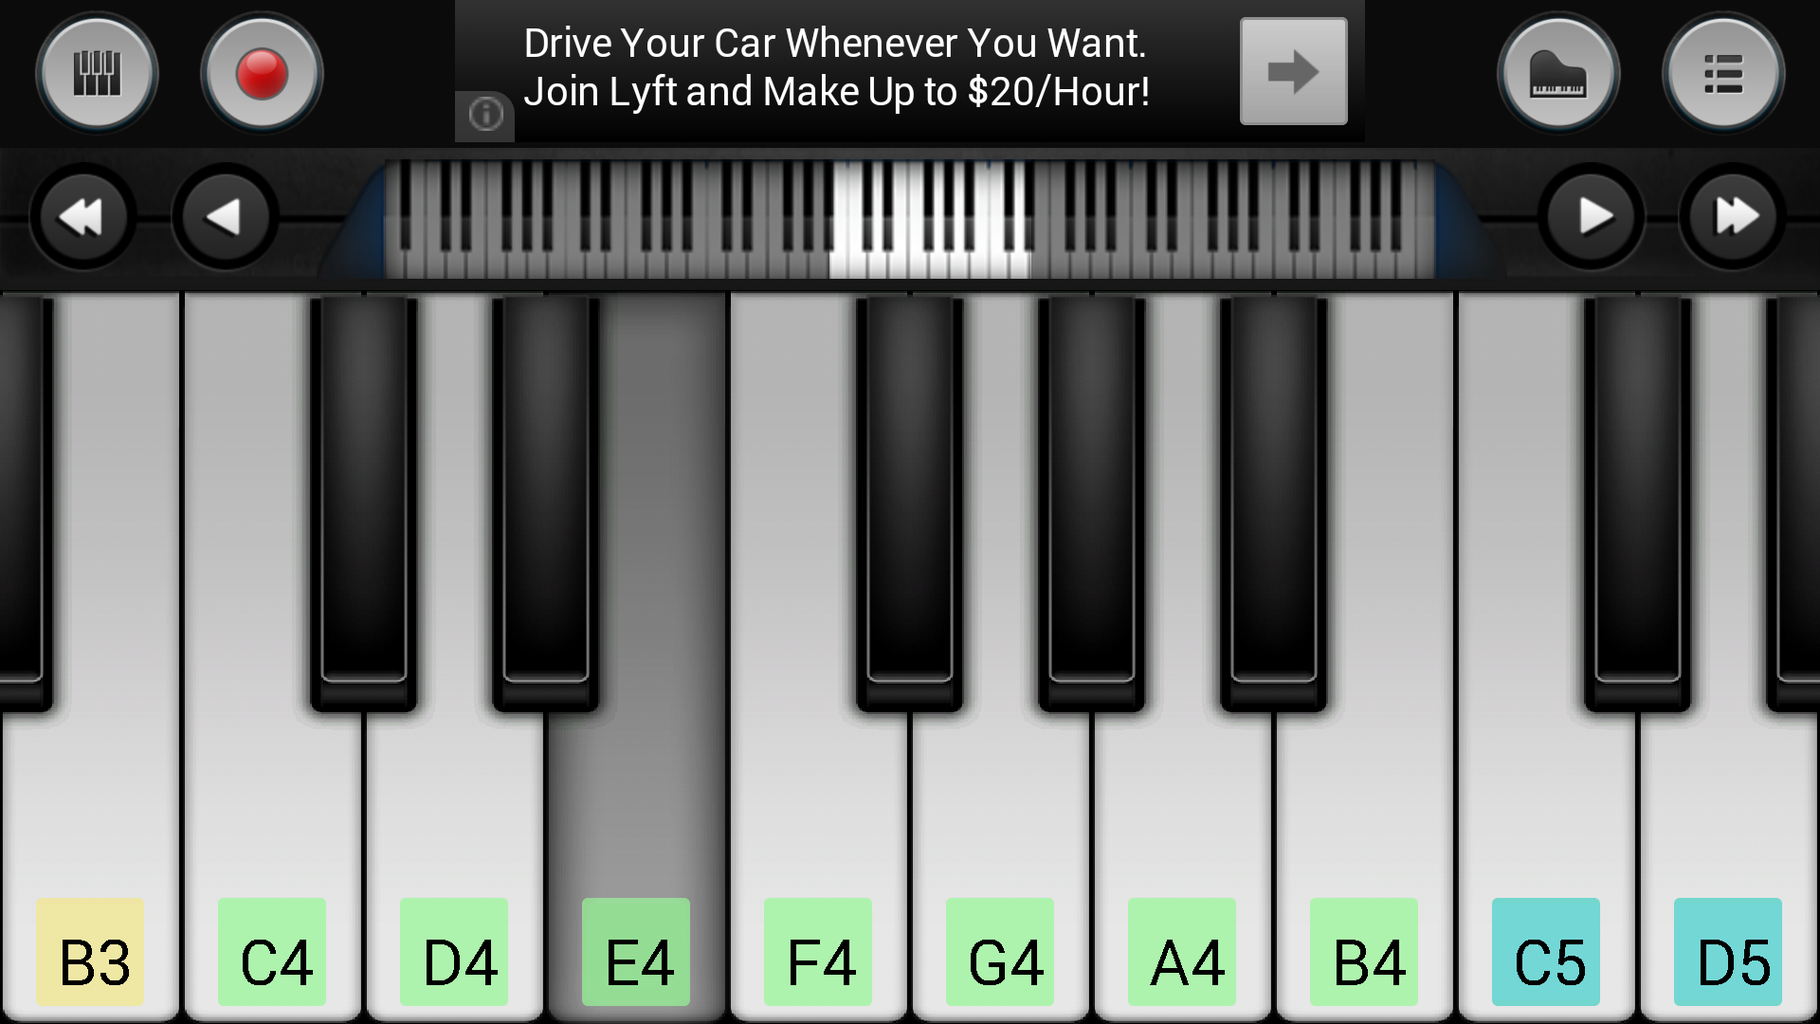
I found a site that has a free virtual piano that you can play. I also downloaded this free Android app on my phone that works really well and freed up my computer for looking at sheet music and the music reading helpers. The app shows the key names (C3, B4, etc) right on the keys. These will relate to the notes in the Arduino pitches header file.
I read a couple measures and played those notes on the piano to see if it sounded right. I would test a few measures, add them to my script and test it on the Arduino before moving on.
Keep in mind the "FACE" mnemonic device, when you are reading the sheet music. Basically, the spaces between the lines on the staff represent the F, A, C, and E notes and the lines represent the E, G, B, D, and F notes. Speed in reading the music doesn't matter much when you are only playing a measure at a time.
Again, I'm not a musician, so the main thing that tripped me up was that the octaves change on the piano keys between the B and C keys, not the G and A keys as I thought. If you don't keep this in mind, you will probably get some strange notes.
Step 4: Arduino Code


This tutorial on the Arduino site explains how to play every note you would ever want to play in every octave. Unfortunately, it doesn't deal with rests very well, so you are forced to draw out your notes to make the song sound right (again, I am not a musician, so please excuse my terminology).
I modified the pitches.h header file with a new note definition at the top of the list:
UPDATE ** I changed this from 0 to 1 because a 0 note causes some
Arduino flavors to error out (both nodeMCU and Feather Huzzah both had trouble in my experience). A "1" will cause a little popping in the speaker, but that is better than an error.
#define REST 1
This way I can call REST like any other note, and define the length that it will play as well. I can add the REST into my song array and the sketch will play silence just like any other note.
For the music what I came up with was:
Intro
NOTE_E4, NOTE_E4, REST, NOTE_E4,
REST, NOTE_C4, NOTE_E4, REST,
NOTE_G4, REST, REST, NOTE_G3, REST<br><br>Main song
NOTE_C4, REST, REST, NOTE_G3,
REST, NOTE_E3, REST,
REST, NOTE_A3, REST, NOTE_B3,
REST, NOTE_AS3, NOTE_A3, REST,

NOTE_G3, NOTE_E4, NOTE_G4,
NOTE_A4, REST, NOTE_F4, NOTE_G4,
REST, NOTE_E4, REST, NOTE_C4,
NOTE_D4, NOTE_B3, REST
Attachments

Step 5: Bonus Level!

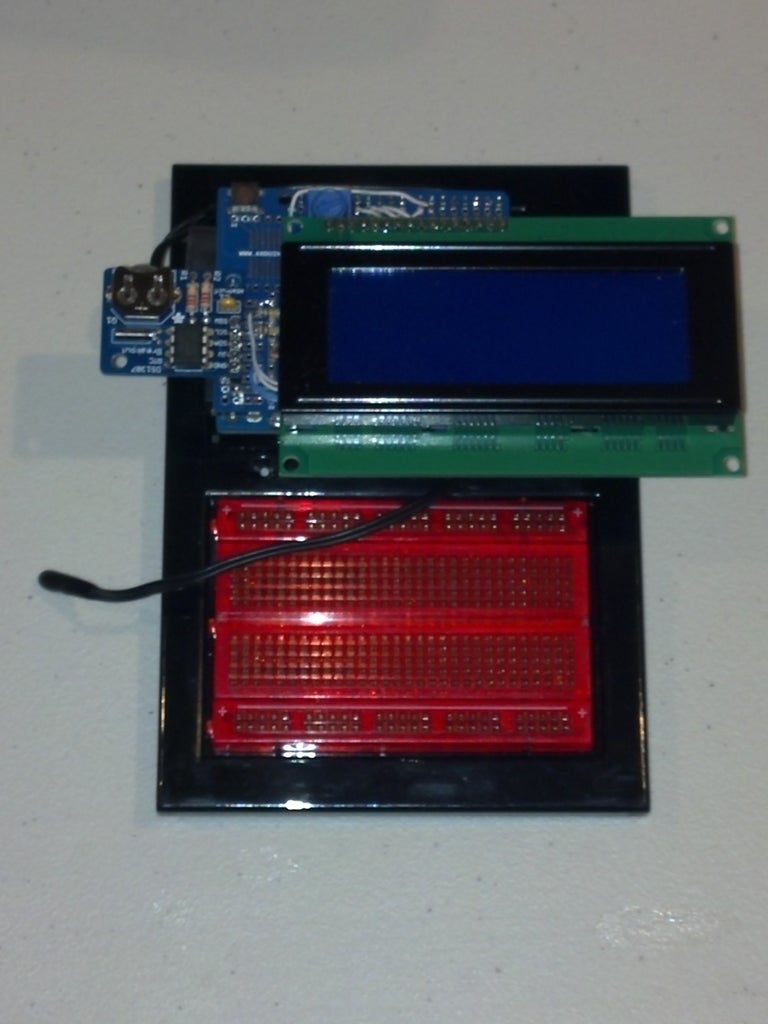
Since I was writing this to go on my Time and Temp shield, I couldn't let that LCD screen go to waste, so I decided to add a little animation to play along with the song. I made a new music note icon using this site and added a little sine wave animation code to the Mario theme code. I tried making a Mario shaped icon, but there just isn't enough detail to make it look like anything, so a music note was the best I could do. Use the text file above with the modified pitches.h file from the previous step. If you have an LCD screen it should work, although you may need to change the dimensions of the screen in the setup function.
Attachments

Participated in the
Epilog Challenge VI


