

Introduction: Pocket-Sized CHDK USB Camera Shutter Remote


This Instructable shows you how to make a pocket-sized CHDK USB remote for your Canon camera inside of an Altoids Smalls tin (the new kind with the hinged lid). I kept it pretty simple as far as the circuit goes. It's just batteries connected to a NO push button switch and a jack into which a modified USB cable is inserted. There are no resistors, capacitors, or voltage regulators. It's simplicity at its finest. This remote has a detachable cable as well, that allows a bit of multitasking, as the cable can be used to charge a Motorola phone (or any other device that charges from a 5v power source through mini USB). This I will explain in a bit. In the meantime, let's get a little background.
If you have a Canon camera you should--if you haven't already--check out the CHDK (Canon Hackers Development Kit). The CHDK is a software package that is installed on an SD memory card and runs on your camera in conjunction with your existing firmware to allow a whole slew of features heretofore unavailable with the stock camera. In other words, your camera can do a lot more than Canon is willing to tell you or support with their software, e.g. greater control of photos and video settings, ability to record RAW files, adding USB remote shutter trigger(the subject of this Instructable), and more.
It does all this without voiding any warranties. There are no firmware or hardware hacks. It's all done with software and can be turned on and off in a matter of seconds. It's free, open source and allows the ability to use existing as well as write your own scripts to give even more functionality. Best of all, it gave my Canon A590 IS an option for remote shutter control. Alas, this only works for Canon cameras. If you use a Kodak, you're out of luck on this particular site.
Note: This Instructable is in conjunction with two others recently posted by the Author. They are pieces of this project made into their own Instructables. They combine like Voltron to form the end result of this one. There may be a bit of overlap in these Instructables. Just skip what you have already read. Links to these other Instructables are found on the relevant steps.
Step 1: We Have Got to Get It Together


Okay, let's get some stuff together.
Go get the following:
Altoids Smalls container (the new one with the hinged lid)
Energizer "Energi To Go" cell phone charger with extra adapter
Motorola wall charger
3/32" mono panel-mount jack
NO SPST momentary push switch
N type battery holder
A23 Energizer battery
hook up wire
solder
heat shrink tubing
various tools
First of all, thanks to Kipkay for his Instructable ([https://www.instructables.com/id/12-Volt-Battery-Hack!-You_ll-be-Surprised.../ 12 volt battery hack]) about disassembling A23 12v batteries to harvest the coin cells within. I powered my circuit off three of these coin cells and after paying $1.88 (still the same price as his Instructable shows) for a 2 pack of A23s, I have 13 cells left to power other projects or to back up this one. Your voltage needs may vary, though. I'm told some cameras require less voltage, but my camera requires more than 3v to trigger the remote (4.5v works great). Either way, this is a ridiculously cheap way to power some really small circuits. Good, one, Kipkay!
[For some reason the link above to Kipkay's Instructable "12 Volt Battery Hack!" will not embed. Can anyone tell me why? I've run into this with specific links in the past. Very frustrating.]
Meow, to simply create a USB remote to trigger the shutter of a CHDK modded camera you really don't need all of this stuff. However, I like to have things that can pull double duty if need be. I'll explain:
Multitasking: Using the same cable to charge my phone in the field.
I picked up an Energizer "Energi To Go" charger at a store that was going out of business and had everything on clearance. If I were really cool I would have made a minty boost, but the unit was cheap and here right now--two very powerful aspects of my decision-making process. And besides, I've never been cool before and I ain't gonna start now! Anyway, it came with an adapter to charge my Palm, as well as another type of phone. I would have had to buy another whole unit just for the plug to charge my Motorola phone.
A special circuit or software is required to force a Motorola phone into charge mode (at least for mine). I decided to use the cord from a Motorola charger I got at Goodwill to easily solve that problem. I already had a spare charger that I use in a different part of the house, but the one at Goodwill was only 99 cents, so I picked it up anyway to hack up for this project. If you don't already have one or can't find one at a thrift store, the link above has them for 79 cents (+ a few bucks shipping). These things are everywhere, though. You should be able to get your hands on one if you don't have an extra one laying around in your closet. But I digress. . . Anyway, the proprietary 'Moto' wall charger has the circuit built into the mini USB plug and therefore solves the problem of getting your phone to actually charge. Here and here are pages including more info about USB pinouts for motorola chargers if you want to make your own. Using a modified Energi To Go adapter will allow my new cable will work for triggering my camera shutter as well as charging my cell phone. Yippee!
In order to make my cable compatible with my camera remote, I am adding a 3/32" jack to the remote. I am then splicing one of the unused Energi To Go adapters to The USB cable (discussed later) The cable can then be used for my camera remote as well as to charge my cell phone in the field. I can't tell you how many times I've forgotten to put my phone on the charger before a day out. This allows me to be prepared without adding too many items to my pockets.
Step 2: Drill It Out

Carefully mark and drill the holes for the switch and jack. I use drill bits with sharp points at the tip for metal because they tend not to slide around before they dig in. Keep the holes low in the case to allow room for the lid to close all the way. A later picture will illustrate this. If your switch is bigger than mine or you accidentally drill a hole too high, just use a circular file or perhaps a dremel tool and file the lid a bit until it closes. Also, it's a good idea to drill your holes just a bit smaller than they need to be and file them the rest of the way for precision. At least, this works well for me. Different materials call for different techniques as do different people. Do what works best for you.
Step 3: Battery Holder Mod


In order to hold some coin cell batteries I got out of an A23 12v battery, I removed a bit of an N type battery holder and glued it back together a little smaller. Check out my DIY Coin Cell Holder Instructable for the details.
Step 4: Stop, Solder Time!


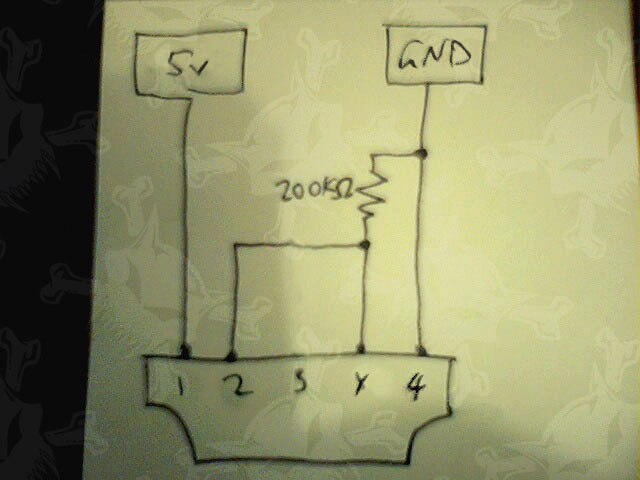
I began building the circuit by soldering a wire in between the 3/32" jack and the momentary switch. After the glue on my modified battery holder had dried enough to work with, and observing polarity, I soldered its wires to the unused terminals of the jack and switch to complete the circuit. I use heat shrink tubing to cover all solder joints.
A multimeter is a must-have when working with electronics. Use it to help you verify polarity before you solder. I've never done it, but I imagine it's no fun to brick your camera!
Step 5: Mount Up


After mounting the jack and switch in their respective holes I used my Dremel tool with a sanding tube on it to roughen up the part of the case to which the battery holder will be glued. If you don't have a Dremel tool, just use some sandpaper. I used superglue to attach the holder to the case.
Step 6: Admire Your Handiwork


The finished remote. Now on to the cable.
Step 7: Make the Cable


To make the cable, I cut the USB end off a Motorola wall charger and spliced that to the 3/32" plug end of an Energi To Go adapter. This allows me to use the cable for the camera shutter remote as well as charging my Motorola phone. Check out my Modify an Energizer Energi To Go Adapter to Charge Your Motorola Phone Instructable for the details.
Step 8: The Finished Product


Now you know how to make a CHDK camera remote with a cable that can pull double duty. This plan can be modified, though. Your needs may be different than mine. Good luck on your own projects and let me know if I can help.
Cheers!
-pdub
p.s. I would appreciate any votes for me toward the Pocket-Sized Contest. Thanks.
Participated in the
Pocket-Sized Contest


