

Introduction: Program Your Arduino With an Android Device!


Hi,
in this Instructable I want to show you, how you can program your Arduino with your Android device. It is very simple and cheap. Also it allows us to program our Arduino where ever we want, this is usefull for permanently installed Arduino boards, like in light controllers...
So lets get started! :)
Step 1: Materials and Tools
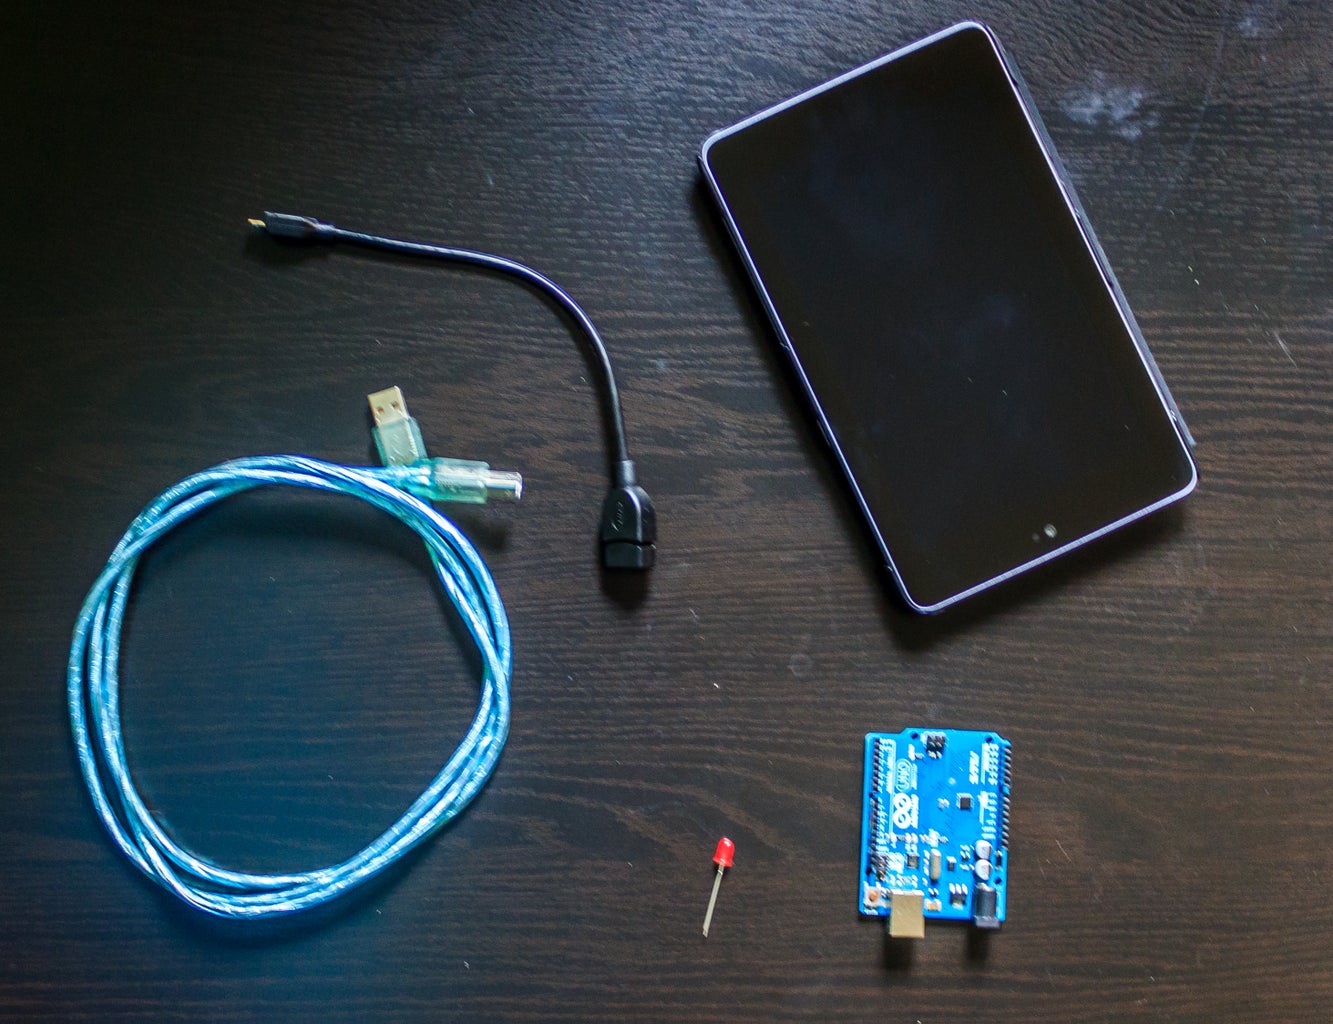
Materials:
A USB-A to USB-B cable
A USB-Host cable (OTG cable)
An Arduino
1 LED (for testing)
A Android device with Android 4.0.0+ (or with host aviability)
Software:
ArduinoDroid or
ArduinoCommander from the Google Play store
Step 2: The USB-Host Cable

Such a USB-Host cable is basically just a USB cable, but just with a few changed resistors in the mikro USB plug. The internal resistors let the Android device activate the USB-Host mode, in this mode you can also use USB-Sticks or other usb applications on the device. That is very useful, now you could plug a usb-printer in.
The problem is now, that every USB device which you plug in, will now run on the energy of your device, what really can bring the battery down.
Step 3: Connections

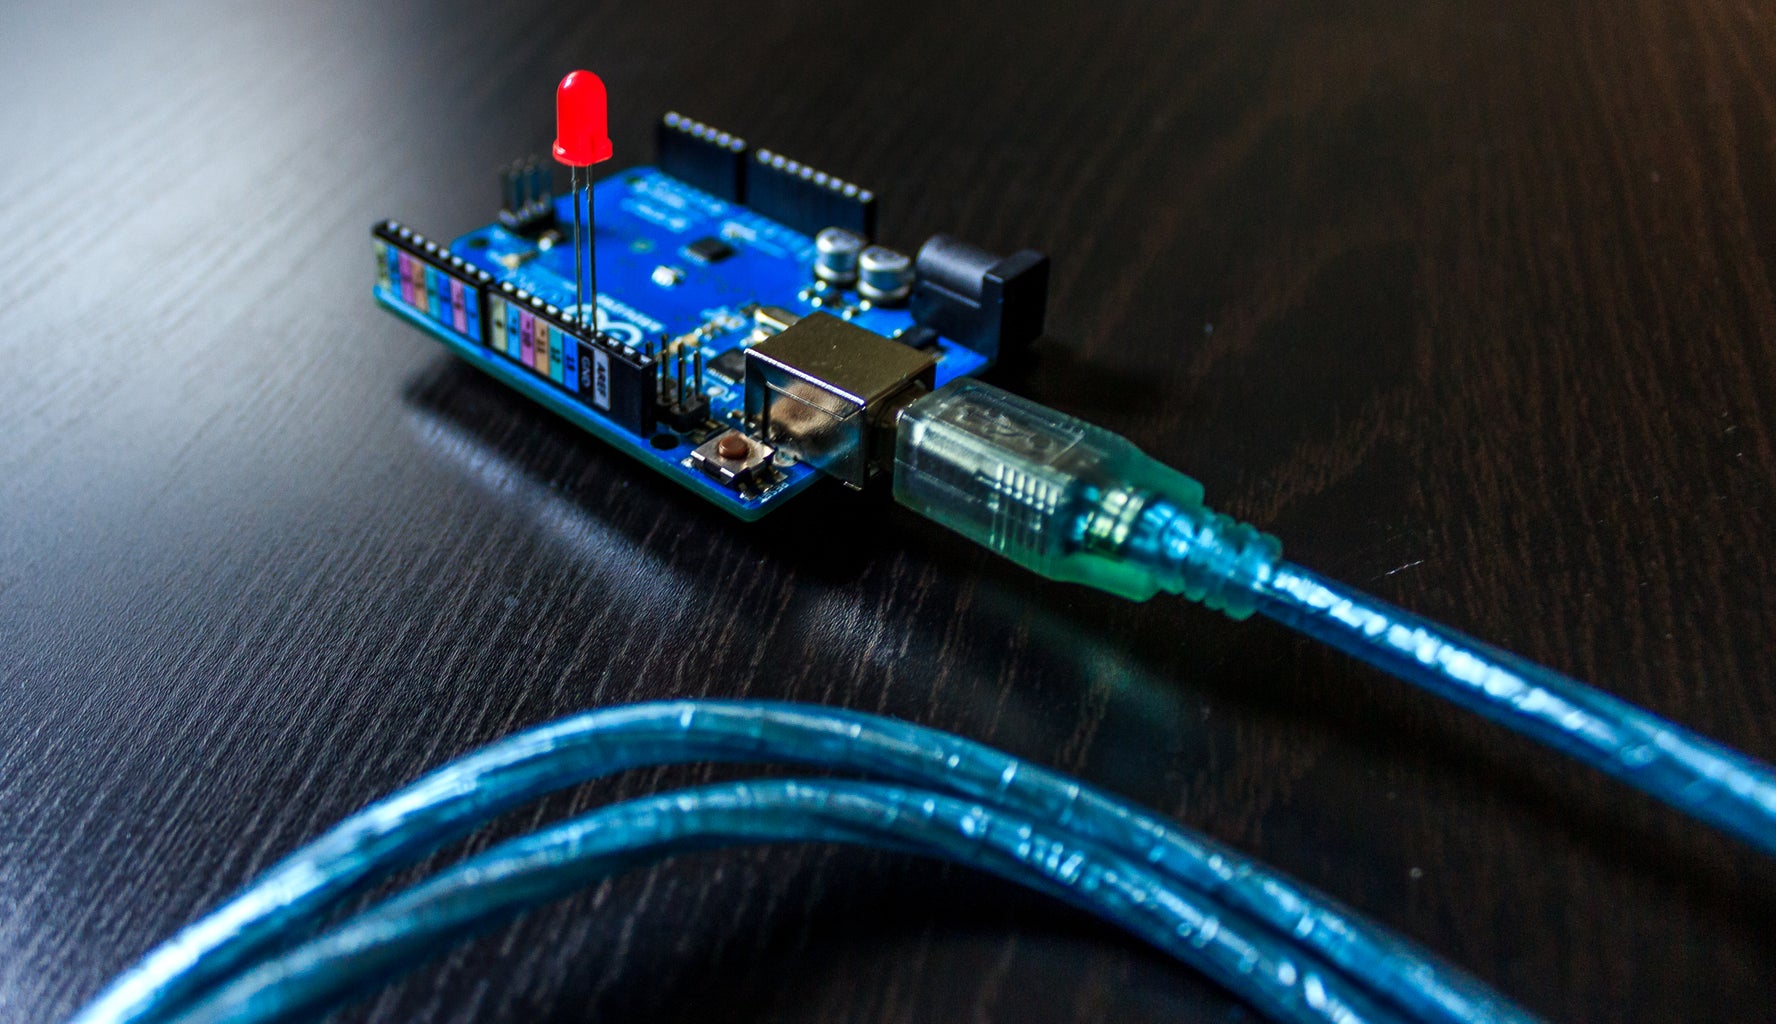

This step is very simple and doesn´t require much text. Just plug the USB-A to USB-B cable into the female USB of the Host cable. Then plug the USB-B plug into the Arduino and the Micro USB into the Android device.
Step 4: Arduino Power Up
Now it should look like the connections on the picture. Also your Arduino should now power up and load the last code you uploaded. On my Arduino was the Blink sketch. If it doesn´t power up, check connections.
Step 5: The Apps

Now your Arduino is ready to get coded, but your Android device isnt...
Lets change that!
Currently there are 2 apps which allow us to work with our Arduino via the Host mode.
To get them we have to go to the Play Store, then type into the search bar "Arduino". Now tap on "Apps", now there should be only apps. We want the apps "ArduinoDroid" and "ArduinoCommander". Install them and launch "ArduinoDroid", it has to update the IDE, that will need some time. "ArduinoCommander" should be ready promptly.
Note: We don't need both apps, i just want to show you both! :)
Step 6: ArduinoCommander by Anton Smirnov

Okay, the first app I want to show you is "ArduinoCommander". It is by Anton Smirnov and is for Android 2.2 or higher.
https://play.google.com/store/apps/details?id=name...
This app is for working with the Arduino on an Android device, you can change pins easy (directly set pins high or low), upload sketches or read analog pins with a oscilloscope mode.
The app is easy to understand, even if the controls are unusual. It finds the Arduino automatically and doesn't crash.
But sadly some of the functions did not work when i tried to use them, hopefully that get fixed. Uploading a sketch worked very good!
So I would give this app 4.0 out of 5 stars :)
I want to show you short how you can connect to the Arduino:
Step 7: Step 1

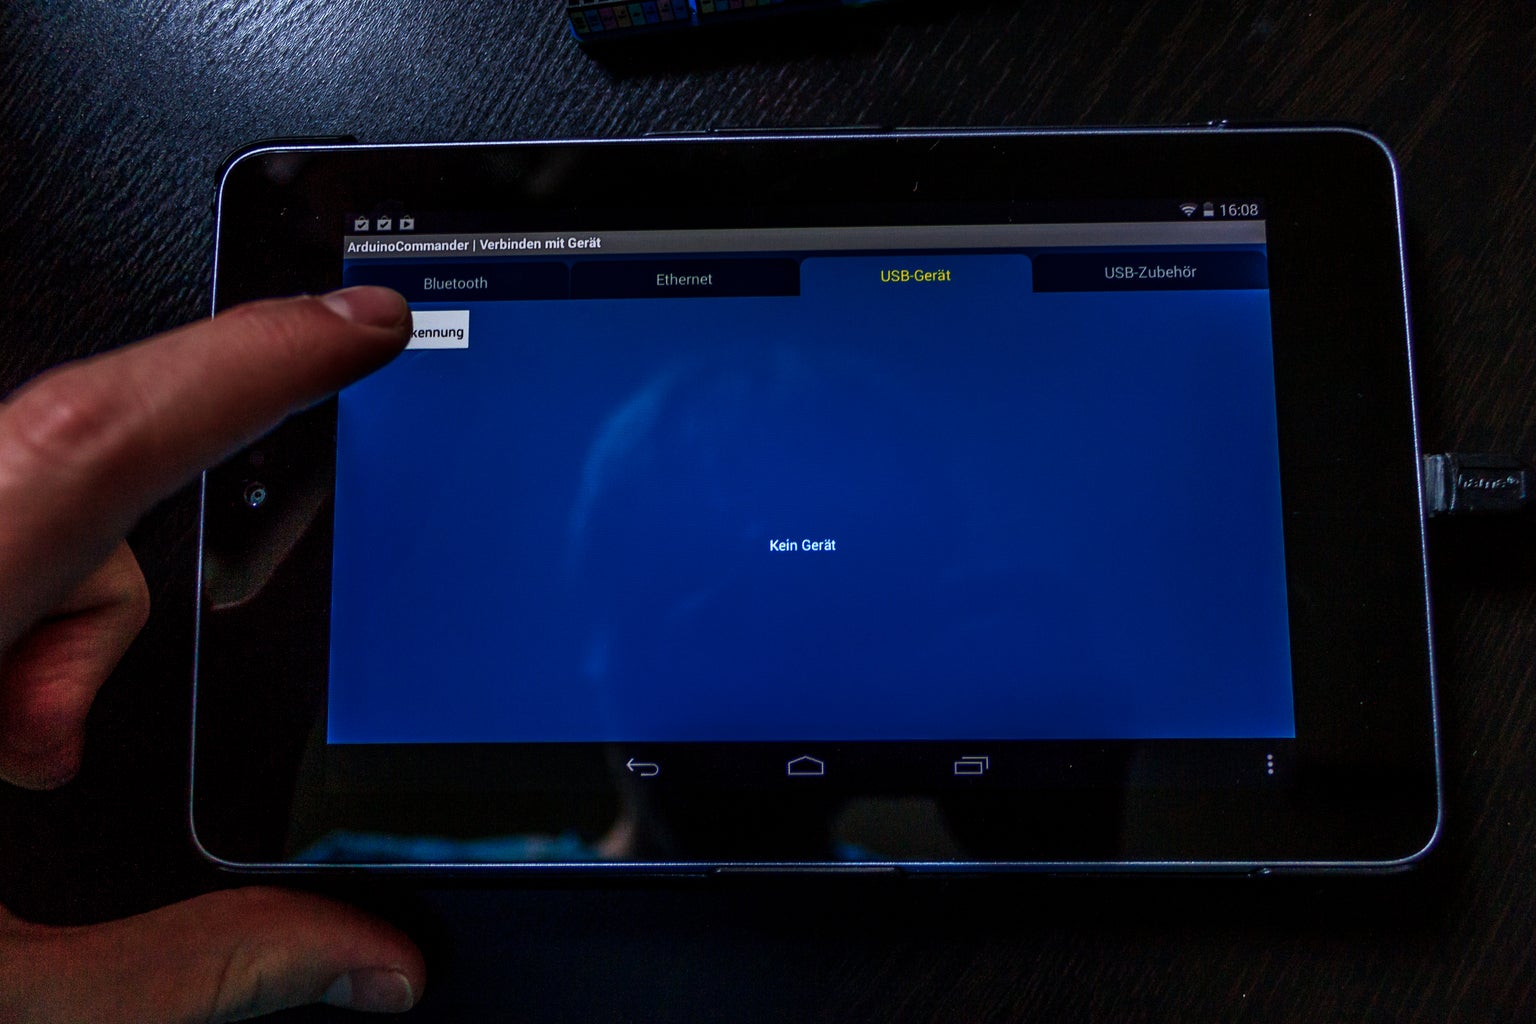
First we have to start the app, now a blue window with 4 options should appear. As we want to connect via USB we tap on "USB-Device".
Other options are:
Ethernet
Bluetooth
USB-extras
Step 8: Step 2

Now tap on "Autodetect", the Android device will now scan for Arduino(s) and show them on the screen. We will pic our Arduino ( just tap on it ).
Step 9: Step 3
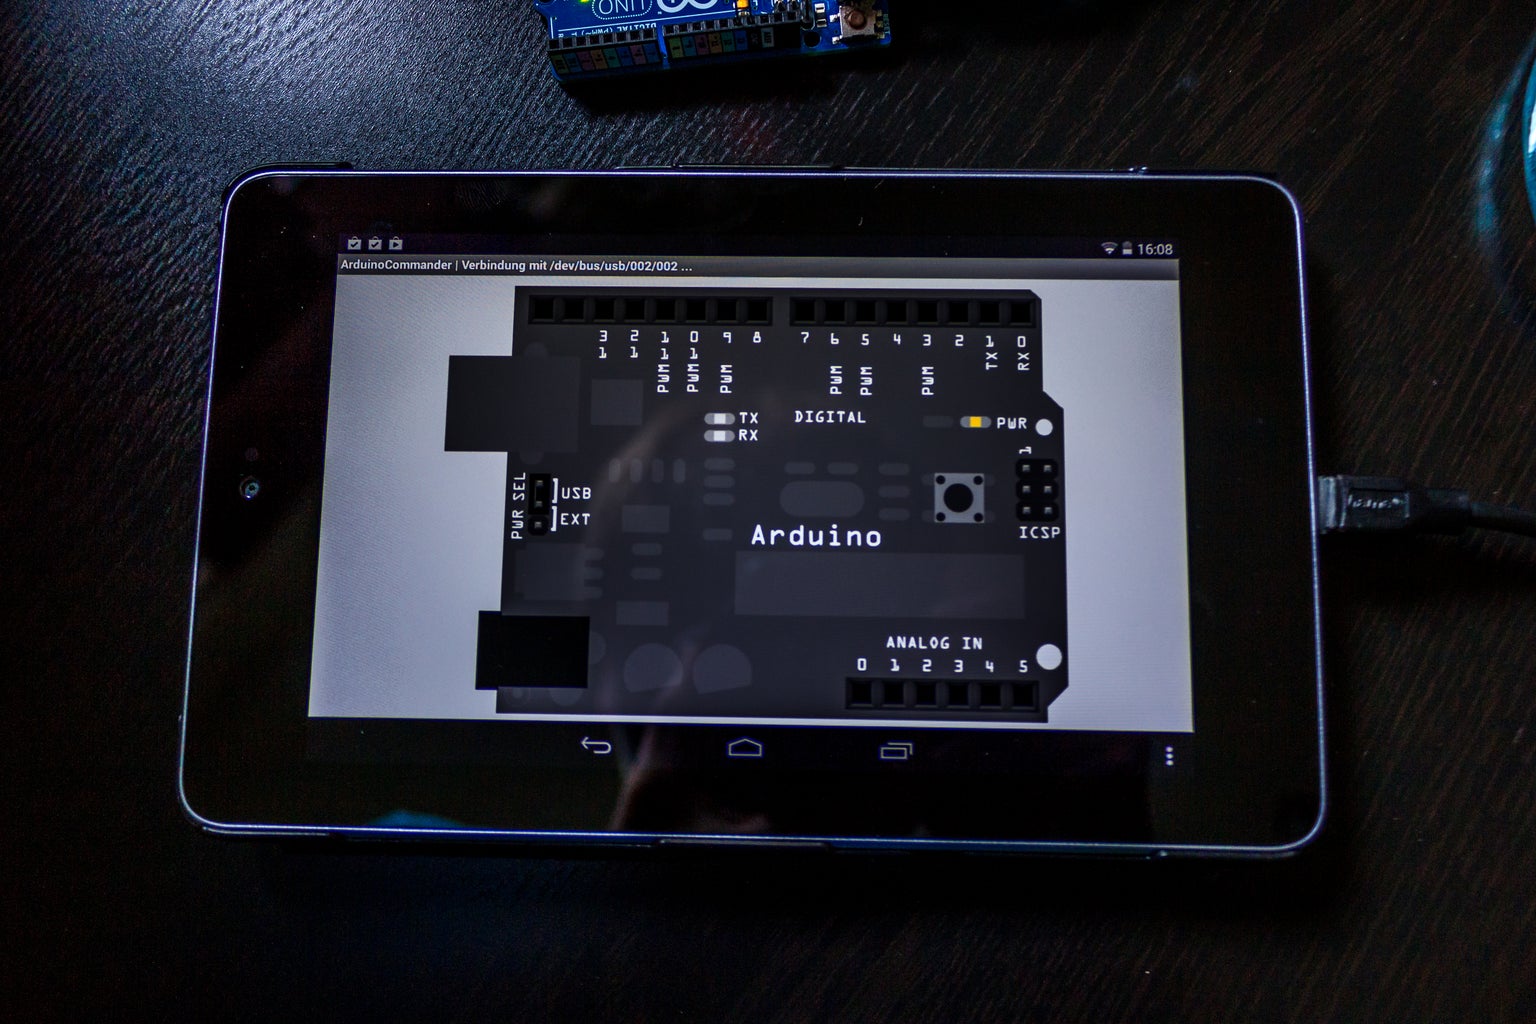
After we did that the app will now show us our Arduino as a drawn animation. Normally it is colored and you can tap the pins, to change their mode. This didnt work for me, sadly i couldnt fix it for me, maybe it works for you. when you tap in the down right corner you get to the menu, where you can upload sketches from your SD-card, what works very well.
Step 10: ArduinoDroid

Now the seccond app, which allows us to upload sketches to our Arduino. This app is called "ArduinoDroid" and is for Android 4.2.2 or higher. It is also by Anton Smirnov!
https://play.google.com/store/apps/details?id=name...
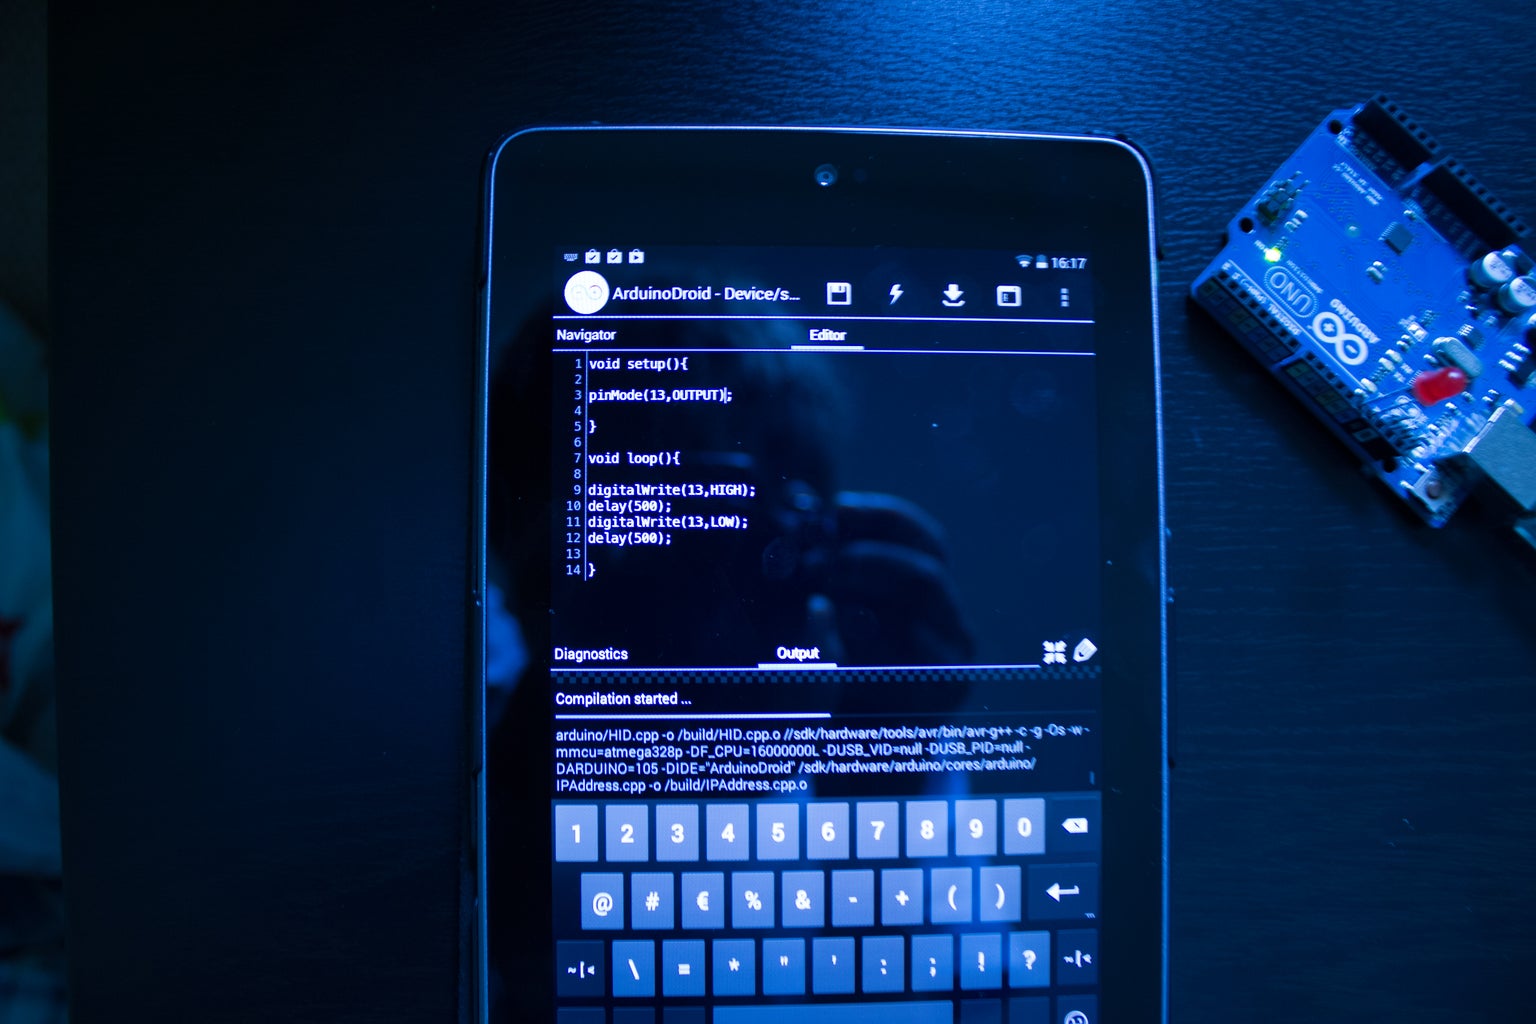
This app is an IDE, a compiler and an uploader for Arduino, it also uses the host mode to upload sketches, which you can write directly in the app.
After you wrote a code, you can compile it with the "Lightning-Button", that needs some time, but works good.
when its compiled you can press the upload button (the to the right).
The upload should take only secconds.
After that my Arduino started the new code --> It worked very good!
For testing I used the "Blink" sketch.
Why am i talking?! here is a short video of the app compiling and uploading a sketch:
Step 11: Finishing!
As you just saw, it is very easy to write, compile and upload a sketch to an Arduino with an Android device.
And here a big THANK YOU to Anton Smirnov who created the apps for Android!
https://play.google.com/store/apps/developer?id=An...
Thank you for reading!
Feel free to comment and to visit my other websites!
Best
Jana

Participated in the
Sensors Contest

Participated in the
Epilog Challenge VI

Participated in the
Summer #mikehacks Contest

Participated in the
Battery Powered Contest


