

Introduction: Rasp and Pepper Tree Knife


My grandfather is a vet, and when he found out I got into blacksmithing a while ago, he sent me a handful of farrier rasps to play around with. Naturally, my first inclination was to make knives out of them, but I did not have anything good to make the handles with. However, that changed a few months ago when my dad cut down a pepper tree at his place. Pepper trees are my favorite type of trees, so I salvaged as much of the wood as I could get, and several pieces were just the right shape to use for handles.
Now, I have a good set of pack knives I can bring on hunting and camping trips that are good for cutting and slicing small things, but also pack the weight needed to hack apart tree branches and firewood.
Step 1: Tools and Materials


All you need for this project is a large rasp and a tree branch. Ideally, you want to find a branch that is about the same diameter as the rasp you are using so the edge of the blade is flush with the handle. Fortunately, this is the perfect size for a nice, comfortable handle.
As for other tools and materials, you will need
-Grinder (with a cutting disk and a flap disk)
-Drill
-Forge and anvil
-Oil and pan (vegetable oil will work)
-Epoxy
-Polycrylic
-Propane torch
-Whetstone
-Basic safety equipment (gloves, glasses, etc.)
Step 2: Shaping the Rasp
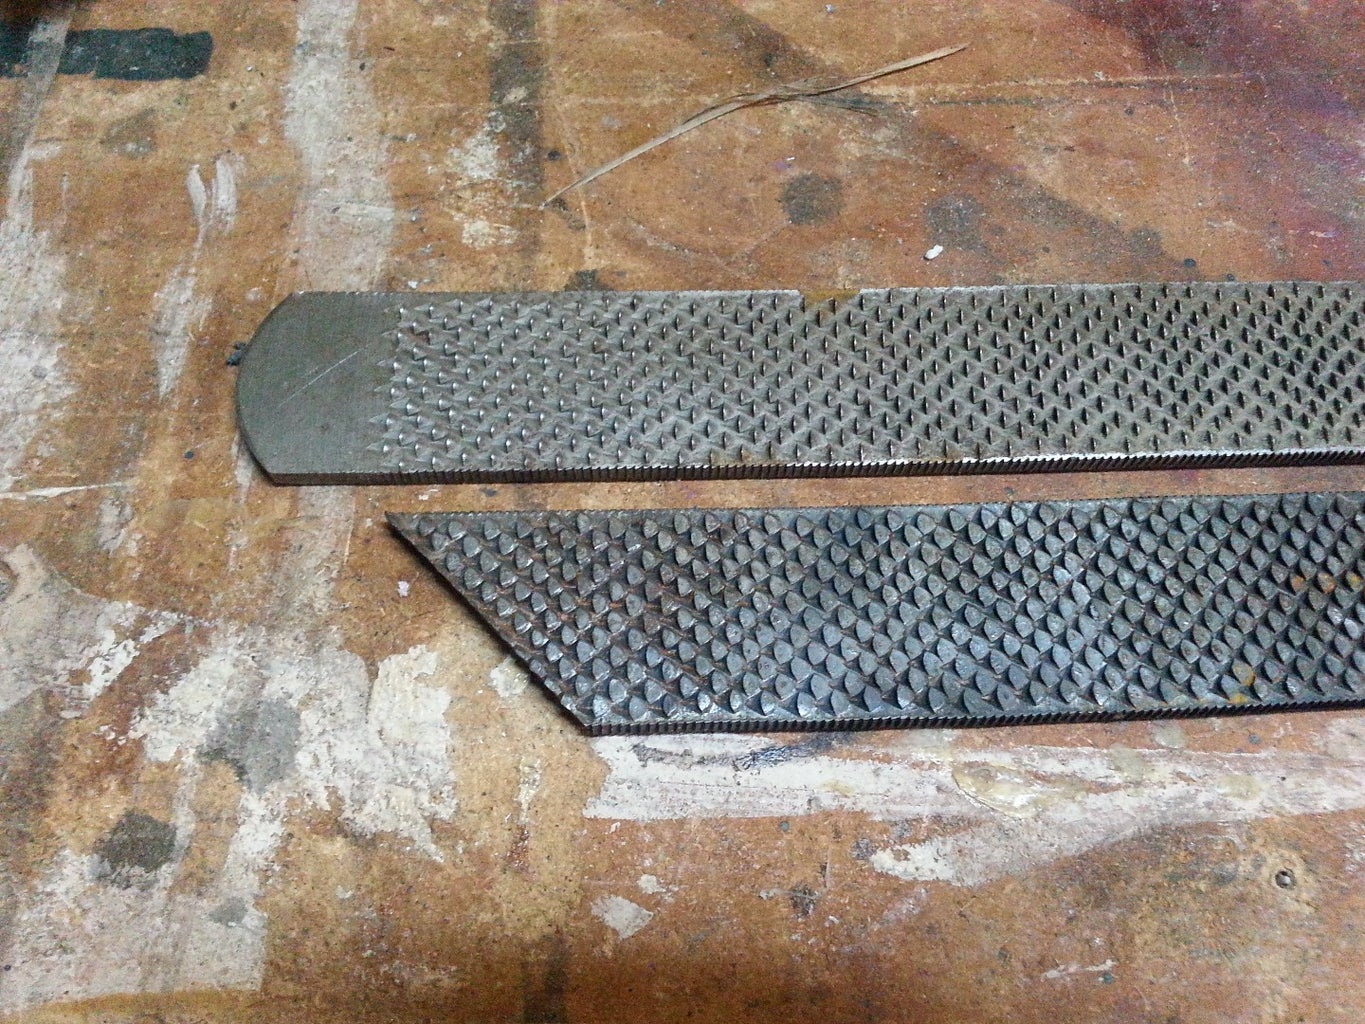


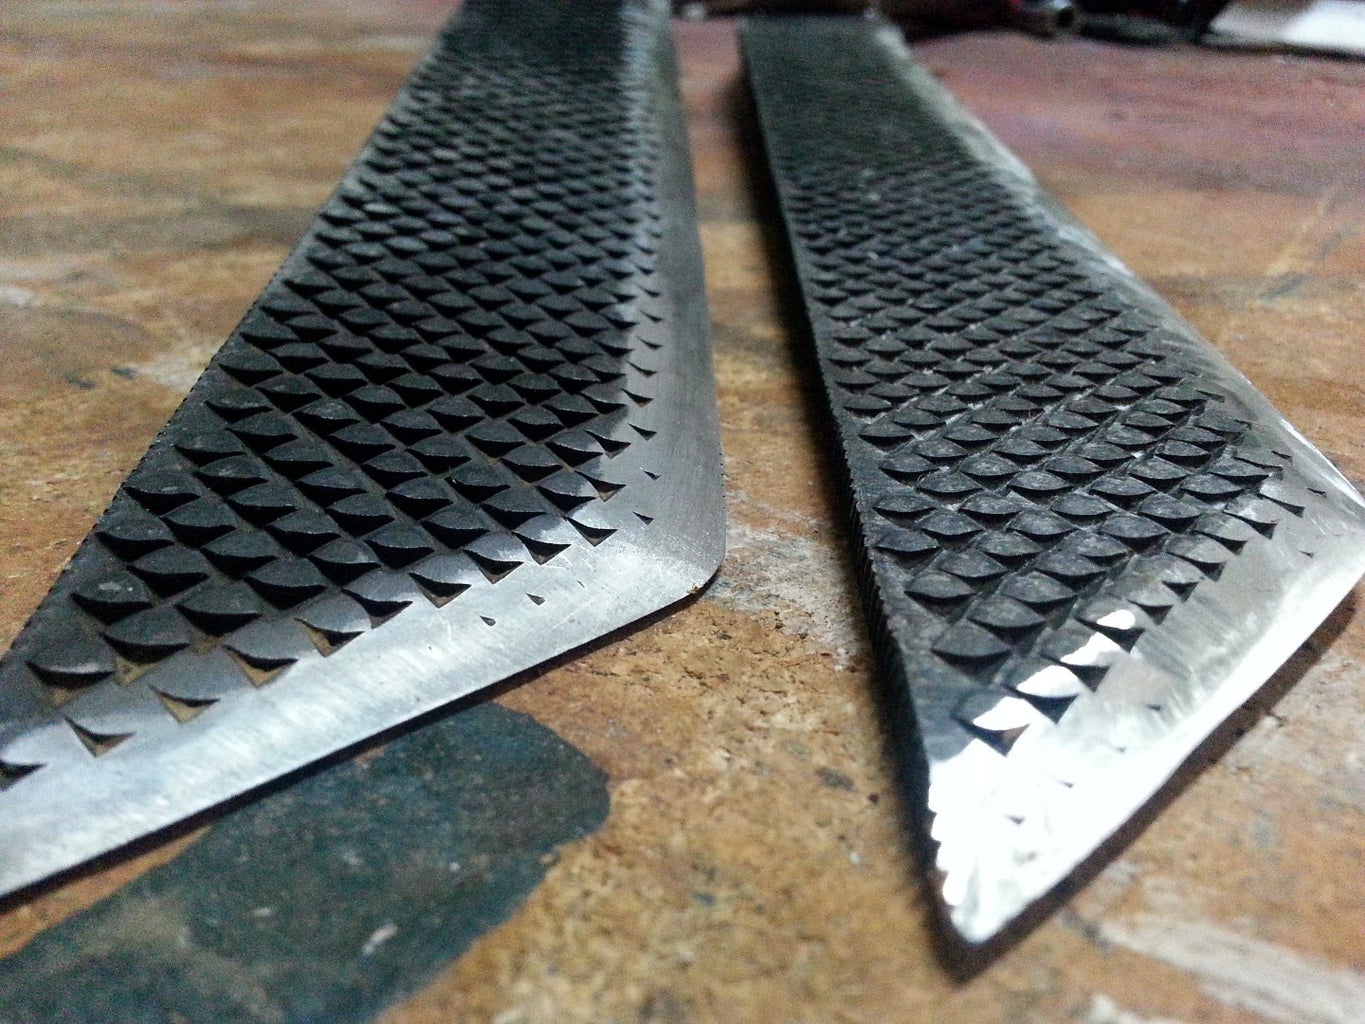
Cut a wedge off of the end of the rasp to give it a forward cutting surface. I found that a 45 degree cut gives it a very nice and somewhat aggressive look. Then, heat the entire rasp in a forge and flatten all of the little burrs. This will help prevent them from catching on absolutely everything you try to cut.
As for the edge that will become the blade, use the flap disk to create the bevel that will later be sharpened with a whetstone. The flap disk is much less aggressive than a grinding disk, but goes much faster than filing by hand. A belt grinder would be perfect for this, but an angle grinder and a flap disk are the next best thing.
For this knife, I went with about a 30 degree bevel and shaped both sides evenly.
When creating the bevel, there are two important things to consider:
1) Be gentle and patient with the bevel. Move the grinder back and forth along the blade so you do not overheat particular sections. Also, do not try to fully sharpen the knife with the flap disk at this point; that is a job for the whetstone later. Instead, sharpen it just enough to define the bevel.
2) Do you want a serrated blade? Many times, rasps have rough sides, and if you are careful, you can translate this to a serrated edge on your knife as shown in the last picture for this step.
Step 3: The Handle


Time to get the handle prepared. First, drill a hole in the center of the handle that is the same diameter as the thickness of the rasp. Using a small file or by carefully wiggling the drill bit, widen the hole towards the edge of the handle, but keep it in line with the placement of the blade. The hole should be just large enough to start sliding the tang in.
Now for the fun part. Using a propane torch, heat up the tang to a very faint cherry red glow and push the tang into the handle. This will burn away the wood and give the handle a closer fit. The tang will cool off fairly quickly, so set it aside, shake the ash out of the handle, and repeat the process until you are happy with the fit. It is important to avoid getting the tang much hotter since it will burn away too much wood. I experimented with heating the tang up to a bright orange in my forge, but when I tried pushing it into the handle, the handle just caught on fire and burned in more of a circular pattern.
Once you are happy with the way the blade and handle fit together, set the handle aside for now.
Step 4: Heat Treating and Sharpening


The process of heat treating metals is a complex process and there is much discussion on properly heat treating blades and catering the process to specific metals. However, most of that is beyond the scope intended for this project. I wanted to keep the build short and simple, so I went with a basic oil quench for hardening the blade. This gives it a sleek, black finish while hardening it enough to keep a decent edge for a while. If you want to go more in depth on hardening and tempering the blade, this would be the time to do so.
Once you are done, you can sharpen the blade. I chose to do this by hand using a whetstone.
Step 5: Getting a Handle on the Project


Epoxy the sharpened blade to the handle, making sure you are placing the blade in the right direction. I used some of the small two-part, 5 minute epoxy for this. The mount has held up on my first knife for several months of decent usage so far, and it appears to still be in excellent condition. Once the epoxy is dry, give the handle a light sanding to take away the rough edges and put on two or three coats of polycrylic. Once that is dry you are done!
Step 6: Enjoy!
Enjoy your new knife, and be careful with it!

Participated in the
Outside Contest

Participated in the
Before and After Contest

Participated in the
Metal Contest


