Raspberry Pi Owncloud (dropbox clone) by hackitbuildit
IMGP8170.JPG
What I'm going to show you is how to build a your own personal dropbox like service using a raspberry pi and some software called OwnCloud. ownCloud gives you freedom and control over your own data. It's a personal cloud which runs on your own server.

If you don't want to go through the steps for downloading and setup up the software you can download the image I have setup from here. While I have done everything I can to check this is working it should be understood that you use at your own risk. If you do download the image you can skip to step 5. 


Step 1: What you need

IMGP8154.JPG
IMGP8155.JPG
IMGP8151.JPG
IMGP8157.JPG
A Raspberry Pi
An Usb External Harddisk or a USB Drive
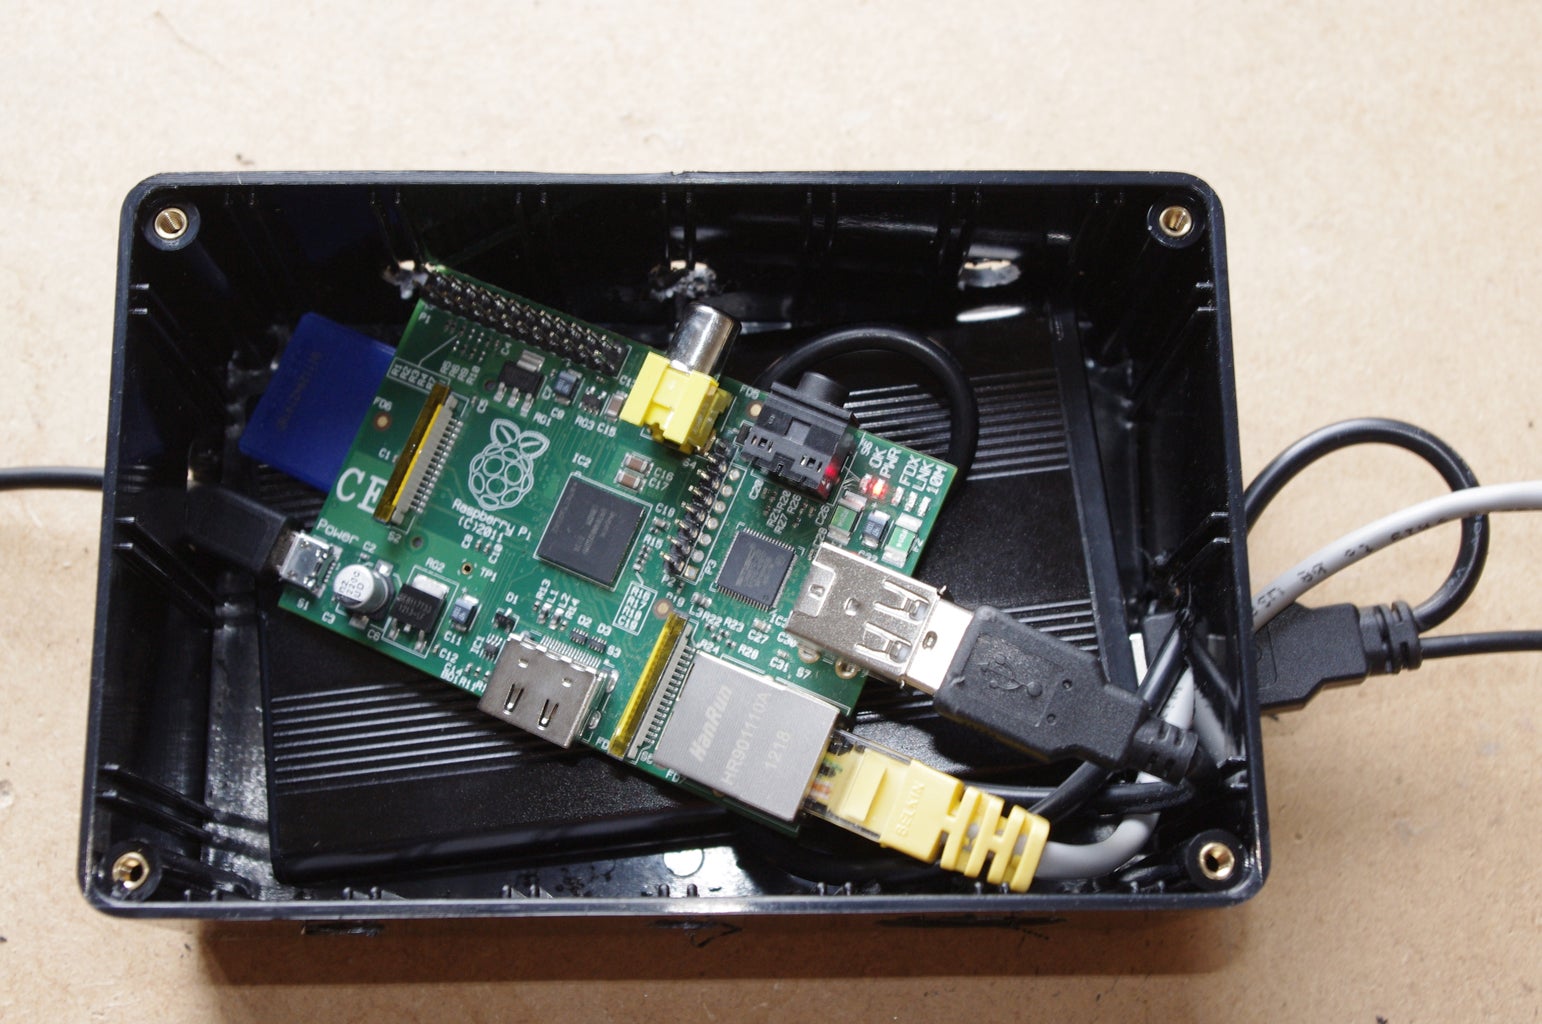
An Enclosure for the Raspberry Pi and Hard Disk
Wireless network card (optional)


Step 2: Setting up the network download the software

Screen Shot 2012-10-27 at 16.21.03.png
So first off we need to give the Pi a fix IP address we do this by editting the network interfaces file

$ sudo nano /etc/network/interfaces

Once open we need to make the file look like this (your IP address might be different)

auto eth0
iface eth0 inet static
       address 192.168.1.118
       gateway 192.168.1.1
       netmask 255.255.255.0
       network 192.168.1.0
       broadcast 192.168.1.255

The file then needs to be saved by pressing ctrl o and ctrl  x to exit

once exited the networking need to be restarted

$ sudo /etc/init.d/networking restart

After that is done we need to update the Pi and download the software. This will take a little while to complete

$ sudo apt-get update

We are going to install Apache with SSL, PHP5, PHP APC which will load pages faster

$ sudo apt-get install apache2 php5 php5-json php5-gd php5-sqlite curl libcurl3 libcurl4-openssl-dev php5-curl php5-gd php5-cgi php-pear php5-dev build-essential libpcre3-dev php5 libapache2-mod-php5 php-apc gparted

Step 3: Configuor php & Apache

Screen Shot 2012-10-27 at 16.21.03.png
Screen Shot 2012-10-27 at 16.18.07.png
Screen Shot 2012-10-27 at 16.18.32.png
Screen Shot 2012-10-27 at 16.18.53.png
Screen Shot 2012-10-27 at 16.19.49.png
Screen Shot 2012-10-27 at 16.20.49.png
Now we have download the software we need to configor it.

First off we need to install PHP apc

$ sudo pecl install apc
 
After that is done we need to create the apc.ini

$ sudo nano /etc/php5/cgi/conf.d/apc.ini

In to that file we need to add the following

extension=apc.so
apc.enabled=1
apc.shm_size=30

Once added the file needs saving

Next up we have to change the PHP.ini to change the max upload file so we can add large file and add the APC externsion to PHP

$ sudo nano /etc/php5/apache2/php.ini

In this file we need to find upload_max_filesize and then change the value to 1024M which will allow files of upto 1GB to be uploaded

The we need to find post_max_size and then chaged the value to 1200m which will allow files to upto 1 gb to be uploaded

We need to find externsion= section and add in the extension=apc.so

After we have done that save and exit

next up we need to config apache and enable SSL

$ sudo nano /etc/apache2/sites-enabled/000-default

inside the file we need to change Allow over ride to All from none 

Next up we need to setup SSL

$ sudo a2enmod rewrite
$ sudo a2enmod headers


After the follow command you will be asked to provide information

sudo openssl genrsa -des3 -out server.key 1024; sudo openssl rsa -in server.key -out server.key.insecure;sudo openssl req -new -key server.key -out server.csr;sudo openssl x509 -req -days 365 -in server.csr -signkey server.key -out server.crt;sudo cp server.crt /etc/ssl/certs;sudo cp server.key /etc/ssl/private;sudo a2enmod ssl;sudo a2ensite default-ssl

Once all that is done the apache need restarting

$ sudo service apache2 restart

Step 4: Download and install own cloud

Screen Shot 2012-10-27 at 18.32.39.png
Now we have Apache and PHP setup we need to download own cloud

$ wget http://mirrors.owncloud.org/releases/owncloud-4.5.1.tar.bz2

once download it needs unziping

$ sudo tar -xjf owncloud-4.5.1.tar.bz2

And then copying in to the web root

$ sudo cp -r owncloud /var/www

After it's been copied we need to give the webserver permission to access the owncloud directory

$ sudo chown -R www-data:www-data /var/www/owncloud/

We also need to edit the .htaccess file to change the max upload file these values need to changed to the same values as you set in you php.ini

$ sudo nano /var/www/owncloud/.htaccess

Step 5: Setup own cloud

Screen Shot 2012-10-27 at 18.23.47.png
Screen Shot 2012-10-27 at 18.25.06.png
Screen Shot 2012-10-27 at 18.25.25.png
The easy way to setup the external drive is to use gparted on the Pi

$ startx

and the from inside the  GUI open a ternmail and type

$ sudo gprarted

from here you can partion and format the drive

Once done give the web-server permission 

$ sudo chown -R www-data:www-data /media/owncloud

All that needs to be done now is to setup owncloud

in a web browser type in https://IPADDRESS/owncloud

Choose a user name and password by typing then in to the user name and password box

click advanced and changed the data location to the place of your external drive in my case it's /media/owncloud

The click finish and you are done.

You should now be able to upload files. To play video files you'll need to enable the video player app.

To setup external access to your device I would suggest using DyDns or Noip.

Step 6: Placing it in the encloser

IMGP8173.JPG
IMGP8172.JPG
IMGP8171.JPG
IMGP8170.JPG
IMGP8163.JPG
IMGP8161.JPG
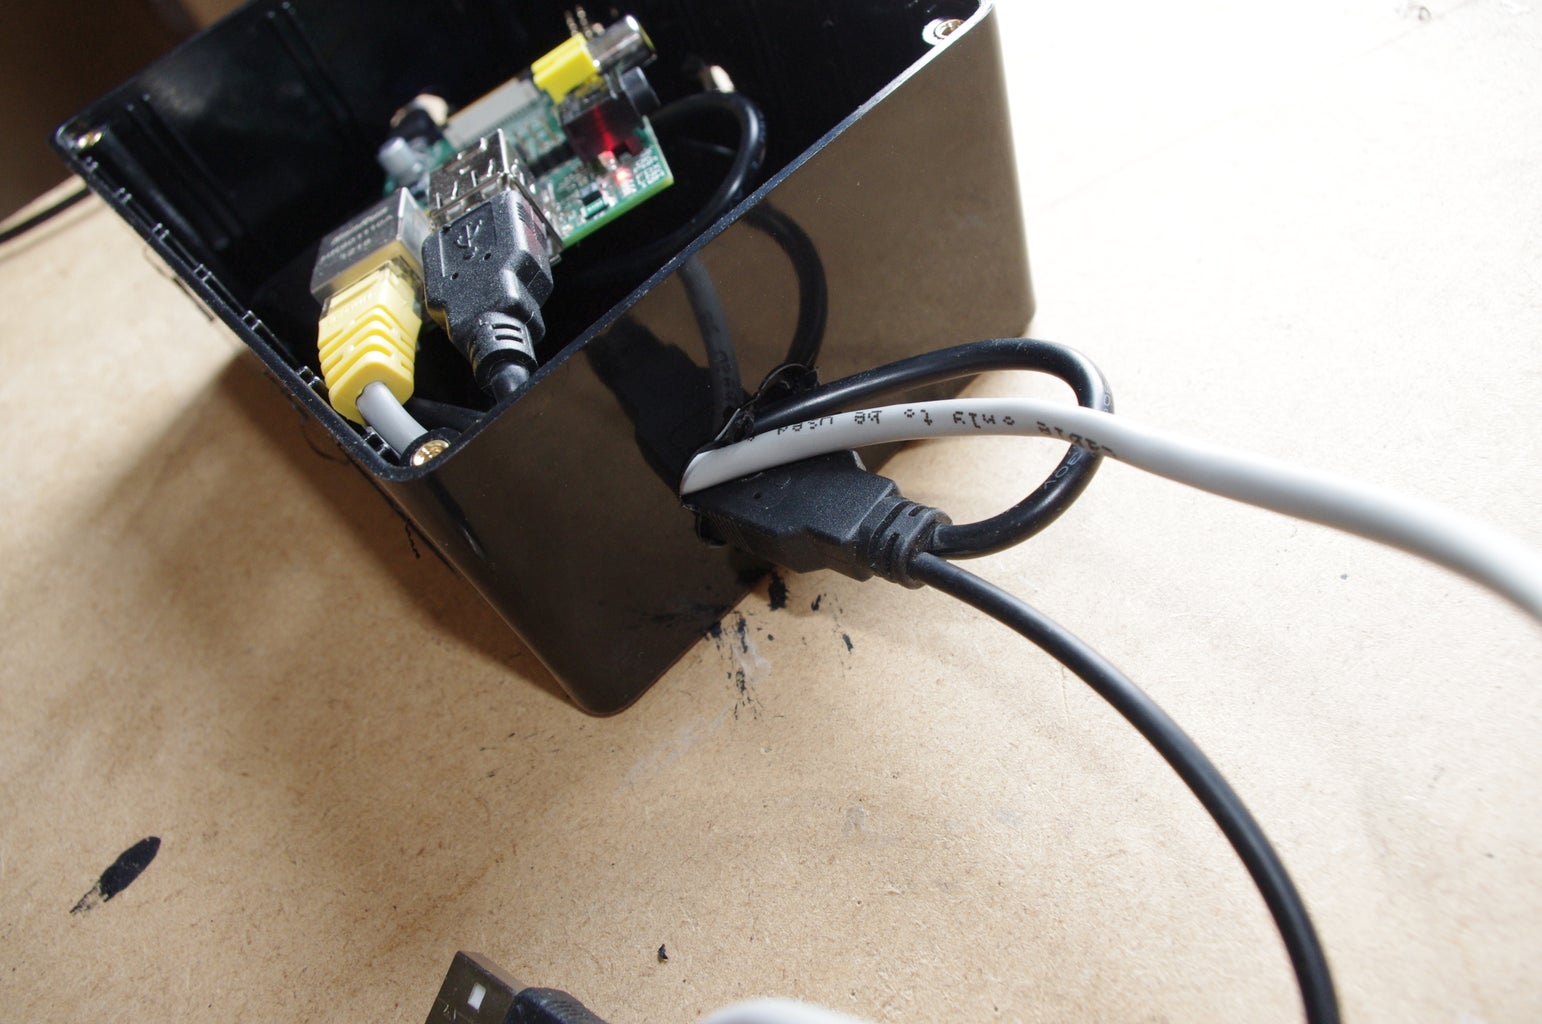
Now the software is setup the Pi just needs placing in to the box. I would drill some hole in the box to allow a little air flow.

And that's it done.
greatpanda says: Apr 24, 2013. 9:16 PM
FYI, your command line text in step 5 should read sudo gparted, not sudo gprarted.
hot-chili says: Mar 29, 2013. 12:19 PM
In response to adriancuervo:

99.9% of the general population  has no idea what open source is or cares about the ideology. They are not developers and they just want something that works. My neighbors and friends have no clue about what open source is when I bring it up in a discussion, and they all seem to concur about  going with a product  supported by a company.

BTW, although Real Time Logic could close the project, the software would still be available on the Internet for eternity. Just because software is old and not maintained does not mean it's not useful. I still prefer XP over Windows 8. In any event, I find it extremely unlikely that Real Time Logic would close the project.   Just because something is open source does not mean that it could not be shut down or maintained.

Owncloud is extremely slow on the Raspberry Pi. You should check out the following benchmarking, which shows how BarracudaDrive outperforms all major servers such as Apache and Nginx by a large margin.

http://barracudadrive.com/blog/2013/03/Apache-Nginx-Lighttpd-Monkey-and-BarracudaDrive-Speed-Test
hot-chili says: Feb 14, 2013. 5:58 PM
BarracudaDrive is much lighter, faster, and includes more features:
http://store.raspberrypi.com/projects/barracudadrive
adriancuervo says: Mar 29, 2013. 4:02 AM
Maybe, I did't check the features, but the point is: it's not Open Source. In other words, if in 2014 Real Time Logic closes this project, they kills you :) Open Source is the way in computer development.
GR0B says: Mar 27, 2013. 6:53 PM
For a newer versions of owncloud use "4.5.7" instead of "4.5.1"

wget http://mirrors.owncloud.org/releases/owncloud-4.5.7.tar.bz2
sudo tar -xjf owncloud-4.5.7.tar.bz2
village76 says: Mar 26, 2013. 3:29 PM
Hi, thanks for this, got it up and running nicely. But at the end of your project you say that it would be possible to access the Rpi remotely using noip. Would this allow me to use the Rpi from a remote computer as if I was sat in front of it? Or would this just be another way of access owncloud?

Following these instructions (http://www.stuffaboutcode.com/2012/06/raspberry-pi-access-from-internet-using.html) I've set up the no-ip account, got a host and set the client running on the Rpi (which has a fixed internal IP address) but all I'm seeing when I put in http address in the browser (http://myname.no-ip.org) is the home page of my router. I see from other posts I need to set up port forwarding but I'm a bit new at this and can't work out which port I need to forward. I guess I'm then forwarding that port to the fixed IP address of my RPi. Once I've done this, what shoud I expect to see? Grateful for your views
etossin says: Mar 23, 2013. 9:16 AM
I know it’s a lot to ask, but could you please upload a Raspberry Pi Image with Owncloud V.5.00 installed?

Or give instructions on how to update from version 4.51?

Thanks in advance!
jshaw22 says: Feb 1, 2013. 2:37 PM
I loved this guide but I kept struggling to get the permissions set and the thing firing on my USB drive. In the end, I used the apt-get package and it configured owncloud and permissions perfectly. Another bonus- upgrades. Just in case it helps someone reading this...

From http://software.opensuse.org/download/package?project=isv:ownCloud:community&package=owncloud

For Debian 6.0 run the following as root:

echo 'deb http://download.opensuse.org/repositories/isv:ownCloud:community/Debian_6.0/ /' >> /etc/apt/sources.list.d/owncloud.list
apt-get update
apt-get install owncloud

You can add the repository key to apt like this:

wget http://download.opensuse.org/repositories/isv:ownCloud:community/Debian_6.0/Release.key
apt-key add - < Release.key

Cheers! Thanks for the guide.
dcdevito says: Jan 14, 2013. 10:20 AM
@philpage85:

make sure /media/owncloud is mounted. From the command prompt type:

mount

And see (mine was /dev/sdb1) the usb drive mounted (you'll see /media/owncloud). If not simply type:

mount /dev/sdb1 /media/owncloud
philpage85 says: Jan 7, 2013. 9:31 AM
Hi I am hoping somebody can help?

I get to step 5 and enter

$ sudo chown -R www-data:www-data /media/owncloud

and I get

chown: cannot access '/media/owncloud': no such file or directory?

I am a noob to all this so any help would be grateful.

many thanks

Phil
dcdevito says: Dec 14, 2012. 5:55 PM
I'm getting a "failed to write to disk" error when trying to upload videos, ranging from 150MB to 400MB in size. I'm trying to upload them individually but still get the error.

I am able to upload tons of pics with no issue. I see in php.ini the max upload size is set to 1200MB - is that too large perhaps? I also saw the temp directory location commented out so I un-commented it and created a tmp directory in /media/owncloud/tmp (and added it to the path in the .ini) - however, it still fails.

Any suggestions? Cheers
bigme says: Dec 6, 2012. 10:13 AM
Haven't done much with our pi since getting this summer, this looks like a great idea. Of course if I get it set up my kids will think of another good use for the pi so maybe I should just order an additional pi before I get started.
Thanks for the great write up
RJones06 says: Oct 30, 2012. 1:09 PM
Great guide very helpful!

My isp blocks port 80 so i can't access owncloud through my DyDNS url.
I currently have a DyDns account setup and working for monitoring my torrent client when outside the network. (i access through http://mydyndnsurl.dyndns-free:port)

Would it be possible to access Owncloud through the same DyDns url on an alternate port? If so could you provide some instructions, i'm still learning the basics of debian and server administration.

Thanks again for the guide.
DXM says: Nov 20, 2012. 11:55 AM
You should be able to set up port forwarding in your router to pass port 5000 for instance to Port 80 on the raspberrypi... that would allow access from port 5000 outside of your network and it will lead to port 80 on the Pi... hope that helps
MutatioM says: Nov 1, 2012. 4:09 PM
Indeed a nice guide!

I took the easy way and started off trying the image file you'd created. There is a problem though, I can't bypass login, and I think it's your username/password information I have to use.

Thanks in advance,
if I'm just a big douche that misunderstood something simple, I'm sorry

MutatioM
Steve-CC says: Oct 30, 2012. 12:11 PM
Great project - thanks.
It would be handy for me and others who are less familiar with the Pi and getting started if you would either explain how or point to where to get info on how to go from Step 1 to Step2. ie: Get the Pi ready to Set up the network and download the software.
I may just use your image - thanks for them - but there is a part of me that likes tinkering and it would be fun to go through the process.
In the meantime I will be trying to figure it out.

Thanks again

Steve
Fabi280 says: Oct 29, 2012. 9:01 AM
What's the average speed for a file transfer?
Wouldn't using nginx speed it a bit up?
hackitbuildit (author) says: Oct 30, 2012. 4:59 AM
The file transfer speed is about 5-10 seconds to upload a 10MB mp3 file and about 3 Minutes to upload a 350MB video file.

Using nginx might speed it a bit but it seems to be going at an acceptable speed and I've been using apache for about 12 years so am just more use to it.
unholythree says: Oct 30, 2012. 3:33 AM
I'm also curious about the pi's performance. Did you test this on the new 512 MB Pi or the older 256 MB?
hackitbuildit (author) says: Oct 30, 2012. 4:56 AM
Its with the 256MB Pi the performance is good. The thing to point out is I'm the only user of it which means it doesn't have to multi task at any point.
Pro

Get More Out of Instructables

Already have an Account?

close

PDF Downloads
As a Pro member, you will gain access to download any Instructable in the PDF format. You also have the ability to customize your PDF download.

Upgrade to Pro today!