

Introduction: Remote Controlled Lobster


I know this wacky little kid, all he wanted for Christmas was a remote controlled lobster.
He asked his parents... he asked Santa.... he asked anyone who would listen.
Unfortunately... "Your search - Remote Controlled Lobster - did not match any documents" and Santa nor his elves had the chops to pull of such a radical thing :(
Luckily for this little boy, he'sgot a crazy uncle who likes to make stuff !
Step 1: R&D

I didn't have a long time to pull this off so i knew i wouldn't be able to construct this entire thing from scratch.
I started out looking for an existing RC vehicle that was somewhat lobster shaped.
I eventually came across the Tyco Terrainiac which was far more lobster shaped than i could have ever hoped for!
and guess what else?
IT WORKS ON LAND AND WATER!!!
Just like a real lobster.
Step 2: Where to Start


I wanted the body panels of this beast to be replaceable just like a traditional rc kit, this way when they get all beat up and destroyed by the erratic driving of a 7 year old they can be replaced easily. I was planing to sculpt and thermoform the body panels but incredibly i was able to find an existing thermoformed lobster shell that just happened to be the exact scale of the base vehicle i was working with.
The first step was to divide the styrene shell in to pieces that would fit well on to the body of the vehicle.
i divided the shell with an xacto blade and rough fitted it to the vehicle
Step 3: Mounting

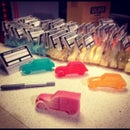
I wanted this thing to look as stock as possible so i opted for a mounting system that would use pegs and pins just like the rc cars i had when i was a kid. I built a 3d file of a simple peg with a plug end and printed them out in abs on an old stratasys 3d printer.
i drilled holes in the plastic body of the existing rc car and then used solvent to fix the pegs in place, i also added a small puddle of red hot melt glue around the base of each peg for reinforcement since i knew they'd take a lot of abuse.
after the pegs were mounted i lined up the new body panels and used a soldering iron to melt clean holes for mounting.
the new panels are held on with cotter pins.
Attachments

Step 4: Paint Job


the lobster shell was a perfect size and fit but the paint job was not so hot.
i used a few different cans of rustoleum spray paint to get a more realistic natural finish.
i misted the parts with a base coat and then used darker colors as accents and finally partially obscured the nozzle of one color to cause it to bubble and splatter for some dots and texture.
Step 5: Packaging


The whole thing looked great but it wasn't going to be perfect until i jammed it all back in to the original Tyco packaging.
The little dude was super psyched when he opened it and immediately took it outside to learn that while lobsters might drive fine on both land and water they get absolutely no traction on ice!

Participated in the
UP! Contest

Participated in the
Holiday Gifts Contest


