

Introduction: Repair a Dead Power Bank || Repair and Replacement


One of my friend recently gave me a power bank which was completely dead. He is not using so he decided to gave me. So in this instructable i will show you how to repair such power banks with some repair and replacements. The batteries inside the power bank was corroded, so i tried to remove them out and gave a new life. I will share some simple tips in order to how to remove such corrosion even with home made solution easily available in our Kitchen. You can also replace new batteries for full capacity of power bank.
Small Introduction: Portable Power Banks are comprised of a special battery in a special case with a special circuit to control power flow. They allow you to store electrical energy (deposit it in the bank) and then later use it to charge up a mobile device (withdraw it from the bank). Power Banks have become increasingly popular as the battery life of our beloved phones, tablets and portable media players is outstripped by the amount of time we spend using them each day. By keeping a battery backup close by, you can top-up your device(s) while far from a wall outlet.
The Power Banks we're talking about are good for almost any USB-charged devices. Cameras, GoPros, Portable speakers, GPS systems, MP3 players, smartphones and even some tablets can be charged from a Power Bank - practically anything that charges from USB at home can be charged from a Power Bank - you just have to remember to keep your Power Bank charged, too! Power Banks may also be known as Power Stations or Battery Banks, too.
If you liked my project please CLICK Vote!
Lets Get Start!
Step 1: Disassembly


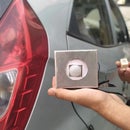
First Disassemble the power Bank carefully. You need to apply little bit of force but be carefull not to break the circuit board inside. Do not forget to take safety precautions.
Step 2: Checking for Problems and Errors


Here observing carefully in my case i found corrosion/rust over all my individual Li-ion battery . So in order to remove this use white vinegar and rub over the surface where corrosion/rust is present. This will clean the contact surfaces of the battery and now we are ready to solder all batteries together.
If you don't have White vinegar the you can do it via making your own solution .Follow these steps-
This process uses two solutions, one is regular table salt and vinegar. Any kind of vinegar will fine here. Its the acidity and corrosiveness of the salt and vinegar together that you want. The other solution is Sodium Bicarbonate/baking soda, and water. This is used to neutralize the corrosive properties of the other solution, and to further clean the battery terminals.
Step 1: Take off the Battries.
Step 2: Get 2 containers, one for each solution.
Step 3: Get 1 tablespoon of raw salt, and put it in one of the container. Fill up the rest of the container with vinegar, and stir the both together. Generally we put as much salt in the vinegar as will dissolve.
Step 4: Get 1 tablespoon of Sodium Bicarbonate(baking soda) and add it to the other container. Fill up the rest with water, and stir well. Add more baking soda to make it cloudy. The amount is not important, as long as it is alkaline to cancel the acid of the vinegar solution.
Step 5: Take the cotton ball or any cloth piece and rub over the battery terminal
Step 6: After 2 minutes or so, the terminal will look very shiny and new after appplying the vinegar solution. The acid and salt in the solution is etching away the oxides, exposing the bare metal. Make sure the metal is uniformly shiny. Leave it in longer if it is not perfectly clean throughout.
And you are done!! Shiny new battery terminals are ready for soldering.:)
Step 3: Plan for Repair and First Charging!


Check the Charging PCB with the help of multimeter, whether you are getting desirable output voltage or not. The nominal voltage of Li-ion cells is 3.6V-3.7V. I am getting output voltage of around 4.1volt that is enough to charge li-ion battery.
Now its time to solder the batteries. Unluckly while observing carefully i found that one of my four battery is dead because it was sweeled from the upperpart that simply means it wll not work. So i contuinuied my soldering part with just 3 batteries. Offcourse this reduced my Power bank capacity.
So lets do some Calculations over that.
Step 4: Calculation for New Capacity of Bank


In order to calculate overall capacity of bank we have to first determine the capacity of individual battery . So for this we have one formula:
Capacity of one cell(Battery)= Total Capacity of power bank / No of cells
= 10400 / 4
= 2600 mAh
That means the capacity of one cell is 2600 milli ampere hours(mAh)
OR
2.6 Ampere hour(Ah)
Now,
New capacity of power bank = Capacity of one cell * No of cells working cell left
That is,
=2600 * 3
=7800 mAh or 7.8 Ah
Our power Bank capacity reduced from 10400mAh to 7800mAh.
Step 5: Packing and Testing


Enough Calculation, now its time to put all together. Pack the powerbank once again by installig batteries and other necessary parts.
Bring back the USB cable and Plug and finally just check weather powerbank starts cahrging or not. And wow we gave a power bank a new life with capacity of 7600mAh.
Step 6: Enjoy With Enough Power!


You can see after charging powerbank a little bit, it is now ready to use:)
You just gave a new life to a dead power bank;)
Now use and Enjoy.:D
This marks the end of this instructable. Hope you liked it.
Please vote for the project and share if you think it was awesome.
Don't forget to follow for more cool projects!!
YouTube channel: https://www.youtube.com/channel/UCzpuqnIheB4g1VSbvXsCGAg
Fell free to have any query. Hope you liked my instructable.
Share and Vote Thanks.
***If you liked my project please CLICK Vote! ^ Above ^ Thank You***

Participated in the
Before and After Contest 2017

Participated in the
Power Supply Contest


