

Introduction: Rope Ladder


We do geocaching with family and friends and sometimes it's really hard to get someone somewhere high or low and rope ladder comes quite handy. This instructable is about our first one made only from two ropes as we had plenty of ropes around ;)
Safety first, so adult person with common sense should be involved during usage of this ladder. Placing this kind of ladder against sharp edges or hot objects could cause serious injuries as a result of fall from destroyed ladder. Please stay safe and consider backup belay.
(Quality of photos is really poor. It's because my digital camera was always somewhere else than I was. Sorry for that.)
Step 1: Ideas and Expectations

This ladder should have:
- eye at the top for hanging
- two tails at the bottom for tactical usage
- width for one foot
- height as long as possible :) lets say 7 meters
- reasonable weight
- eye is crucial and needs protection (rope thimble)
- rungs are made from rope
- knots are under rungs only
Step 2: Material and Tools


Material:
- main rope - static rope 7 mm in diameter (15 kN, blue color)
- rope for rungs - reep 6 mm in diameter (10.5 kN, golden color)
- insulating tape
- rope thimble
Tools:
- tape measure
- scissors
- round nose pliers
- lighter and bowl of water
- pen and notepad
- tying tool (just a piece of wood and two long nails, 16 cm between them)
Step 3: Math
Don't be afraid, it's nothing complicated. Just a few calculations of rope lengths. Let's see:
Golden rope (the one for rungs, 6 mm in diameter)
You need 1.8 meter for every rung and 3 rungs for every 1 meter of ladder, plus 1 bottom rung. So:
7 meter ladder = 7 x 3 rungs + 1 rung = 22 rungs = 22 x 1.8 meters of rope = 39.6 meters of rope
Allow yourself some reserve for tying knots and burning ends. 41 meters should be enough.
Blue rope (the one for main strings, 7 mm in diameter)
You need two times height of ladder plus knots plus top eye plus bottom tails:
7 meter ladder = (2 x 7) + (22 x 2 x 0.1) + (1.5) + (2 x 1) meters of rope = 21.9 meters of rope
Again, having some reserve is recommended, 24 meters is fine.
Step 4: Rungs


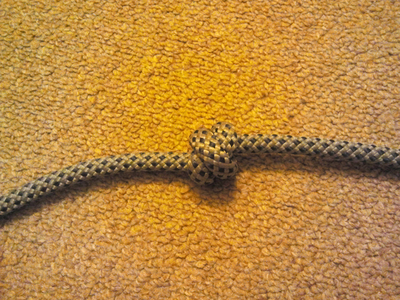
This part needs the most of your strength and patience. Mark 1.8 m from the end of golden rope and wind it twice around tool. Then start winding around these four lines. Do it with force and after five or six winds pull back lower line in order to move these winds to right as much as possible and also to make lower lines loose for reeve the end. Continue winding till the left end, get left side from the tool and reeve the end of rope through the lower loop. Put upper loop back on tool, check and tight the winding and pull the rope with marker (which leeds to rest of rope) really powerfully to close lower left loop and fix the winding. Get it down from the tool, cut the rope and burn both ends. If some loop is too small or tight use pliers to extend it. Rungs should have the same number of winds, ours have 20.
Step 5: Right Side


One way you can string rungs is from the top. If you don't care about rest of your blue rope, just make top eye and string rung on both ends, make knots under it and repeat.
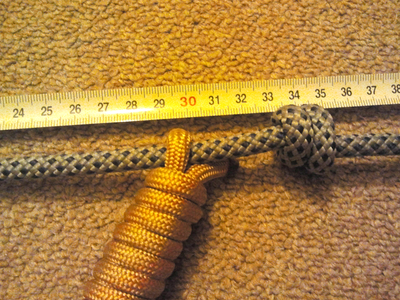
Other way is little more complicated, but rest of your blue rope will be in one piece. String one side of all rungs and tie first knot 1 meter from the end on right side. You have one tail and one support for the lowest rung. Now tie knot under every rung observing the space between knots is exactly 33 cm. Repeat until you have knots on one side under all rungs. After few knots it could become complicated to make these knots and reeve whole done part. Making 'packages of rungs' should help.
Step 6: Eye


Just make loose eight-figure knot, mark rope at the edges of the thimble and wind tape between marks. Tight the knot right next to thimble and fix the thimble with tape if needed.
Step 7: Left Side

Reeve rungs one by one and tie knots under them. After the lowest one leave 1 meter rope for tail, cut the rope and burn the end.
And that's all folks ;)


