

Introduction: DIY Rustic Twig Lampshade


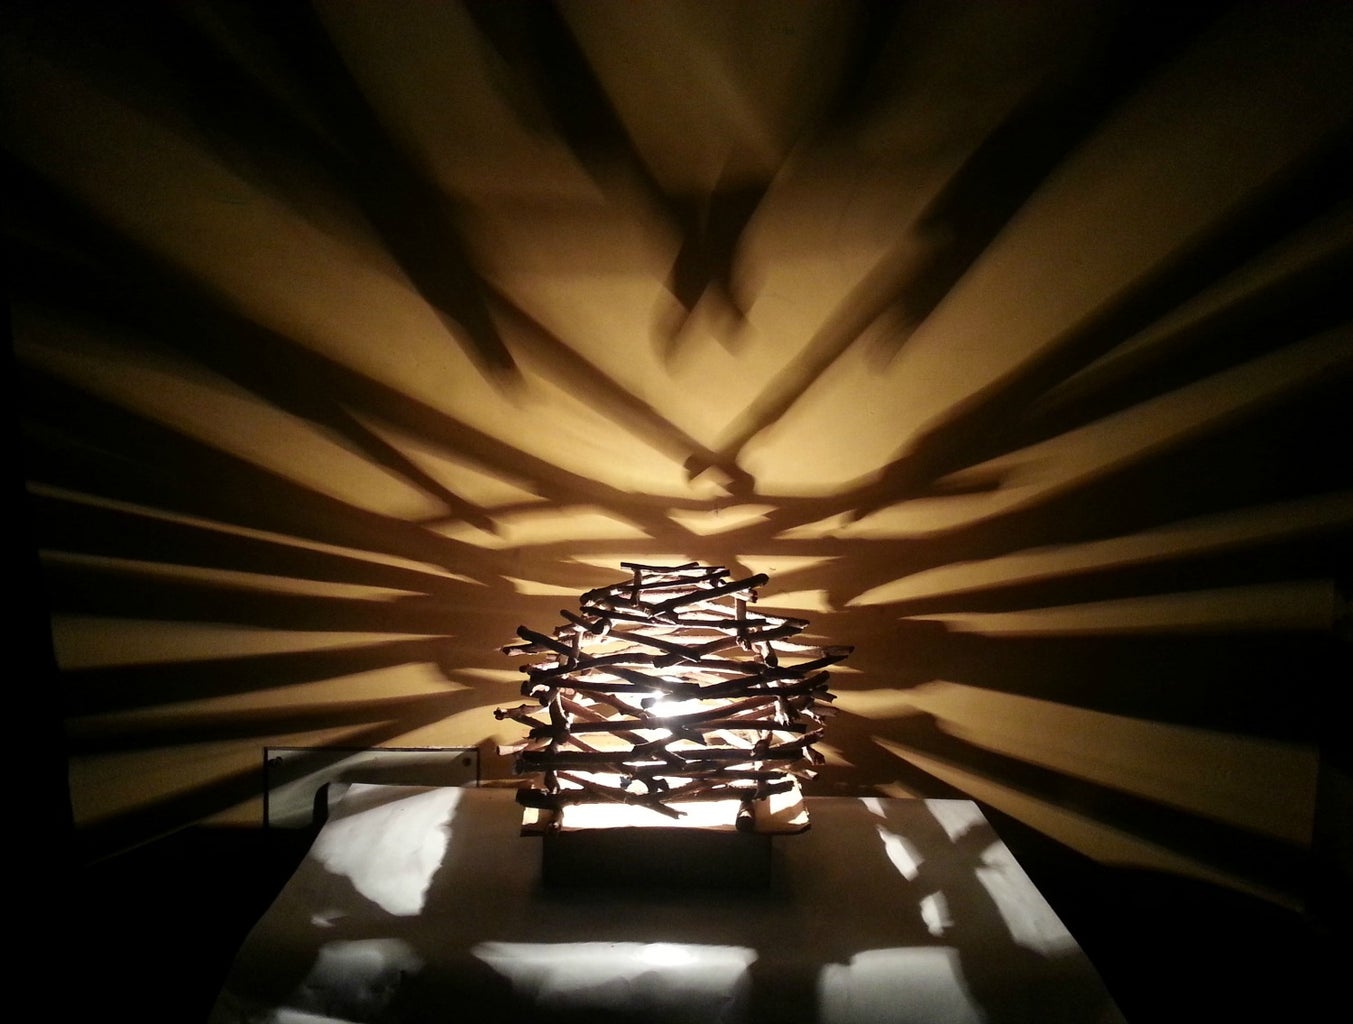
This lampshade is quite similar to the lampshade I've made last year. But the making technique is a little different and the light effect is different as well. I love rustic, vintage crafts and couldn't wait to make this shade as soon as the idea popped into my head :)
Check out the ible to find out how I made this rustic lampshade.
Step 1: Materials Needed
To make this lampshade you'll need:
- Dry tree branches, sticks or twigs,
- X-acto knife,
- Scissor,
- Glue,
- Cardboard,
- Lighting system.
Step 2: Preparing the Twigs


Collect as many dry tree branches, sticks or twigs as you can.
To make this lampshade it's better if the twigs are of the same size or relatively of the same size. You'll also need to cut all the twigs equally.
Use a marker to mark the length,
Use x-acto knife to cut half way through the twig,
Then use your fingers to create pressure on the cut and the log will break easily.
Step 3: Making Twig Frames

Now that we have all the twigs ready it's time to make the frames.
For each frame we'll need to use 4 twigs,
Place two logs in parallel as shown in the first picture of this step,
If you place the first two logs vertically then you'll have to glue the next 2 logs horizontally to complete the frame.
After gluing the twigs allow the glue to dry.
Now, similarly make more frames. The number of frame depends on the required length of the lampshade. I wanted to make an 20 cm tall lampshade and I had to make 10 twig frames to reach that length.
Step 4: Joining the Frames


After the glue is completely dry and the frames are sturdy enough you can make the shade.
Place a frame on a flat surface,
Take another frame and place it over the first frame by rotating it to 90 degrees with the frame below it. Check if it fits nicely and keep rotating to find the perfect fit,
Now apply glue on the parts where both frames join,
Similarly glue other frames. Every time you place or glue a frame make sure to rotate it to 90 with the frame below it.
Step 5: Covering the Top


To cover the top you'll need to make more frames, but this time the frames should be smaller than the main frames.
For the top, each frame should be smaller than each other,
After making the small frames for the top join them like the main shade, by rotating each frame to 90 degrees with the frame below it.
After making the top cover allow the glue to dry,
Then place it on the top of the shade, find the perfect fit and simply glue it on the top.
When the frame is complete allow the glue to dry and most importantly use fire retardant spray for safety.
Step 6: Lighting System


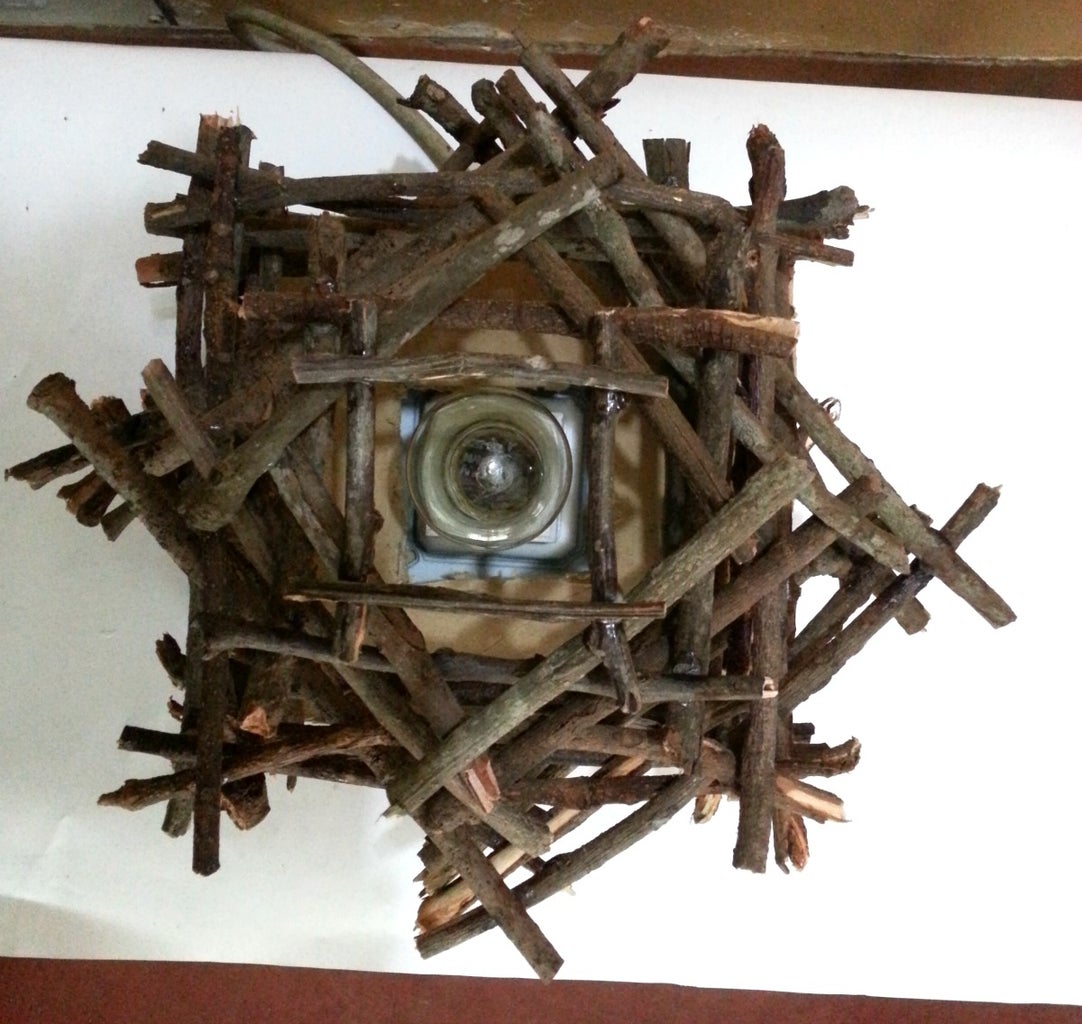
For the light fitting you'll need cardboard, plug, wire, bulb holder and bulb.
Connect the wire with the plug and the bulb holder, test if it works.
Keep in mind, don't use more than 40 watt.
For the base:
I used cardboard to make the base.
You'll need 6 pieces of cardboard. 2 squares pieces of equal size, they should be at least an inch larger than the twig frame and 4 cardboard strips to cover the sides.
Glue the cardboard strips around any one of the square cardboard pieces.
Now place the light fitting right on the middle of the square cardboard,
Make a square hole on the other square cardboard piece and place it over the light fitting, as the light fitting will go through the square hole.
Simply place the shade on the cardboard base and light it up.

Participated in the
Epilog Challenge VI

Participated in the
Glue Contest

Participated in the
Featured Author Contest: Tarun Upadhyaya


