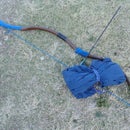
Introduction: Single Piece PVC Recurve Bow
Do you want to learn archery but are too cheap to buy a bow? Do you seek historical authenticity in your weaponry but are unable to find anyone that sells what you want? Do you wish to be like Legolas from the Lord of the Rings, slaying orcs with well placed shots from your trusty bow? Do you want a bow that can be repeatedly swung against a tree and suffer no ill consequences. Well look no further for now you can make a stylish custom recurve bow for less than ten dollars in materials and an afternoon in time.
Before we get started I'd just like to give a shout out to Nick Tomihama, The Backyard Bowyer. This bow is primarily inspired by his work. If this bow isn't to your style he's got a lot more on his youtube channel and his books. They're definitely worth a look.
Tools and materials:
Leather gloves
5ft section of 1in PVC pipe
Heat source: A heat gun is the easiest but a stove top, propane torch, or bed of coals will also work
Hacksaw
Black marker
Tape measure
A board at least 2.5ft long
Drill
Optional:
file
Aluminum foil
Spray paint
Electrical tape
Step 1: Mark Your Pipe
First take your 5ft section of pipe and mark 1ft and 2ft from each end. Then mark the center point at 2.5ft and 3in on either side of it. This will be the handle later on. You don't have to mark all the way around the pipe like I did, but it will make it much easier later on.
Step 2: Heat Your Pipe
First make a simple heating jig by placing aluminum foil against your board and setting your pipe against it in the corner between the ground and the board. (This step is optional but will make the heating process much faster)
Start heating the 1ft section nearest the tip, rotating the pipe as necessary to ensure even heating. Once your pipe loses its rigidity and behaves more like a large plastic noodle, fold part of the aluminum foil over it to trap the heat in and start working on the next 1ft section. Continue heating until you reach the center mark periodically going back and reheating any sections that have cooled off.
Be careful while heating your pipe. If the pipe starts to discolor you're heating it too fast. If the pipe starts to bubble or blacken you're heating WAY too fast. A little discoloration is okay. Bubbling and blackening starts to affect the strength of the pipe.
Step 3: Taper Your Pipe
A PVC pipe bow takes its strength from its cross section. Therefore, in
order to get the bow to bend like we want (bending more at the tips than at the center), we need to modify that cross section by making it weaker towards the tips and stronger towards the center. We will accomplish this by tapering the pipe.
Once you've heated your pipe all the way to the center place it flat on the ground as straight as possible. Then place 1in spacers on either side of the midline (I like to use scrap pieces of pipe since they're already the right size), and place your board over the top of the heated section of pipe. Stand or kneel on the board in order to flatten the pipe underneath and wait until the pipe cools.
You should now have a pipe that is almost completely flat neat the tip and almost round near the center.
Repeat this step and the previous step on the other side.
Step 4: Re-flatten the Tips
Take your newly tapered bowstave and mark the center point at the tip and at the 1ft mark you made at the beginning. These mark will act as guides when we re-flatten the tips.
Take your heat source and reheat the end of your bowstave up to the 1ft mark. The funny thing about PVC pipe is that it likes to be round. After heating it should puff up and return to its original shape. Once it has, smash it flat with your board perpendicular to the taper and allow it to cool. Use the marks you made earlier to make sure you're flattening the pipe correctly.
Repeat on the other side.
Step 5: Shape the Siyahs
Every recurve bow has a stiff non-bending section towards each tip. These sections are called siyahs or bow-ears. When the bow is drawn and released the siyahs act as levers and snap forward adding some extra speed to the arrow.
Mark the center point of the tip of your bow. Then draw a line from that mark to the edge of the pipe at the base of the flattened section. (I also added a curve to the tip but that is purely aesthetic.) Cut along this line with your hacksaw.
Now take a knife or file and shape the cut edges so that they slant inward towards the center. This is so when we close the edges up the come together more cleanly. (Shaping the edges like this is optional. We're going to cover the tips in electrical tape anyway.)
Repeat on the other side.
Step 6: Close Up the Siyahs
Take your heat source and heat the cut edges of the siyah. Remember how I said PVC pipe likes to stay round? If you do this correctly the edges should close up all by themselves (although they may need a little help to stay even). Start at the tips and work your way down. While closing up the edges start bending the pipe so that it curves forward (The cut edges should face backward.).
Make sure the tips are still in line with the midline of the bow before you finish. If they're a little off we can fix it next step. If they're a lot off you need to reheat and reshape the tips.
If you want this is a good time to use the file and clean up the tips a little.
Repeat on the other side.
Step 7: Finish the Siyahs
See the pinch point base of that siyah? If we apply any pressure to this bow it will snap right there. It has to go.
Take your heat source and slowly heat up the area right around the pinch point. Don't heat more than an inch or two on either side. The pipe should puff up and smooth out the transition between the siyah and the rest of the arm.
Use this time to adjust the angle of the siyah. If it is too far forward or too far back for your liking adjust it (Keep in mind this will affect the draw weight. Forward means more draw weight. Back means less.). Sight down the bow and take a look at it. Does it point to the left or right? It shouldn't. Twist it around so it points dead center.
Repeat on the other side.
Step 8: Add Some Curve
At this point you should have a fairly straight section of pipe with two forward curving tips at each end.
Start heating the pipe between the siyah and the handle section. Heat primarily on the front and back of the bow rather than the thinner edges. This allows the bow to be bent into shape without losing too much of the taper we put into it earlier. Once you have a nice even bend throughout the pipe, place it on a flat surface (to ensure the siyahs stay in alignment), bend it by grasping the handle and the tip (to ensure a nice even bend), and let it cool.
Repeat for the other side. Congratulations. Your chunk of pipe is now recognizable as a bow.
Step 9: Shape the Handle and Add Recurve
Bow handles should not bend. Bow handles that do bend transfer a great deal of shock into the users hand and much less fun to shoot.
Start by heating up the handle section of your bow. Once it becomes flexible, place it on your knees and compress the handle into an oval shape with pointier parts of the oval facing forward and backward. Also at this time push down on the handle so that the tips of the bow rise up.
Once the bow has cooled enough to hold its shape sight down the bow to make sure the tips still line up.
Step 10: Cut the Nocks
Take your siyah and mark about 3/4in down form the tip and 1/4in in from the front. Take a 3/16in drill bit and drill on that mark. Then use your hacksaw to cut to the hole you just drilled. Clean up the edges with a knife or file (sharp edges slice bowstrings) and your nocks are done.
At this point your bow is essentially done. Find a string (Making one is an Instructable all in itself. Polycord makes a pretty decent substitute though) and this bow is ready to start flinging arrows.
PVC does degrade in UV light. If you want to learn how to protect it and/or make it look good keep reading.
Step 11: Make It Pretty
PVC does degrade in UV light and the best protection for your bow is to simply cover it up.
Start by giving it a good coat of spray paint. When you can no longer see the letters on the pipe or the marks you made you're done.
Then take electrical tape and wrap it around the siyahs. This also has the added bonus of covering up the cut edges of the siyah if they didn't join as well as you liked. Start at the base and work your way the the tip. Once you get there, leave a little extra and use it to cover over the end. Use the pictures for reference if you're having a hard time getting it to look nice
Uh-oh. It seems we have covered over our string nocks. Simply cut a slit in the electrical tape over the nock and flatten the tape against the back. If you're having trouble use a string to push the tape out of the way.
Almost done. Take your electrical tape and wrap the handle of your bow.
And now you're finished. You just made a bow for a price even the cheapest of the cheap can accept, are now the envy of every archer at the medieval re-enactment, and Legolas has nothing on you.

Runner Up in the
PVC Challenge


