

Introduction: SMD Test Probe


When recently testing a circuit board full of SMD's (Surface Mount Devices) I discovered that it can be quite difficult to manage holding two probes which whilst slim, are still quite clunky in relation to the devices being tested. In fact, the tips of the 2mm probes were as big as some of the devices I was testing.
I decided to make a probe where the prods are joined together so that both can be managed with one hand, useful for resistance testing and testing the voltage across a device, and where the tips are shaped to better fit SMD's.
Because the test leads for my meter are soldered into it, I made a probe with sockets that the meter's test prods can plug into.
Step 1: Tools and Materials
Materials
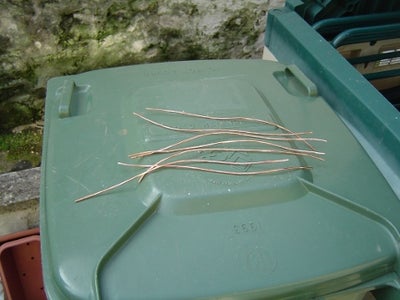
Heavy wire
Plastic tube from soap dispensers
2mm sockets, or similar (I used a twin PCB header plug with wires attached)
Wire - preferably with nice thick insulation
Heat shrink sleeving or similar
Top from a plastic milk bottle
Small terminal block
Screw
Solder
Tools
Soldering iron
Screwdriver
Files
Long nose pliers
Step 2: Prepare Bottle Top
I actually did this last, but as I used a pair of sockets already connected to the wires, it would have been better to do it first.
Using the terminal block as a guide, use your soldering iron to melt some holes in the sides of the bottle top in opposite pairs, the same spacing as the terminals. Make the holes quite close to the flat part of the top.
One pair of holes needs to take the plastic tubing from the soap bottle as a tight fit, the other pair needs to be a nice snug fit for the wires you will be using, after they have a layer of heat shrink on them.
Make the holes a bit smaller than you need, and file them out with a needle file to get nice clean holes.
A word about making holes with a soldering iron
A standard soldering iron is rather too hot for this job, so if you have a temperature controlled one, turn it down. To reduce the amount of melted plastic sticking to the bit, tin the bit thoroughly before making each hole, and clean it well afterwards. Don't breath in the fumes!
Step 3: Solder the Wires
If you prepared the bottle top first, thread the wires through and strip the ends which are inside the top. This is only necessary if your wires have the sockets pre-attached. Strip about 10mm.
Keep the stripped ends straight, and tin them.
Clamp the thick wires in something - I find forceps extremely useful for this sort of thing. Tin one end of each one, and solder the flexible wire to it, keeping the joint straight along tthe thick wire. Don't wrap the flexible wire around the thick one.
Cut some heat shrink tubing to cover the joints and about 1cm of the flexible wire, apply and shrink. If heat-shrink isn't available, tape is fine.
Step 4: Fit the Terminal Block
The purpose of the terminal block is to hold with wires in place - it isn't used to connect the wires.
Undo all the screws enough to slide the thick wires through right up to the heat shrink, and slide them through. Tighten up all four screws. The effect should be something like those chopsticks you can get which are joined together at the top.
Step 5: Fit the Parts Together
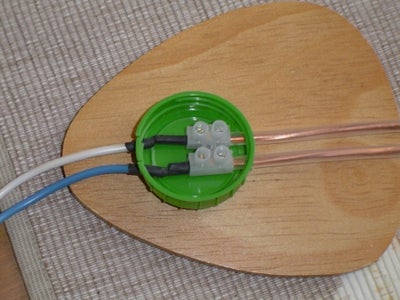
Slide the thick wires through the holes in the bottle top, from the inside.
Find a position you are happy with for the terminal block. This should be close to the centre of the top, but so that the insulation of the flexible wires passes through the holes. Use your soldering iron to melt a small hole in line with the centre of the terminal block, and clean it up a bit with a knife and needle file.
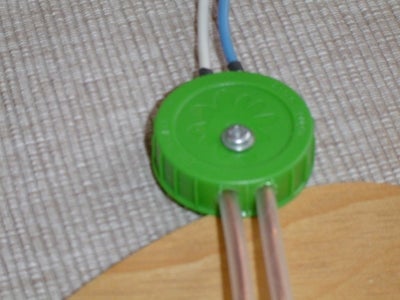
Flame polish the cut ends of the plastic tubing slightly - you only need the briefest application of a lighter flame for this, then slide them over the thick wires, push them through the holes in the bottle top, and into the ends of the terminal block plastic casing, so they are nice and snuggly up against the metal.
Get a small self tapping screw and screw it through the hole you made in the top and into the terminal block.
The effect you should now have is that the thick wires are held parallel, but are easy to squeeze together.
Bend the wires slightly as necessary to make them parallel.
Step 6: Make the Tips
The business end of the probe.
Cut the thick wire so between 10 and 15mm are projecting beyond the tubing. Bend the ends inward so they cross, and then bend the tips so they are parallel (see photo).
Clamp them together, and file them on the outside so that you have two rounded points which follow on from the inside surfaces of the wires. The tips should be dead level.
Step 7: Try It Out
You will probably need to bend the wires a bit so that the tips are properly aligned.
Plug your meter probes into the sockets. Hold the probe you have just made in the fingers of one hand, and test something!


