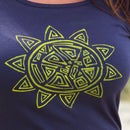
Introduction: DIY Screen Printing: Easy, Detailed & Inexpensive!
You can make your own unique, detailed, screen-printed shirt at home with a few simple materials! This method uses Drawing Fluid and Screen Filler to easily create your detailed design on a screen. There are other cheap methods you can use for screen-printing, however I really like this method because it allows you to create more detailed designs than you would using Mod Podge to paint on a screen and it's much easier than using an exacto knife to cut out fine details from contact paper. Also, it's less expensive than purchasing screen-printing frames from art stores, which are usually $15 & up.
If you'd like to see some finished products or view my other tutorials, check out my etsy shop & blog , or follow me on twitter ! Also, your constructive feedback on this tutorial is greatly appreciated! Thanks for looking and message me with any questions!
http://www.etsy.com/shop/anotherwaydesigns
http://anotherwaydesigns.blogspot.com/
http://twitter.com/anotherwaydsgn
Step 1: Materials
You need a few inexpensive materials which can be found at art stores & most craft stores.
- embroidery hoop (only about $2 for a basic hoop, available at craft stores)
- mesh material (nylon, polyester, silk - something with tiny holes that can serve as a fine screen)
- Drawing Fluid (I use Speedball, available at most art stores)
- small paintbrush
- newspaper
- Screen Filler (I use Speedball, available at most art stores)
- plastic spoon
- screenprinting ink
- squeegie
- shirt or bag to print on
Step 2: Assemble Your Screen
Take your mesh material and place inside embroidery hoop. Tighten hoop. Stretch material evenly across hoop and tighten hoop again. Should be tight or your material will shift and you won't have a clear print.
Step 3: Draw Your Design!
This is the fun part! Flip hoop over so that the screen is facing up. Shake your Drawing Fluid bottle. Using your paintbrush and drawing fluid, draw a design onto screen. (This Drawing Fluid will be washed out later after the Screen Filler is applied.) Make sure your brush strokes aren't TOO thin or the design will not be clear. Allow to dry fully (about an hour, or if you're impatient, speed the process along w/ your hairdryer)
*If you would like to be more careful when drawing your design onto the screen, you can draw your design onto paper using a marker first, then tape drawing to underside of screen and trace the design with drawing fluid.
Step 4: Apply Screen Filler
Place newspaper under screen to avoid making a mess. Shake your Screen Filler bottle. Spoon a couple tablespoons of Screen Filler onto top of screen (same side as the Drawing Fluid). Using squeegie, drag Screen Filler at a 45 degree angle from top to bottom of screen. Repeat a few times (2-4x) until you cover the whole screen. Do NOT do this more than a few times because it will become difficult to wash out the Drawing Fluid. (This Screen Filler will remain on the screen, and the Drawing Fluid will later be washed out.) Check the underside of the screen to make sure the Screen Filler isn't seeping through. If it is, don't worry, just use your squeegie to scrape off excess Screen Filler. (And next time, use a finer mesh material with smaller holes).
Allow to dry fully for a few hours or overnight (again, impatient folks can bust out the hairdryer). Should be completely dry to touch.
Step 5: Rinse Out Drawing Fluid
When screen is dry, rinse screen w/ water (use shower head if possible) to remove drawing fluid from screen. (This is where the ink will pass through the screen to create your image on your shirt or bag.) The Screen Filler should remain on the screen. It will block ink from passing through the areas that are not part of your drawing/design. Allow to fully dry again!
Step 6: Test Your Screenprint
Place your screen onto test paper/material and place a few spoonfuls of screen-printing ink onto the top of your screen. Hold screen down firmly in place with one hand. Using pressure with the other hand, drag squeegie at a 45 degree angle across screen to distribute the ink. Flip squeegie over and drag squeegie upwards. Do this about 3 times. Once you have made a satisfactory test print...
Step 7: Screenprint!
Print on a t-shirt, tote bag, pillow case, cardstock..anywhere! Have fun with different ink colors, too! You can print for around 15-20 minutes at a time, making sure the ink doesn't dry in the screen by "flooding" the screen between prints. To flood the screen, drag ink across screen using your squeegie WITHOUT applying pressure. This will distribute ink into the screen holes so the ink doesn't dry up too quickly.To clean up, simply scrape excess ink off screen with squeegie and rinse screen. Let screen dry and reuse later! You may have to stretch and tighten screen across embroidery hoop before your next printing session.
Let me know if you have any questions or comments. If you'd like to check out my etsy store or blog, please do... I love visitors!
http://www.etsy.com/shop/anotherwaydesigns
http://anotherwaydesigns.blogspot.com/


