

Introduction: Drying the Dry Specialist Dry Bag


As we all know salt water paddling means.. lots of gear rinsing and drying when we get home...
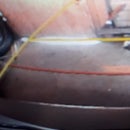
Two pieces of gear in particularly continued to frustrate me in the drying process,(see picture above) by virtue of their particularly design, are both essentially bags.
When hung up by their tips with the open end down, the "bag" collapses upon them selves and traps condensation and water within.
Remedy: "Drying tubes"...
What i used;
- Lengths of 13 mm irrigation pipe ( here in NZ this is cheap pipe that kinks if you try and bend it- designed to be laid in the garden for irrigation lines to plug in to)
- Scissors
- Pedestal drill & Drill bit
- Duct tape
- Cable ties
Step 1: The First Drying "thing"


This bag was originally designed to hold a hand held VHF so has two "ears" above the bag - one for the antenna and one for the control knobs.
- I cut pipe 1. to extend right to the top of the smaller "ear"(picture 2-c) and then protrude form the base of the bag by around 20 cm (picture 2-d)
- Then i cut a second length to extend to the top of the longer "ear"(picture 2-e) and out a similar distance from the base.(picture 2-d)
- Placed both pipes in to their positions in the bag and then cable tied them together at the bottom.(picture 2-f)
- Removed them and used the drill press to fill both tubes with plenty of holes around their sides.(picture 3) I didn't bother cleaning the "cuttings" off.. figured they would also help:-)
To hang the wet bag;
- Part of the hack i did on the bag for its new purpose means there is a length of bungy cord attached to the base of the bag, i take this and hook it over the ends of the pipe (at bag base) and then up through the former lanyard hole before then placing a peg on the looped end ( see picture 4-g)
- This ensures the bag hangs with the "ears" upwards and they are prevented from sticking together.
Step 2: The Second Drying "thing"


The Paddle float is essentially a large bag with a closure at one end and two large inflatable bladders on each side of the bag.
This time i cut one length of pipe long enough that both ends of the pipe stick out of the bag by around 20 cm,(Picture 5-h) while the middle of this length forms a curve at the closed end of the "bag"(Picture 5-i)
I then took a second length of pipe and bent the middle over the top middle of the first loop at 90 degrees,(Picture 5-j) before duct taping these to ends in the same place on the first tube (Picture 5-k)
then i repeated the drilling procedure on the pipe that would be inside the bag (Picture 6)
To dry;
- empty free water out of the bag
- push in the double loop of tubes to hold the sides off each other
- pop a peg on the top of the closed end of the bag on the washing line.. to drip dry .. then i move it out of the sun in to my shed... dry as a bone as i pack up for the next trip.

Participated in the
Outside Contest


