

Introduction: Shrink Plastic How To: Name Tag


Today, I’m going to show you how to use shrink plastic, sometimes known as Shrinky Dinks. If you aren’t familiar, it’s a type of material that starts out thin enough to cut easily with scissors, and when heated, shrinks down to (usually) around half its size and becomes a hard plastic. It’s a really cool way to make charms, jewelry, little shaped pieces, or - as I’m doing today - a sturdy name tag.
I have all of my counselors make their own during summer camp. We use stickers for the kids, but there's something about having a decorative, lasting name tag that adds to the experience for everyone.
Check out more videos on my YouTube channel, Barb Makes Things.
Step 1: Materials


- Shrink plastic - either purchased sheets, or reused #6 plastic (often found in salad take out containers)
- I've been doing shrink plastic for years, and Grafix Shrink Film at that link is still the best deal I've found
- Scissors
- Drawing utensils
- If you're using smooth plastic, it needs to be permanent ink like in Sharpies
- If you're using rough plastic, you can use non-permanent things and even colored pencils
- Sandpaper (optional)
- To make your smooth plastic rough
- Hole punch (optional)
- Heat source, such as a toaster oven, conventional oven, heat gun, or embossing heat tool
- Note: hair dryers are not hot enough
- Pliers, clothespins, oven mitts, or other items to protect your hands from the heat
- Parchment paper or aluminum foil for toaster oven trays
- Clip, pin, or lanyard on which to attach your name tag
Step 2: Pre-Shrink


Half a sheet of plastic is about the max for fitting into my toaster oven, so that's the size I make my nametags. The plastic will shrink down a lot, so if you're making a name tag and want it to be legible, write your name as big as possible.
A few notes about drawing on shrink plastic:
- If you’re drawing on a smooth sheet, use permanent markers or permanent stamp ink. Anything else will smudge off quickly...
- UNLESS, you roughen it up with sandpaper. You can purchase frosted plastic sheets, but you can also just make your own. roughened plastic can hold more coloring sources, including colored pencils
- Your colors will darken as the plastic shrinks, so keep that in mind when decorating
A hole punch will let you make holes to add charms or a spot to hang it from a cord. Part of the beauty of this stuff is that you’re not stuck with rectangles. This is the time to do any shaping you want.
Step 3: Shrink


There are a few options for actually shrinking your plastic. You can use a toaster oven, a regular oven, a heat gun, or an embossing heat tool. Hair dryers are generally not hot enough. I have a toaster oven that’s used exclusively for shrink plastic (or other crafts). I usually heat it to 350-375 degrees Fahrenheit, but your mileage may vary. If you go this route, you’ll want something to remove and put in the hot tray, such as pliers or an oven mitt. You can put your shrink plastic straight on the tray, but using a piece of parchment paper or aluminum foil will protect the surface, and lets you slide the plastic off before it’s cooled and put more pieces in right away. If you’re doing this with a group of kids, I highly recommend anything that will make getting the next piece in as soon as possible. Shrink plastic is a favorite and there's always a line to shrink more things.
Pop it in and watch the fun. Your plastic will heat up in different spots at different times, which means that it will do some curling. Don't freak out, this is normal, and it will flatten back out. Sometimes, especially on large pieces, those curling edges might touch and then stick to each other. If this happens, pull it out of the toaster oven, and gently pry the edges apart with a couple pairs of pliers or forks or whatever other grabby tools you have on hand, then pop it back in. When your shape has flattened out, it’s done. Pull it out and let it cool.
It's entertaining watching kids see this process for the first time. They absolutely don't believe you that the curling up thing is temporary. They say "Oh no! It's getting all messed up!" and then are shocked when it flattens out again.
Step 4: Post-Shrink


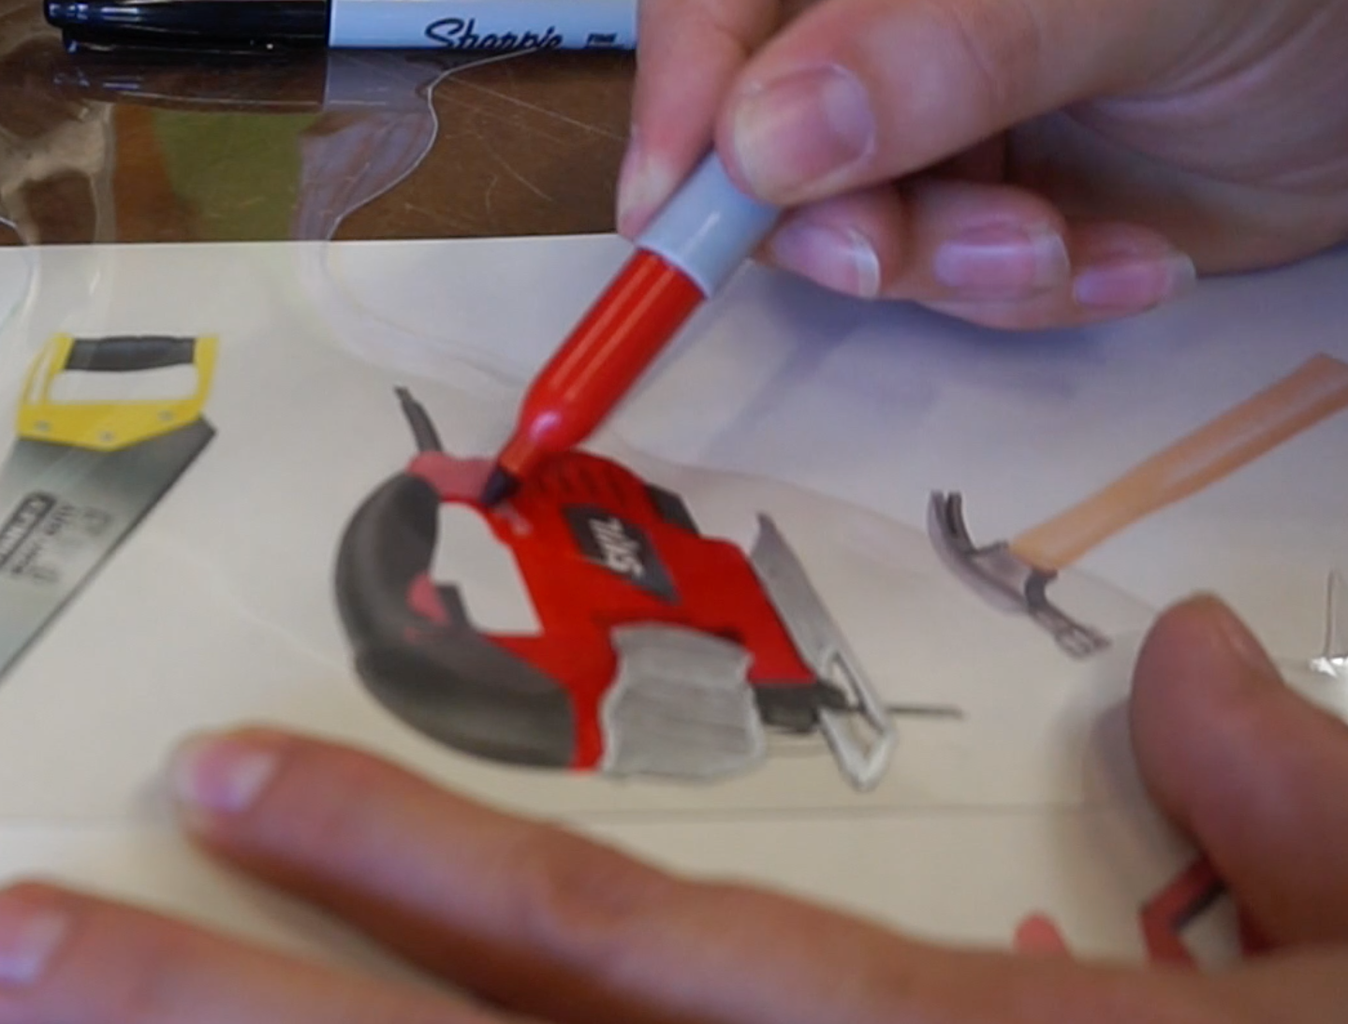
You can draw or even trace pictures onto clear shrink plastic, then shrink them until they look adorable and precise. This is how I did my tool charms, then used jump rings to attach them. You could also use wire or string.
There are types of shrink plastic that you can print on with an ink jet printer. Stamps are another cool way to get consistent, little shapes. Check out the video I made of 3d printing stamps and then using them to make shrink plastic jewelry.
If you forget to punch a hole before you shrink, you can drill one as long as you do it slowly and gently and don't get too close to the edge.
There are types of shrink plastic that start out opaque. If you're using clear and want contrast at the end of the day, cut and glue a piece of paper to the back of your nametag as I did here.
Step 5: Fin


I've made a few of these over the years and they hold up well, even with some mistreatment. One quirk is that blue ink, even permanent ink, has a tendency to smudge, so if you want to make sure it stays longer, you can use clear nail polish or super glue to add a protective coat over the top.
More of my shrink plastic projects and references:
Shrink Charm Tree (video)
Shrink Plastic Vintage Light Bulb (video)
3D Printed Emoji Stamps and Shrink Plastic Necklace (video)
Light-Up Shrink Plastic Mayhem (instructable)
Please post pictures if you do this yourself, I'd love to see what you come up with!

Participated in the
Unusual Uses Challenge 2017


