

Introduction: Simple & Cheap Arduino Uno ATmega328 Programmer


Here's how to build a simple & cheap Arduino Uno ATmega328 Programmer.
Hope you enjoy it...
Step 1: Parts
Step 2: Prepare the Arduino
a. Connect the Arduino to the Computer.
b. Open the Arduino application >File >Example >ArduinoISP.
c. Upload the sketch.
d. Open Tools >Programmer >Arduino as ISP.
Step 3: Build Your ATmega328 Programmer Shield
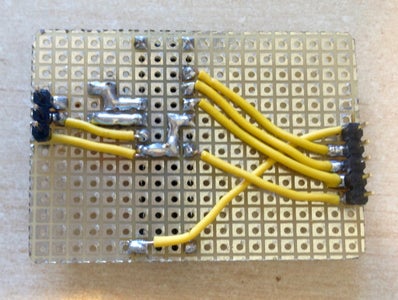
ATmega328P Pin Mapping > Arduino
1 > 10
7 > VCC
8 > GND
9 > Crystal > Capacitor1 > GND
10 > Crystal > Capacitor2 > GND
17 > 11
18 > 12
19 > 13
20 > VCC
22 > GND
Step 4: Burn the Bootloader

a. Plug your ATmega328 Programmer Shield on the Arduino (refer to photos).
b. Plug the new ATmega328P microcontroller on the Shield.
c. Open Tools >Burn bootloader.
Step 5: Load Your Sketch to the New Microcontroller
a. Load your sketch for the microcontroller.
b. Open Sketch >Upload using programmer.
That’s it!


