

Introduction: Simple Drilling Template
Pretty Simple, and cheap. The idea was to improve my accuracy when drilling holes on a material that didn't take pencil markings too well. This may have been covered in an 'ible before- If it has I apologize.
Things you'll need:
An Idea
Paper
Pencil
Ruler
Printer
Center Punch
Drill- or Drill Press
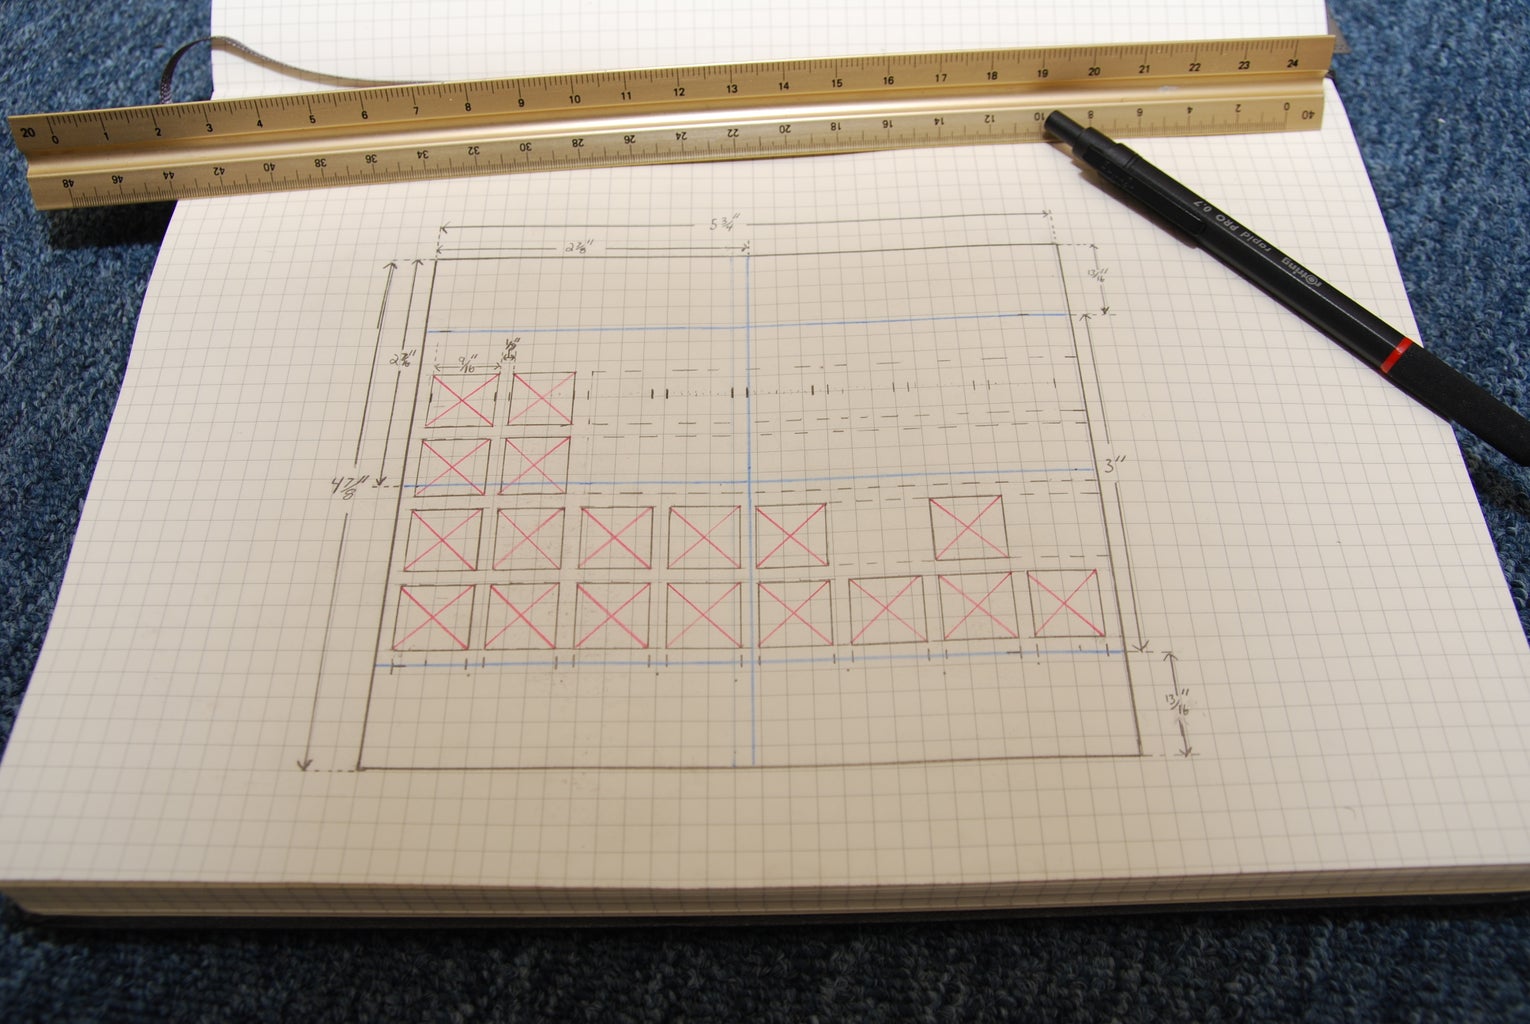
Step 1: Draw Your Template- to Scale

If you need a larger template, than the paper will allow- draw it to a scale (later, use your printers "enlarge by x" option to enlarge your drawing)
This is a simple template for a series of holes, on a plate.
Step 2: Done Drawing? Take It to the Printer/scanner

Scan the image- Leave it at 100% if it fits on the paper- and the scanner.
Step 3: Here's the "Template"

Fresh off the printer.. Now it just needs to be trimmed.
Step 4: Trim the Template

Use a paper shear, or a sharp exacto knife and rule,r to trim the page you printed.
Step 5: Scotch Adhesive Dot Roller Works Awesome to Attach the Template

Step 6: Apply the Double Sided "Tape"

Nothing Special (It cleans up fairly easily even though it says "permanent") I cheated- the picture shows the template, after the drill press.
Step 7: "Template" Glued to Material

Carefully line up the template you printed to the material you plan on drilling.
Step 8: Use a Center-punch to Make Your Marks..

Step 9: This Is Where I Fail- But the Template Worked Great.
Camera was off-target on the drill press (I'll try to re-shoot this- and upload it)
Step 10: End Result! Not Too Exciting- I Know

Yea, so it didn't end with a fantastic way to build a CNC machine- just a simple way to make evenly spaced holes like one could (little easier than programming a CNC too) I hope it helps someone save some time : )


