

Introduction: Simple Noise Maker!

This is a noise maker which generates square waves, then mixes them together to make different sounds. You change the sounds by waving your hands over it. It's a simple circuit and it's noisy, so it could be useful for children to try electronics.
The circuit uses a "Quad Schmitt Trigger NAND gate" to provide 4 oscillators. These oscillators will either make a sound, or turn another gate on and off by connecting its output to another gate's input.
It's loosely based on a circuit in the book "Handmade Electronic Circuits" by Nicolas Collins.
Video: hereHow it works
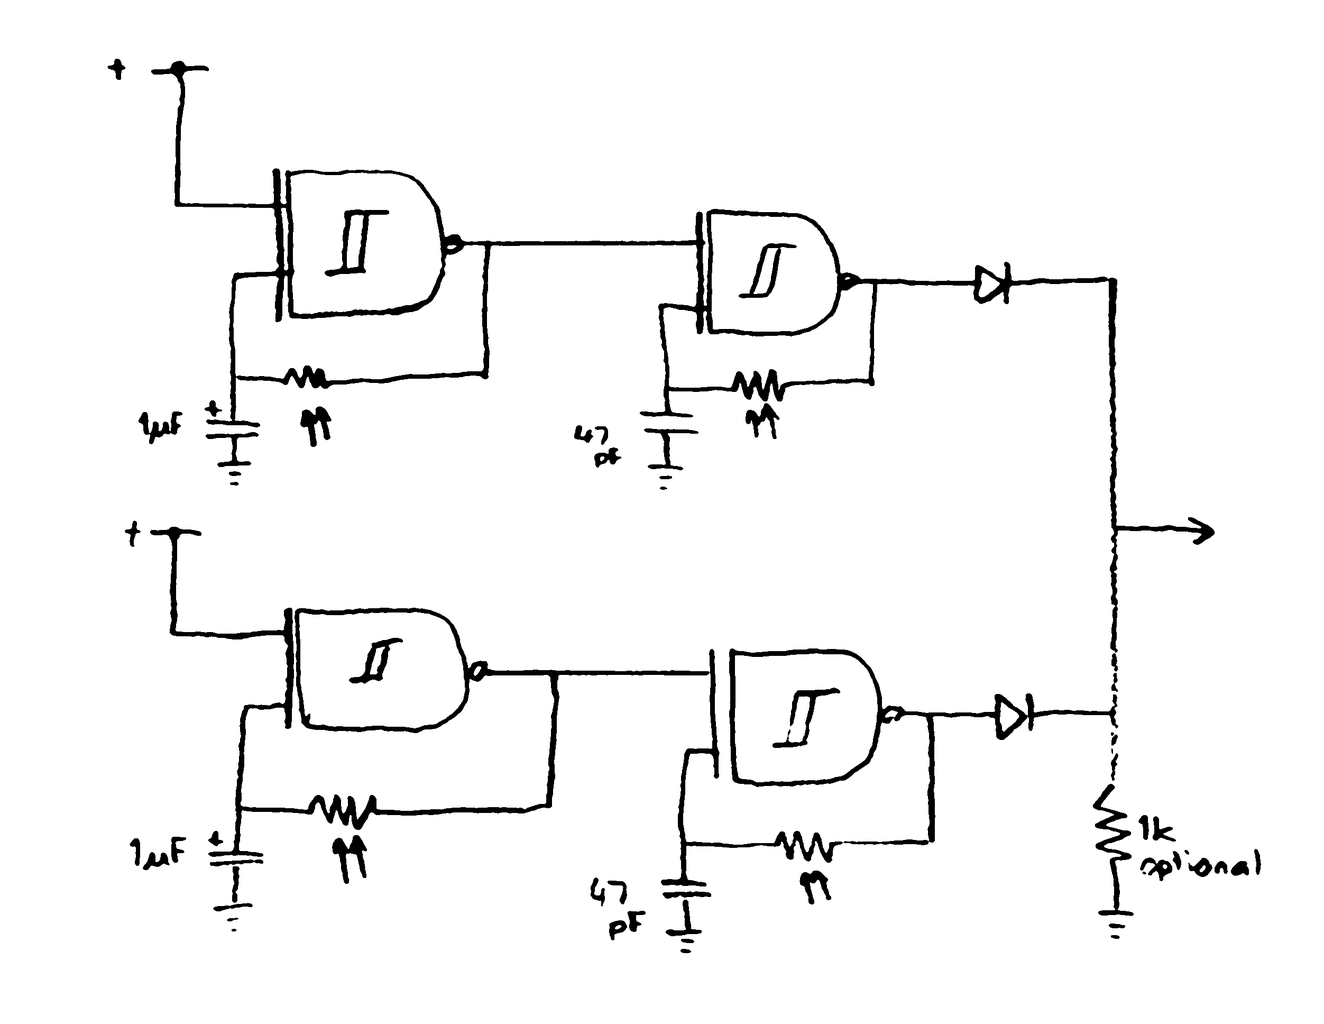
The four oscillators are in groups of two.
The first in each pair makes a slow square wave which turns the second oscillator on and off. This goes into one of the inputs on the second gate. Because both inputs must be high for the gate to switch on, this connection will stop the second gate from working. The second gate oscillates fast enough to make a tone.
Finally the two pairs are mixed using the diodes to make the final sound.
Have a look online for more about how Schmitt trigger oscillators work.
Step 1: Parts

You'll need:
- A medium or large breadboard
- A 4093 integrated circuit
- 2 small value electrolytic capacitors (I used 1µF)
- 2 ceramic or greencap capacitors (I used 47pf)
- 2 diodes (I used 1n914)
- 4 light dependent resistors (LDRs) aka Cadmium Sulphide (CdS) cells
- Batteries which provide 3-12V (I used 4×AAs) and a way to connect them to the breadboard
- An amplifier and speaker. Computer speakers or those battery powered speakers you get for music players should work. This circuit isn't powerful enough to operate a speaker on its own.
It's probably best to have many different capacitors, so you can experiment with different sounds.
For an amplifier, I used an LM386 board from eBay.
Step 2: Building It
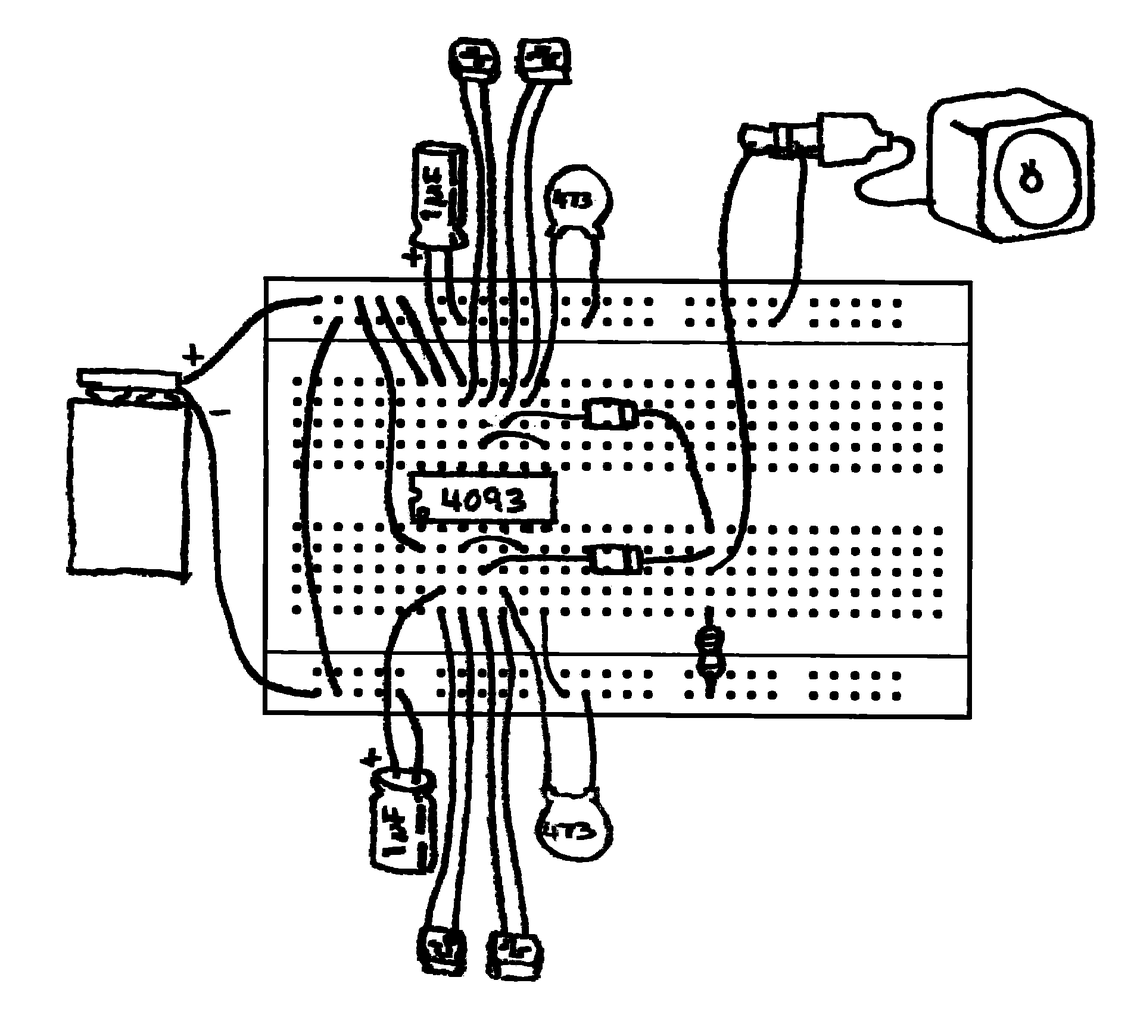
Put the components in the breadboard, like in this picture.
If you have a large breadboard, remember that the bars at the top and the bottom might have gaps in the middle, so if your circuit crosses it you'll have to wire them together.
Once you've wired it all up, and double-checked it, switch on your speakers (if you need to), connect the battery and see what happens!
Once it's all working, experiment by changing the capacitors, and maybe the light dependent resistors if you have different values.
Step 3: Mounting It

I put mine in a food container, mounting the light dependent resistors on stalks made out of solid core mains wire, but use your imagination for yours!

Participated in the
Supercharged Contest


