

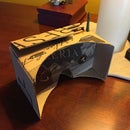
Introduction: Sintra Samurai: Cosplay With PVC Sheeting


We're always trying to outdo ourselves for the annual Asbury Park Zombie Walk, and last year I decided to pursue a personal passion and make a suit of samurai armor. We always go thrift-shop cheap, and, not being a cosplay guy, I wasn't sure what material to use. Then I discovered SINTRA.
Sintra is like foamcore posterboard, but with thin sheets of PVC on the top and bottom layers. It is fairly easy to cut, can be spray painted, glued and sanded, and when heated at a low temperature can be shaped (within reason-- curved but not spherical) and will be durable and hold its shape once cooled.
I got a large (8' X 3') sheet from a sign shop. Ordering a sheet of this size online will be cost prohibitive, but if you plan this well, smaller sheets will work.
Renna of Walking Shadows Cosplay made a cool if highly unedited tutorial:
Step 1: Gather Your Tools and Materials

You will need:
MATERIALS
- about 20 sq ft of sintra
- about 100 yds of 550 paracord (your choice of color)
- masking tape
- parchment paper and a large cookie sheet
semigloss spray paint (your choice of colors; some is actually made to paint on plastic)
TOOLS
- sharp utility knife with extra blades
- metal edged ruler
- sharpie
- a drill with a 11/64" (roughly) diameter bit
- a heat gun (optional-- I used an oven, but heed the warning at this step)
OPTIONAL: miscellaneous decorative pieces from a craft shop and superglue to hold them on
Step 2: Create a Pattern and Transfer It the Sintra.


I had a guy ask me what era my armor was from. Ha! I Googled "traditional samurai armor" and picked out elements from different ones that I liked, keeping it simple. I measured my torso and arms to get the approximate length, and basically winged it. Better to cut too big and trim pieces. The sections are:
- chestplate, with wide strips below it for a flexible abdomen
- backplate, essentially one piece
- plates to cover the area below your belt, 3 columns in the front and three in the back
- a column of plates to cover each shoulder
- the helmet
Step 3: Cut the Sintra.

Cutting this stuff is the art, and can be either reasonable or deeply frustrating. Start with a shallow cut, and make multiple passes through the same cut. Straight cuts with a ruler are super easy, and don't even have to be made all the way through; like glass, you can cut about half way deep and snap it off. For curves, expect a rough cut that you'll end up sanding.
Step 4: Sand the Edges.

Step 5: Heat the Sintra and Bend It to Fit Your Body.

CAUTION: sintra is PVC, and heated PVC can release nasty fumes. I used an oven at 210 degrees, made sure the windows were open, kids AWOL, and exhaust fan on, and aired the oven and room out when I was done. A heat gun will work with fewer fumes, but is much harder to heat a large piece consistently.
I found out 75% through my project that sintra at 200 degrees is tolerable to touch, but nevertheless, you should probably handle it with gloves (warm sintra can cast fingerprints) and shape it against clothing rather than bare skin, since you'll be wearing clothes under your armor anyway (I would hope).
Preheat your oven, put your sintra piece on a cookie sheet with parchment paper, and put it in for between 5 and 10 minutes. When it's ready, it's floppy. Hold it against your body or a substitute shape (here, a large garbage can to sub for my ribcage) while it cools in the shape you want. Against an cool object it will harden in less than a minute. Not the right shape? Flatten it by reheating it in the oven. (Can do this many times with no noticeable problems.)
Step 6: Mark the Holes for the Paracord and Drill.


For 550 paracord, use a bit that is about the same diameter, or 11/64 inch. I made all of my holes while the sintra was still flat, because that's just easier to drill, but they'll line up better with each other if you drill them after you've curved them and hold them together.
Step 7: Spray Paint.

Sintra has a leatherlike texture and look, and semigloss brings it out even more.
Step 8: Stitch Your Plates Together.


Create an aglet (the hard plastic at the tips of a shoelace) at the threading end of your paracord by wrapping it tightly with a small piece of tape. If you are adding any decorative pieces to the holes (as in image 1 above), superglue them in first.
Be sure to maintain the same length and tension as you work across the row of holes in each piece. You can adjust these afterwards, of course. Knot the ends, cut the extra, and melt them with a match to prevent unraveling.
Step 9: Flourishes and the Helmet

Gold rope, a belt, and a sword complete the suit. The helmet is a tutorial in itself (and, sadly, my pix of this process are nowhere to be found!
You can see from the pix above that I began with a pink kid's helmet, which fit my big head after removing the innards. After much trial and error, I found that you have to create plates that are both cut in a curve and heat molded into a curve. It will work best if you prototype it with thin cardboard first, and then copy the working pieces to sintra.


