

Introduction: Solar Thermal Cooker


You will now on embark on a journey to build a great solar thermal cooker under $25. Yes, under $25. By following this model, you will be able to create a super efficient cooker and make it for cheap. Besides all that, the time you will spend making this will be amazing. Also you will gain great building skills and money management skills. Finally, building this with a group of friends will make this moment even more special and tremendous. Just make sure you all work together and listen to each other's ideas and be nice to one another. Word of caution this will reach up to 1000 degrees fahrenheit. Overall, just have a good time and have fun.
Step 1: Supplies

The goal of this project is to built a cheap, yet effiecent way to heat up anything you want to cook. We were trying to accomplish to have the hottest cooker in the class and to see how hot we can get it, without spending too much. The maximum temperature will be close to 1000 degress fahrenheit, if focused properly. Anybody, who wants to build and have a good time, will really enjoy this project. In order to make this project you first have to get all the essential items to build it. Items you need to buld this project are:
Tools:
1. One drill
3. A pair of scissors
2. A blade
Matierals
1. 6 feet by 1 feet of reflective maylar
2.big piece of cardboard (any size you want, prefernece to be big). We used 7ft by 4ft piece of cardboard.
3. Two rolls of heavy duty tin foil
4. One can of adhesive spray
5. A pack of string
6. four googles
7. A box of gloves
8. A pair of ziptights
9. A roll of tape
10. One roll of reflective tape
The matierals cost about under $25. Most of the items are household products that can be found at the home. The items you do not have will be under $25 easily, especially if you are a good shopper. To make this project it will take about 2-3 hours and than 1-2 hours of improvement and to enchance it. This porject is fairly safe as long as you protect your eyes and be careful when you cut. You could find cheap materials by dumpster diving and also borrowing tools from friends you may have. With these in hand you are on the path of success.
Step 2: Why Even Do This?

The point of this is to gain teamworking skills and also to design somethign you can use in order to cook your food. The light will enter from the sun and it will go off the middle of the cardboard and go to the food. Due to the parabolic shape of this design you will be able to have a large focal point and your food will heat up easily. The middle is designed to reflect the light and heat up the food begin targeted. With this design you can put in it many shapes, vertically or horizontally, in order to get the best sunlight possible. It becomes focused by playing a little with the project in order to get a really sharp focus point. Make sure your cooking pot or surface is black, because that way it can be heated to the highest temperature possible. Most importantly have fun and lets get to building.
Step 3: Showtime


Lets get to it! First off take your piece of cardboard and place it on a flat suface. After you have placed it, clean it up to make sure it is flat and smooth so their are no bumbs present. After you have cleaned it get the reflective maylar you want and place it onto the cardboard. When placing the mylar be sure to go very slowly because this is one of the most critical steps. Making sure to limit the air bubbles and scartches. This is one of the most crucial steps and therefore you must take a lot of time. Having done this experiment, if I could go back and change one thing would be taking my time and making sure the reflective material is smooth as possible. Making sure the center of your cardboard is the best quality possible, because that is where most of the light will go. Having lots of smoothness, provides for great temperatures and the best quality cooker possible. Once you have placed the reflective maylar in long stripes horizontally and vertically, that will cause you to have a high temperature. As you can see in are picture with time and patience, we were able to create a smooth consitency of the material and have the middle of the cardboard be the best part.
Step 4: Alternitives


Next step is to use the tinfoil on the remaining piece of cardboard. Tinfoil is a great alternative because it is cheaper and is fairly effective.To add tinfoil to your design, you first must you apply adhesive spray and then quickly place the tinfoil, in order to get the best product. First off, you want to clean the surface in which you will be applying the tinfoil. After you have cleaned it, than you will gentally apply the adhesive spray. Do not apply to much, have a decent amount in which you know the material will stick. After that, you want to gently apply the tinfoil and smooth it out. Make sure you apply the tinfoil, so that their are no colors showing on your piece of cardboard, but the tinefoil. Next, having great smoothness and minimal air bumbs, will lead to the best result possible. This will be almost a good as strong reflective mylar material, but more than 95% cheaper. This is a strong alternitive if you are running low on matieral or simple if you want to take the least cost effective approach. As with any project make sure you are very detailed and do everything with great precision. As you can see in the pictures, this has almost the same reflectivity as the mylar material, which is much more expensive.
Step 5: Reinforcement


Make sure you put tinfoil on the remain pieces of cadboard, so that their is no cardboard being shown. To place the tinfoil, you need to apply adhevsive spray, so therefore the tinfoil can be easily placed. Also once you have smoothly placed out the tinfoil, you want to cut of loose ends. To make corners connect with one another, just use the relfective tape to connect the two pieces. Reflective tape provides great stablity at the same time you are keeping consistent in using reflective material. Just make sure their is no white space and that it is all smoothly done. Once you have the whole piece of cardboard covered, you are ready for the next step. Make sure you use good team work and take your time on this step. Taking your time on this is very important because this is the most crucial part to getting it to heat up. As you can see the tinfoil looks almost identical to the mylar.
Step 6: Drill It and Zip It


After you have covered your piece of cardboard with reflective matieral. The next step is to drill holes into it, the four corners of each end of the cardboard. you need to drill 4 holes into each of the four corners. As you can see you need to provide support when drilling the holes. You need to repeat this step 4 times, so you do it in every corner. Once you have all the holes drilled, the next step is to apply the ziptights and make sure you secure them properly. Make sure you put two one each because that will provide the most stablity and will make sure that your cardboard wont break.
Step 7: Secure


Now that you have the ziptights attached, add string from the top of the board to the bottom and secure it really well. Make sure you have really strong knots, but not to tight, where the cardboard would have a chance to break. When you are connecting from one side to another, make sure you angle it so you can have the best parabolic shape possible. That will be on personal perference on how tight or loose you want it. I recommend using your best judgement, because I can not descirbe how tight something needs to be.
Step 8: The Parabolic Cooker


This is how the end product should look after all your hard work. When you want to cook something on it make sure it how you place it can, so it ca attract the sun correctly. You can either have it horizontally or vertically depending how you want it and also factoring in the sun into account.
Step 9: FOOD!

We all love food and it is essential to the survival of humans. One benfit you can have from this project is the ability to make food whenevre you want, as long as the sun is out. It works pretty well and can cook food well because of the high temperature it has. You can get it hot as 300 degress or up to 1000 degress fahrenheit, depending on the day and how you focus it. Overall we are very happy with the creation of this project, because of its simplicity and they hard work we put into it. Also the dedication and determination to make this at all costs and no matter how long it took, was a really strong piece in are group. All of 3 of us pitched in equal amount of work and supporting one another ideas and respectfully disagreeing. The only thing I would change is taking a little more time on it and really trying hard to remove all the little air bubbles. A last bit of adivce I leave you with is be patient and do not work quickly on this, in order to finish it. Treat this project like a baby and try to be as detailed as possible, so you can get a even better result than we did.
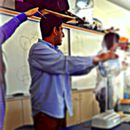
Step 10: The Team


With the work of all three of us (Darrin Jackson, Jose Avalos, Abhijot Sekhon) we were able to create a product in which we were extremely happy and were very proud of. With us working on it equal and making improvement as we go, we are all happy with the result we got. We had a set goal, a idea, and a will to work hard and we ended up with one of the hottest cookers in are class. Overall we can all say we had fun building this project and we achieved a lot of knowledge out of this project. Laslty, we hope you have fun building your cooker with your peers and keep dreaming to make the world a cleaner and more efficient planet.


