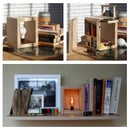
Introduction: Spray Paint Can Lamp
This is a really quick and easy project to turn an old spray paint can into a lamp. I made this a few years ago, but took pictures of the finished product that should help you make your own.
Tools:
-Dremel with bits
Materials:
-Empty spray paint can (Older cans have more unique designs. Check in basements)
-Candelabra Lamp Kit $6
-Candelabra Bulb $1
-Small weights (I used pennies)
Time:
1-2 hours
Step 1: Drilling
1) Make sure the spray paint can is totally empty. You don't want paint to spray out when you start drilling. When it's totally empty, use a small nail to punch a hole in either spot that will be drilled out. This will release any remaining pressure.
2) Using the Dremel, drill/cut out the entire area within the top ring of the can. See the picture for a better description. Sand the edges smooth.
3) Using the Dremel again, cut out a 1/4" hole on the back bottom of the can.
4) Let any remaining paint inside dry for a couple of hours.
5) If you drill the hole in the back high enough, you could fill the bottom with plaster. I just used pennies, so it also functions as a rattler.
Step 2: Wiring
Now, you won't be able to fit the socket or plug through the small holes in the can, so we need to cut the wire. Check out "Step 8" of my other Instructable, Light Box. This will show the basic technique for running the wiring through the lamp. Here's a quick summary of how it's done:
1) Open the switch using a small phillips head screwdriver.
2) Cut the wire, and run it through the lamp.
3) Reconnect the wire using insulated electrical tape.
4) Enclose the whole thing in the switch cover.
Step 3: Finishing
1) Insert the clamp attached to the light socket in the top of the spray paint can. This is plenty strong to hold it in place, so don't worry about glue.
2) Add a bulb and a lamp shade, if you wish. I personally like the lamp with a low wattage bulb and no shade.
Done! Thanks for reading and I hope you enjoyed.


