

Introduction: Stailess Steel Outdoor Led Sign


I was commissioned to build a sign for a friend of a friend's restaurant that was opening in 10 days they had a logo and a design concept for me to work with and it had to be weather proof, lit and durable because it was an outdoor sign.
Step 1: Customer Approval


This was all concept work in CorelDraw for my customer so they had a rough visual of how the sign would look in the end. The texture was a hand hammered texture I came up with just for the job, I took a picture of it and added it to the Rough concept Corel file. The first step I took was cutting my SS into 4x4in sheets to play with different textures to use for the final sign to show my customer our options. The final one I did ended up being the winner, I created it by putting a curved 1/8th inch round bar behind the sheet and hitting it with a soft deadblow hammer. After that sand blasting it to dull the finish to an eggshell or flat and then sanding off the high spots with 220 in on orbital sander to brighten the high spots. At the same time I picked up some plastic samples that I finished a few ways, the supplier only had gloss black in the thickness I needed so I sanded one sample with with an orbital palm sander and the other went through the sand blaster. we ended up using both to create a subtle 2 tone. The sanding came out black while the sand blasting chalked out to be a little grey.
Step 2: The Cut File


When I setup my cut file I left borders all the way around to make it easier to form, rather than beating on it with a hammer and then texturing I wanted it to stay fairly flat, that's why I textured and then cut. It was cut on a water jet and then all the edges went through a sheet metal break. It was then tig welded on the corners, ground and sandblasted to blend out and hide the welds and sanded with the 220 again.
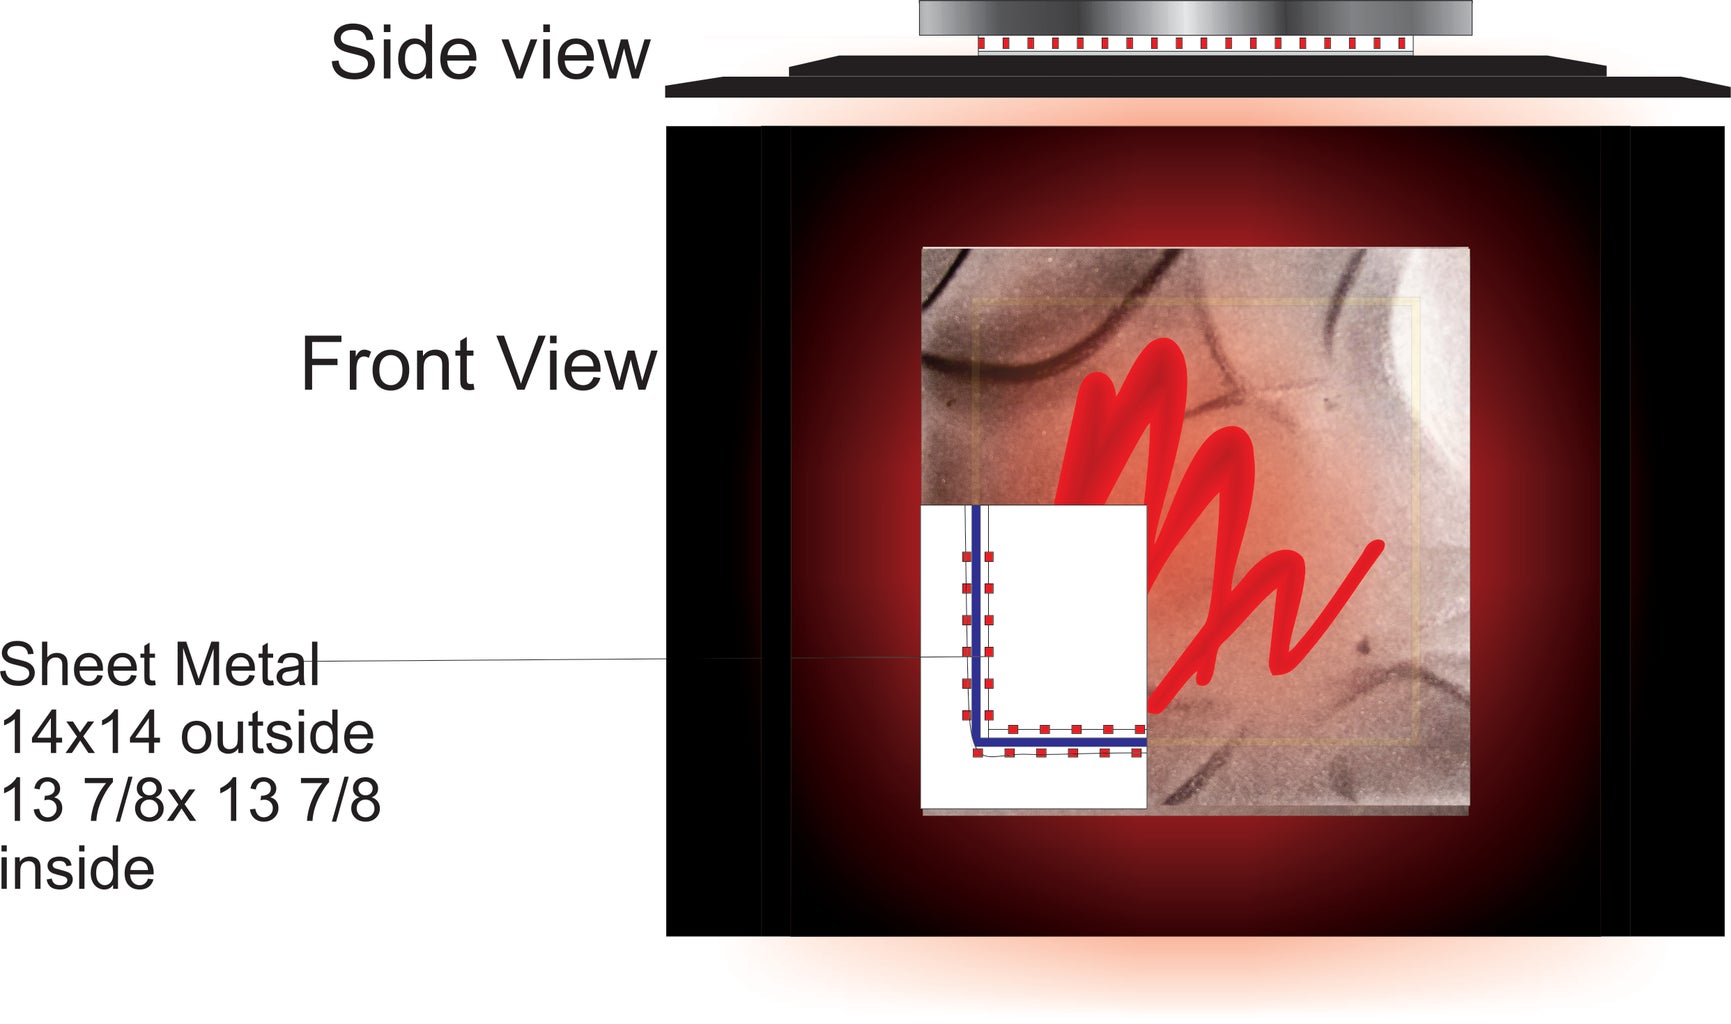
Step 3: Led Mount and Frame


The frame for the led's was made from strips of the left over sheet cut down to 3/4 inch and all welded to make a 90 then capped off with a 1 3/4 strip that would end up being the mounting surface for the face.It was then covered in a spray on rubberized coating to knock down reflections on the outside and brighten up the inside. I didn't get very many shots of the plastic backing as I went, I decided after the fact to make a how to on it. The hole in the center was for an opening in the wall the wires came out of and the rectangle was routed out of the plastic to mount my power supply to, which was a 24 volt ul listed outdoor 35w power supply. I also had 2 holes top and bottom for an alignment pin to make my install a bit easier. The edge were routed on the 1/2in plastics to finish it and look clean. The leds where just standard led strips in a waterproof shrink wrap with heat shrink ends on them for water proofing.
Step 4: The Finished Product


All done I hope you enjoyed, this is my first instructable I know I could have used more photos of the process but like I said it was an after thought. Any feed back is more than welcome as well as any questions, Happy Building!!


