

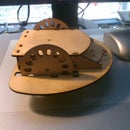
Introduction: Steadycam Adjustment and Display Stand


The problem with these devices is that they must be precisely balanced to work properly. If the device were mounted on a stand, the adjustment process would be much simpler. I have a small unit made by Glidecam called the iGlide.
This is the demonstration video from the Glidecam web page showing the iGlide product use and adjustment.
The actual process of balancing is not as smooth as shown... UNLESS you have a way of holding the iGlide stationary while you make the adjustment. This instructable is for such a stand that is very simple to construct, and very inexpensive.
Step 1: Getting the Parts You Will Need.

The parts are simple CPVC fittings for 3/4 inch CPVC pipe found at most hardware and large retail outlets.
You will need the following CPVC components...
2 Ea - 90 degree Elbow
4 Ea - 45 degree fitting
3 EA - End Cap
2 Ea - Tee fitting
1 Ea - 3 or 4 foot length of 3/4 CPVC to cut into smaller parts.
Step 2: Cutting the CPVC Sections.

From the section of CPVC pipe you will need to cut the following parts...
1 EA - 6 inch length
1 Ea - 3 inch length
9 Ea - 1.25 inch length
The short segments may vary slightly in length... as long as you can press-fit two of the components together cleanly, and they are neither pushed apart, nor too loose... it will be fine. After final gluing it will be quite strong.
Step 3: Assemble the Main Body.


First press-fit three of the short sections into the tree end caps to create the feet.
An optional method would be to install three rubber crutch-feet instead. This would make the unit more stable and less likely to slip off a table. You could also glue rubber sheeting to the end caps, or drill them and mount rubber feet... be creative!
After the feet are assembled, install one of them onto the first Tee as shown.
Install a short segment onto the Tee, then press fit them together as shown in the next image to form the main body of the stand.
Step 4: Putting the Complete Base Together.


From the previous step, insert short sections, followed by the 45 degree parts.
Next add two more short sections followed by the 90 degree pieces.
Make sure everything fits properly BEFORE you glue anything! Adjust the parts until the base is nice and level... then use a marker to draw lines across the joints so help you align them as you apply the glue. Glue up the base and be sure it sits level... you won't have much time to adjust it once the glue is applied!
The second image shows a properly assembled base.
Step 5: Finishing Up the Assembly.


Now that you have a solid base assembly, we want to build and install the neck. I have designed an offset so that the foot of the steadycam (iGlide) doesn't hit the vertical support.
Install the 3-inch section into the base and glue it. While the glue dries we will start the offset assembly.
The offset is made from two (2) of the 45 degree parts with a short section of CPVC between them. Test fit this assembly to be sure it will go together properly. Once you are satisfied with that, glue it together and be sure that it is straight. Install the 6-inch segment and the component is completed.
The last assembly step is to install the offset vertical section onto the base assembly and ensure that it fits properly. Once you are happy with it, it may be glued into place, or you may leave it as-is so that it is removable for storage.
Step 6: Summing Up.


Congratulations !
You have just built a sturdy yet light-weight stand for your camera stabilizer!
This process can be scaled up for larger units... use a larger diameter PVC or CPVC tubing and scale up the vertical lengths as needed. The part after the offset can have an adapter to allow a smaller diameter to fit inside the handle.
Another modification would be to use longer segments between the two front feet... and a longer section inside the offset part. This would allow the unit to stand out farther from the bottom vertical piece in the case of a larger camera stabilizer.
NOTE: I built a second one for a friend... put the vertical part on upside-down. Actually... that works too... the stabilizer just sits higher on the stand. So you can build it either way... or make both vertical parts 4 inches instead. (Customize it!)
Here I surprise my friend Mitch... http://www.youtube.com/watch?v=ygKrd6ZHMmQ
Special thanks - Mary Rose Cassell - Proofreading and corrections.

Participated in the
Portable Workstations Contest


