

Introduction: Stylish Dart Board Frame


I was up in the crawl space of my new house to take apart a wooden bed frame that was up there to be used for a future project. On my way out I notice more crap going in the other direction of the little hatch I go through. I ended up with lots and lots of extra wood from 2 partial wood bed frames several large squares of Pine and well as some other planks. I did also recover 2 overhead light shades and a Frame.
I was wondering what I would do with the frame. Originally it most likely had a Mirror in it or maybe a stained glass panel. I don't want to blow money on a stained glass panel and don't have the time to attempt it from scratch as a project as I have been doing home repairs since I moved in and find that almost all little repairs just have me do the whole thing over just to get it all done properly. However my Game room was kinda of sparse it wasn't a major priority but I do play darts and was going to purchase a new board soon. So this will be an Instructable on how to turn an old frame into a frame for a dart board.
When picking a frame take into consideration size of frame with bulls eye being 5'8" and the height of your ceilings.
Step 1: Get Supplies

Supplies needed:
Frame - Reclaimed FREE
Yard of Fleece cloth ( Felt should work possibly other materials but should be somewhat self healing as possibility of putting holes it it is extremely high) - $4.99 on Sale ( Check Jo Annes, Michaels, AC Moore , Hobby Lobby, or any other Craft or Fabric Place )
24 x 36" FlipSide Cork Panel - $12.99 on Sale ( Hobby Lobby ) ( the board is actually a cork wrapped fiber board )
Staples
Screws
Tools needed:
Heavy Duty Stapler
Screw Gun
Saw
Brad Nail Gun ( Optional )
NOTE : The Size of Panel was in relation to the size required for the 22x28" Frame Opening, Obviously get what size you need although this was also the largest size offered pre-done.
Step 2: Distress the Frame

The Frame was already a kind of beat up but I hit it a few times here and there with various objects and then I used a quick stain technique just to age it a bit.
Now you can distress anything with various techniques Glazes, Dry Brushing Techniques, Staining, etc... If you want to distress something do a search and find out what is best for your project. I just wanted a quick and easy method as I pretty much liked it the way it was it just needed a little bit more cowbell!
I choose to just to foam brush on some MinWax Old American stain and then almost immediately wipe of. I wanted to keep the color of the frame but wanted to just discolor it hear and there and add a little bit of age.
My friend noted that in this picture it looks like the frame is resting on a giant baggy of weed! I assure the readers that this is not the case or I would have probably got a lot more elaborate with this step.
Step 3: Measure and Cut

The opening in the frame was 22 x 28.
So I took the 24 x 36" cork panel and marked it up and then cut it with a portable circular saw.
A manual hand saw will work as well but why bother if you have the tools at hand anyway.
Step 4: Test Fit

Place cut board in frame to test the fit.
You want it so that it goes in with no effort as when you cover it with the fleece it will make it tighter.
This particular Panel had rounded sides originally One side was taken off in the cuts but I found that if you put the rounded side in first it made the fit easier after it was covered. Just some advice if you happen to use the same board I did.
Step 5: Cover Cork Board

Lay the Fleece down on a flat service and stretch out
Lay the cork panel down on the fleece ( cork side down if using the cork covered fiber board like I used )
I moved the board to the top of the fleece so that like 2" would overlap.
I overlapped it and stapled it using 3/8" staples
I then moved from left to right trying to keep material tight horizontally ( L to R )
After top was done I pulled material tight to the bottom and measured out excess material ( anything greater than the 2" overlap ) and trimmed off material
I then pulled material as tight as I could and stapled first stapled at left and worked my to the right this time not only keeping the material tight left to right but also tight from top to bottom.
I then did the left side . Please note you will have to do some trimming here from the material at the edges. It is OK to have overlap maybe even preferred to a degree but there will be a hard board behind this for support of dart board as well to mount to wall. Please take this into consideration.
Left side is down the same principle of as the top just flip the frame so the left side is now the top.
The right side ( now the bottom ) can be down just by pulling tight as possible . You might want to flip it over now and then on this step just to make sure your Fleece is tight to the board.
Step 6: Test Fit and Staple Into Frame

Slide the covered Board into the Frame ( Remember about that rounded edge if using the FLIPSIDE Board )
Then in the back just staple the board to the frame I continues to use the 3/8" staples but 1/2" might be better I was just afraid of the going into deep on the cork/ fiberboard side.
The stapling might not even be necessary as there will be hard board behind this I just like to know that it is secure.
Step 7: Put a Backing on the Frame


Next I wanted to put a backing on the frame.
This is for three reasons.
1) I wanted to securely mount the Whole frame at multiple points to the wall. While this might be able to be accomplished with standard picture hanging techniques. Pictures don't usually have things thrown at them. ( Please note: I said Usually!)
2) I wanted some sort of backing for the cork covered fiber board. I don't plan on missing the board but guests will be playing as well plus doubling out mixed with alcohol, it is always a possibility.
3) You will need to secure the dart board hanger. So it need to be secured to something other than cork board
Measure your Cork board and add what is needed to overlap the cork board insert by at least 1/2"
Cut whatever wood you are going to use and attach to the back. I used MDF which will add serious weight to the frame when hanging on the wall. Keep this in mind and if you go that route make sure it is affixed to beams. Now you could just use plywood, but I had a shelf from when I moved in that I wasn't going to use and I am all about Reclaim and Re-purpose!
I affixed the MDF with 1 1/2" Brad Nails, You could use even screws but frames are usually pretty fragile so even for some Antique repairs I prefer to use a Brad gun as it leaves very little evidence and is very secure. Obviously take into consideration of the thickness of both. I still recommend Brad Nails.
Step 8: Attaching the Dart Board Bracket
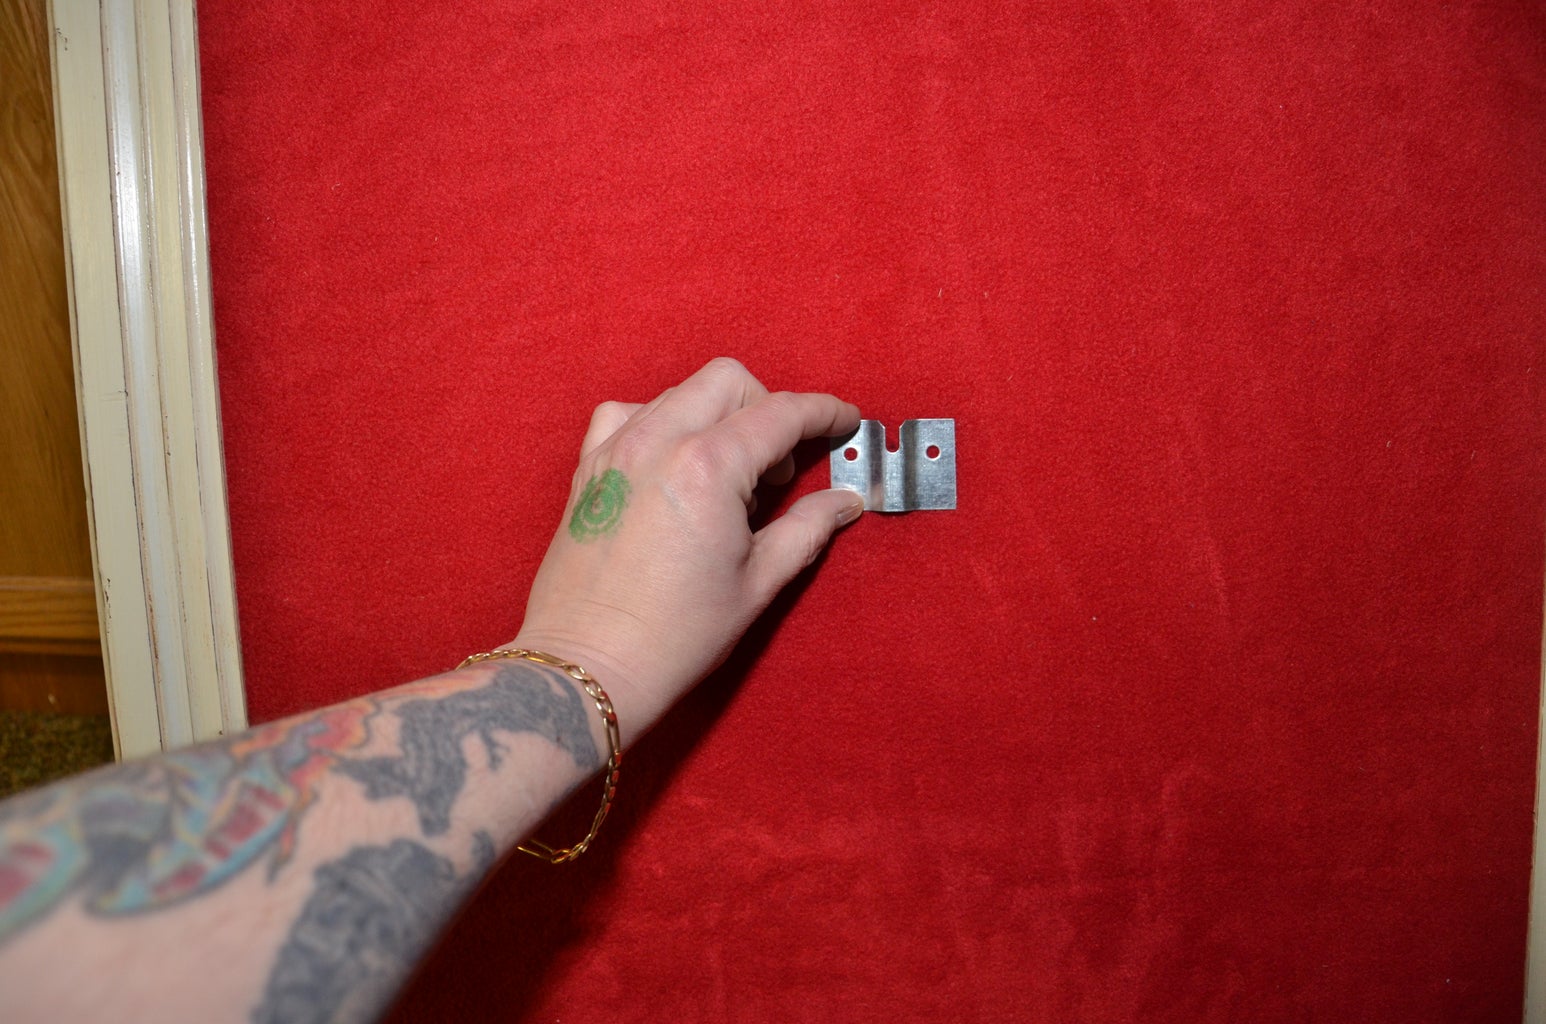
Now you are ready to attach the dart board bracket
Measure in inside length and width of the frame ( where the fleece is ) and make a center mark with ink pen.
Then put the Bracket over the center mark so the the lowest part that actually catches the screw of the dart board is dead center. Then mark the other holes to affix the bracket.
READ THIS FIRST BEFORE PROCEEDING!
I used a punch to try to take material out of the area the screws would go into. I was going to open it up a then use a hot glue gun to go over them and the drill through the HG bead. This is not necessary however DO MAKE A HOLE WITH A SHARP OBJECT! before trying to put the screw in and don't drill into it use a sharp awl or something. A screw and definitely a Drill can grab the Fleece or material and screw up your backboard material.
Now screw in the Bracket support screws
Step 9: Attach the Board

Attaching the board just involves putting the center board screw into the bracket slot, if you already got this far I think you can handle it.
However each dart board manufacturer might have other supports to add behind the dart board prior to mounting so please read the instruction that come with each board prior to mounting.
Step 10: Mount Frame to Wall


I am not going to get into this step as to be perfectly honest I just got done with it and decided to finish the Instructable.
What ever your preference for mounting stuff normally onto the wall will work just keep in mind the weight being supported depending on what materials you used.
EDITED: I ran into an unforeseen issue and added image of final board mounted on wall, notice the frame is now upside down. Actually looks better IMHO plus space for a light. Reason for this was I didn't take into consideration the height of the frame with dart board centered and bulls eye is 5'8"
Hope you Liked it, If you find and use big Frame it could be an Epic Dart Board! If you have really high ceilings! :)
Enjoy!

Participated in the
Furniture Contest


