

Introduction: Sugru and Craft Foam Coaster


I wanted to make a coaster and Sugru has a nice rubbery feel to it. Should hold a glass from slipping and staining coffee tables. But it would need ridges to allow condensation to pool and prevent runoff onto the table, so why not put our group logo to good use?
This was one of my projects for Sugru hack night with maker group HackBergen http://hackbergen.no.
Items used:
- 2 packs of 5g Sugru
- 1 sheet of 2mm Craft Foam
- IKEA HDPE 8mm Cutting board
- Masking tape
- Tack-it
- Mild soap
- Water
- Super Glue
Tools used:
- Computer with G Code drawing tool - iMac w/VirtualBox running W8 and Vectric Cut2D
- DIY CNC mill - Shapeoko with 2mm ball edge mill bit, and Ubuntu PC running Universal G Code Sender
- A small straight edge screwdriver
- 400 grit sand paper
- Sissors
Step 1: Mill a Mould From HDPE Cutting Board


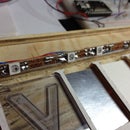
I drew my design in Vectric Cut2D and milled it out of a HDPE cutting board from IKEA.
1.5mm base depth with an extra 1mm milled out to make the decorations (ridges).
1000mm/min feed rate, about 25,000 rpm spindle speed, and a 2mm ball edge end mill bit.
Step 2: Clean the Mould and Apply a Fine Layer of Soap
Remove all the loose rough edges that the mill did not remove. I mostly used my nails, but also a screwdriver, some fine 400 grit sandpaper and a sticky blob of Tack-it.
Apply a thin layer of soap to the mould so the Sugru will not cement itself to the HDPE.
Allowing the soap to dry first will make it easier to avoid blending soap into the Sugru itself.
Step 3: Knead Together 2-3 Packs of 5g Sugru


Use your fingers to distribute the Sugru into the mold in a thin layer, while making sure the decoration pockets are evenly filled.
You might need 3 packs since only 2 packs was barely enough to thinly cover everything. Here it helps to have the same color foam as the Sugru. Then tiny holes in the Sugru do not show so easily on the finished product.
When you have the mould filled, use mild soapy water on your fingers to be able really smooth it out evenly.
Let the Sugru harden for 24h.
With water, gently rinse the cured Sugru of the soapy residue to assure that the super glue sticks.
Step 4: Mill Craft Foam That Fits Into the Coaster Mould

I found it easy and fun to mill out the coaster backing from a sheet of craft foam, but you can just cut it out with scissors.
There is no need to initially cut it out perfectly since the rough edge will need to be trimmed away anyway after it is glued to the Sugru and released from the mould. So as long you cut it out 3-4 millimeters larger than the coaster itself, you should be ok.
Step 5: Gluing the Foam to the Sugru


Use tape to cover the edges of the coaster before applying the glue to avoid the foam from being cemented to the mould itself. I used masking tape here, but electrical tape of a similar color as your coaster might be a better choice.
I had some difficulties finding a glue that would stick to both Sugru and craft foam. I tried using just the Sugru alone, plastic glue, hotgun glue and contact cement, to no avail. Finally, Super Glue to the rescue!
Apply a fine layer of super glue to the dry Sugru and press the foam onto it.
Try not to get glue on your fingers, but if you do - keep them apart! The glue can be sanded off your finger or it will fall off by itself in a couple of hours. Disposable gloves could be used, but I find that they stick to everything and make it difficult to work quickly.
Step 6: Gently Remove the Sugru/Foam From the Mould

The Sugru/foam unit should now detach quite easily from the mould. However, at this point the Sugru may not yet be completely cured and can easily tear apart, so loosen it slowly and carefully.
Step 7: Cut Away the Tape and Excess Foam
Use scissors to cut away the excess edges as evenly as possible.
Let the Sugru cure completely before placing anything on it. I let it dry for another 24 hrs.
Congratulations! Now you have yourself a custom made coaster!

Participated in the
Weekend Projects Contest


